Showing posts with label Appetizer. Show all posts

Monday, January 22, 2018

Chex Mix {gluten free}

Chex Mix - Gluten Free. Homemade. Super easy and simple to make.  Great snack for family game night, gatherings with friends, or a movie.  Recipe. Delicious. Alohamoraopenabook www.alohamoraopenabook.blogspot.com Alohamora: Open a Book

My mother-in-law is one of the nicest people I know.  I hope to be half the grandma she is.  She is incredibly kind, thinks of others, never turns on the TV with my kids, goes outside and plays with them, and she always brings us snacks and treats.  Seriously, my kids and I are so lucky to have her in our lives. 

For years she has brought her famous Chex Mix (that recipe coming next week), but since I had to go gluten free I had to stop enjoying it's deliciousness.   However, Gma being the amazing lady she is, started working on perfecting a Gluten Free Chex Mix.  

This Gluten Free Chex Mix is amazing; my husband even claims it to be better than the original. #wow   This GF snack mix is perfect for a family game night, a gathering with friends, a road trip snack, or whatever you need a fun snack for... maybe the Super Bowl

Gluten Free Chex Mix
Recipe: Elaine
Active Time: 10 minutes
Inactive Time: 10 minutes
Servings: about 10 cups

Ingredients: 
6 Tbsp butter
2 tsp Lawry's Seasoning Salt 
3 Tbsp Worcestershire sauce
1 1/2 c. Honey Nut Cheerios*
1 1/2 c. Multi Grain Cheerios*
1 1/2 c. cashews
1 1/2 c. peanuts
1 1/2 c. Gluten Free Pretzels
1 1/2 c. Rice Chex
1 1/2 c. Corn Chex

*These items are gluten free, but if you're Celiac and your dietary needs don't do well with oat flour feel free to change these to a different gluten free cereal. 

Directions: 

  1. Melt the butter in a large glass bowl in the microwave.  Use a large glass bowl that fits in your microwave; a colored plastic bowl can change how the Chex Mix cooks. 
  2. Add seasoning salt and Worcestershire sauce to the butter and stir to combine everything. 
  3. Add the remaining ingredients to the bowl and stir it all together to coat the mixture with the seasoned butter.  Be sure to thoroughly combine this mixture so that the butter is mixed into the cereal and nuts. 
  4. Place the bowl with the mixture into the microwave and cook it at full power for 2 minutes.  Remove the bowl from the microwave and stir it well. 
  5. Cook another 2 minutes at full power and stir it well after.  
  6. Cook the mixture 3 more times for 2 minutes at 70% power.  Be sure to remove the bowl from the microwave and stir it well after each 2 minutes b/c this snack mix can burn easily. 
  7. If you think the nuts still taste rubbery cook it for 1 minute intervals stirring after every time the Chex Mix cooks in the microwave. 
  8. Enjoy! 
  9. Store the Chex Mix in an airtight container on the counter. 

Happy Gluten Free Super Delicious and Fun Snack Mix Eating!


Monday, April 17, 2017

Smoky Deviled Eggs

Smoky Deviled Eggs. Classic appetizer to use hard boiled eggs, but this gluten free recipe has a smoky delicious taste. Quick and easy to make. Classic. Alohamora Open a Book Alohomora http://alohamoraopenabook.blogspot.com/

Holiday weekends are so dang busy!  Seriously! I'm exhausted.   

I had big plans to get this recipe to you on Friday.   However, my husband was out of town for work and doing the single mom thing is exhausting.  All you parents who have to do it all for one reason or another, you are amazing.  Friday just didn't happen for me; every night as soon as I got the kids to bed I crashed as well. 

My new goal was to get this recipe to you on Saturday.  However, when the husband came home he was sick; darn food poisoning.  Saturday was not happening now. 

I had big plans, but plans never seem to go as planned.  I guess that is the fun of this beautiful thing called life.  

Now, for these delicious Smoky Deviled Eggs.  They are delicious!  Enjoy! 

Smoky Deviled Eggs
Recipe: Alohamora
Active Time: 10 minutes
Servings: 12

Ingredients: 

6 eggs, hard boiled
3 Tbsp mayonnaise
1 Tbsp Dijon/spicy mustard
1/8 tsp Liquid Smoke
1/8 tsp smoked paprika
pinch brown sugar
dash salt

Directions: 

  1. Slice your eggs in half and remove the yolks to a small bowl. Place the halved slices on a plate to the side 
  2. Smash the yolks with a fork. 
  3. Add the remaining ingredients to the bowl, and stir with a spoon or a hand mixer until smooth and well combined.
  4. Spoon the mixture into the egg halves you placed to the side.  You can also use a piping bag and a frosting tip to disperse the mixtures into the egg halves. 
  5. Sprinkle the deviled eggs with smoked paprika. 
  6. Enjoy! If you aren't enjoying the eggs right away place them in the fridge until you are ready to enjoy them.  
  7. Store deviled eggs in a sealed container in the refrigerator.  

Happy Smoky Deviled Eggs eating


What's your favorite way to enjoy hard boiled eggs?  I like deviled eggs and Egg Salad


Monday, April 10, 2017

Instant Pot Hard Boiled Eggs aka The BEST Way to Cook Eggs

Instant Pot Pressure Cooker Hard Boiled Eggs. The absolute best and easiest way to cook eggs.  5 minutes cooking time.  Easy, Quick, fast, and simple.  gluten free, healthy snack, simple, perfect, flawless, Alohamora Open a Book http://alohamoraopenabook.blogspot.com/

Have you been on the fence about spending the $100 on an Instant Pot.  However, the ease with the way the shells come off, and the fact that it takes only 5 minutes to cook is reason enough to get an electric pressure cooker.

Cooking eggs with an Instant Pot is absolutely amazing.  Cooking eggs with an Instant Pot is so easy, so simple, so what you need.  


Instant Pot Pressure Cooker Hard Boiled Eggs. The absolute best and easiest way to cook eggs.  5 minutes cooking time.  Easy, Quick, fast, and simple.  gluten free, healthy snack, simple, perfect, flawless, Alohamora Open a Book http://alohamoraopenabook.blogspot.com/

If you cook/hard boil eggs for a healthy snack, or if you just cook eggs once a year for Easter cooking it in an IP is the way to go.  Cooking 12 eggs perfectly, and having their shells come off easily, simply, and smoothly is the reason I sold my husband on why we needed yet another cooking appliance.

Sure, I love cooking applesauce in minutes, and I love how tender pork chops are (recipe coming soon), but hard cooked eggs... amazing! 

Instant Pot Hard Boiled/Cooked Eggs
Recipe: Alohamora
Active Time: 3 minutes
Inactive Time: 15 minutes
Servings: up to 12 eggs/1 dozen

Ingredients: 
1 c. water
12 eggs, at most

Directions: 

  1. Place 1 cup of water in the bottom of your Instant Pot or electric pressure cooker.  
  2. Place the pot rack, that came with the Instant Pot, in the bottom.  A picture of the rack is shown above.
  3. Lay as many eggs as you want on top of the rack.  I was able to create a tight fit with 12 eggs. 
  4. Seal your pressure cooker, and set your Instant Pot to Manual for 5 minutes on High Pressure.  
  5. Once it reaches pressure and cooks for 5 minutes, let it naturally release for 5 minutes.  That means just let the pressure cooker cool on its own without touching anything for 5 minutes.  
  6. After a 5 minute natural release do a quick release and then use tongs to remove the eggs and place them in a bowl of cool water for 5 minutes to stop the eggs from cooking.  If you let the eggs naturally release longer than 5 minutes, or if you don't place them in cold water the eggs will keep cooking and that is when you will get the green edging around the yolk.
  7. Simply and easily remove the shells and enjoy.  
  8. I love a simple deviled egg recipe, but this healthier version is delicious as well. Tho, egg salad is always amazing as well.  
  9. Store cooked eggs in the refrigerator.  I prefer to keep the eggs in the shell cooked until ready to use or eat.  


Happy The Absolute Best Way to Cook Eggs Ever cooking and egg shell pealing! 


Don't the eggs look beautiful cooling after a quick cook in the Instant Pot. 


Instant Pot Pressure Cooker Hard Boiled Eggs. The absolute best and easiest way to cook eggs.  5 minutes cooking time.  Easy, Quick, fast, and simple.  gluten free, healthy snack, simple, perfect, flawless, Alohamora Open a Book http://alohamoraopenabook.blogspot.com/

Monday, March 13, 2017

Protein Packed Vegetable Dip- 3 Ingredients {health, quick}

3 Ingredient Healthy Protein Packed Vegetable Dip- Veggies, appetizer, easy and quick to make. Simple. Delicious!  Kid friendly. Get kids to eat their vegetables. Alohamora Open a Book http://alohamoraopenabook.blogspot.com/

This dip. Is.  Magic. Absolutely magic.  

If you have a kiddo who refuses to eat veggies or makes that horrible gagging noise when forced to take a bit of a carrot then you need this dip.

This dip got all three of my kids to eat vegetables they had refused to eat in the past.  My 3 kids LOVE this dip, couldn't get enough of it, and probably had equal amounts dip to vegetable in every bite.  

I felt this dip is a definite mom win because my kids ate a TON of veggies!  

This Protein Packed Vegetable Dip is healthy, takes only 3 ingredients, and quick and easy to make.  You need this dip in your life! 

Protein Packed Vegetable Dip
Recipe: Alohamora slightly adapted from momsintofitness 
Active Time: 5 minutes
Inactive Time: 0 minutes
Servings: 2 1/2-3 cups

Ingredients
1 (16 oz) cottage cheese
1 (6 oz) plain Greek yogurt
1 (1 oz) dried ranch dressing seasoning

Vegetables to dip. 

Directions: 

  1. In a small bowl combine the 3 dip ingredients. 
  2. Using an immersion blender, or a blender if you don't have an immersion, blend the dip until it reaches your desired consistency.  
  3. Enjoy with vegetables of your choice! 
  4. Store leftovers in an air tight container in the refrigerator for up to a week. 
  5. Healthy Tip: cut and wash all of your vegetables and place them near your dip in the refrigerator so they are easy to grab.  This will help you make a healthy snack choice. 

Happy Healthy Super Quick and Easy Protein Packed Veggie Dip eating!


Thursday, April 28, 2016

Alice in Wonderland Themed Book Club Treats- Easy Spinach Artichoke Parmesan Stuffed Mushrooms


Splintered by Howard aka Modern Alice in Wonderland with a twist Book Club party.  Mushroom cookies, Drink Me Water, Eat me Shortbread Cookies, and Grow Me Spinach Artichoke Parmesan Dip Stuffed Mushrooms.  Easy to make, and you can buy everything you need for cheap at Costco. Easy, Simple, Appetizer, Recipe, Fun, Fancy, Alohamora Open a Book http://www.alohamoraopenabook.blogspot.com/

My book club recently read Splintered by A.G. Howard and I got to host the book party at my house.  I love hosting b/c I have an excuse to bake and make yummy food.  With Splintered being a modern twist of the fairy tale Alice in Wonderland  I got to have a lot of fun with the food.  

I actually had to work the day of Book Club so I was able to get everything made in a couple hours after work.  However, it was a good thing I have two ovens and a husband that took care of dinner. 

These recipes are simple and easy to make, and I 'm going to share each and every one with you over the next week.

I made the above "Shrink Me" Mushroom Shaped Sugar Cookies, and shown below is the most delicious "Drink Me" Lemon Water you'll ever drink. 


Splintered by Howard aka Modern Alice in Wonderland with a twist Book Club party.  Mushroom cookies, Drink Me Water, Eat me Shortbread Cookies, and Grow Me Spinach Artichoke Parmesan Dip Stuffed Mushrooms.  Easy to make, and you can buy everything you need for cheap at Costco. Easy, Simple, Appetizer, Recipe, Fun, Fancy, Alohamora Open a Book http://www.alohamoraopenabook.blogspot.com/

These "Eat Me" Peanut Butter Chocolate Chip Shortbread Cookies are down right delicious.


Splintered by Howard aka Modern Alice in Wonderland with a twist Book Club party.  Mushroom cookies, Drink Me Water, Eat me Shortbread Cookies, and Grow Me Spinach Artichoke Parmesan Dip Stuffed Mushrooms.  Easy to make, and you can buy everything you need for cheap at Costco. Easy, Simple, Appetizer, Recipe, Fun, Fancy, Alohamora Open a Book http://www.alohamoraopenabook.blogspot.com/


 To finish off the Wonderland themed fun a savory "Grow Me" Spinach Artichoke Dip Stuffed Mushrooms shown below.


Splintered by Howard aka Modern Alice in Wonderland with a twist Book Club party.  Mushroom cookies, Drink Me Water, Eat me Shortbread Cookies, and Grow Me Spinach Artichoke Parmesan Dip Stuffed Mushrooms.  Easy to make, and you can buy everything you need for cheap at Costco. Easy, Simple, Appetizer, Recipe, Fun, Fancy, Alohamora Open a Book http://www.alohamoraopenabook.blogspot.com/

If you recall the Alice in Wonderland story Alice is given a mushroom by the caterpillar.  He informs her that one side of the mushroom will make her shorter (Shrink Me) and the other side will make her taller (Grow Me). Clearly, delicious savory stuffed mushrooms will make you grow. :)

Today, you get the recipe of this savory dish. Enjoy!

Easy Spinach Artichoke Parmesan Dip Stuffed Mushrooms
Recipe: Alohamora adapted from WearyChef
Active Time: 25 minutes
Inactive Time: 25 minutes
Servings: 10-20 people, easy recipe to adjust amounts

Ingredients: 
1 (16-24oz) pkg baby portobello mushrooms
2 Tbsp olive oil
1/4 tsp salt
1/4 tsp garlic powder
2 c. spinach artichoke Parmesan dip (I love the one I get at Costco, but any will do)

Directions: 

  1. Preheat oven to 350 degrees. 
  2. Mix the olive oil, salt, and garlic powder in a small bowl or ramekin. 
  3. Remove the mushrooms (I got a big pkg of mushrooms at Costco for a great price) stems (they should easily pop out if you move the stem around a bit). Use a vegetable brush to scrub and clean the mushrooms.  You can clean the mushrooms in cold water and then let them dry, but I prefer to scrub them good and hard.  
  4. Using a basting brush or your fingers to rub the outside of the mushrooms with the olive oil mixture. 
  5.  Place your mushrooms open side up on a jelly roll pan, 9x13 baking pan, or a baking dish of choice. 
  6. Use a small spoon to scoop the cold spinach artichoke dip into the mushroom openings.  Press the dip down to make sure it fills the mushroom.  Once you've pressed the dip down add a little more dip to round off the look.  The more dip you get into each mushroom the better. 
  7. Bake the stuffed mushrooms at 350 for 20-25 minutes until the filling is hot and the mushrooms are softer. 
  8. Enjoy!  Serve hot! 
  9. Store leftovers in refrigerator. Reheat leftovers in the oven at 300 degrees until warm. 

Happy Easy and Simple Spinach Artichoke Parmesan Dip Stuffed Mushroom eating!

and 

Happy Alice in Wonderland Party/Book Club fun

Wednesday, April 20, 2016

Loaded Pepper Skins {Vegetarian} {30 Minute Meal}

Loaded Pepper Skins- Vegetarian, Mexican, and delicious!  This 30 minute recipe is filling enough for dinner but the perfect size and appearance for an appetizer.  Eat this healthy diet friendly meal by the pool or socializing with friends. Alohamora Open a Book http://www.alohamoraopenabook.blogspot.com/ healthy, protein, beans, Mexican Rice, Del Real Foods, simple, easy quick dinner, potluck, party food

My mom would make Stuffed Peppers every so often growing up.  It's delicious, and I credit that dish to me being a fan of bell peppers.  I love to eat bell peppers cooked in fajitas as well as raw dipping them in hummus or guacamole.  

The other day I was thinking about my elimination diet days; boy those were dark days.  However, these Bison Stuffed Mini-Bell Peppers were a definite bright spot during those crazy doctor prescribed days.

The thinking of those dark food days was when the idea for these Vegetarian Loaded Pepper Skins came.  I love how filling and nutritious these skins are, and I love how fun they are to eat.  I  love that I can enjoy them for a meal, or serve them as an appetizer with friends.  I love that they are healthy and delicious; they are perfect for a pool side meal or a party outside under the stars.  Basically, they are awesome and delicious!.  

Del Real Foods is having a recipe contest, and I received this Vegetable Mexican Rice as one of the products to use in developing a recipe for that contest. Voting starts May 9th if you were wondering.  

This rice is ridiculously easy to make in the microwave and enjoy as a side dish, or with a few additional spices and ingredients I was able to easily and quickly, in under 30 minutes, make these fancy little Loaded Pepper Skins.  #momwin

You can use this store locator to find where Del Real products are sold, but I have seen them at Costco and Kroger stores. The great thing about that store locator is you can search zip code AND the specific product you are looking for.  It's quite handy when looking where you can buy this rice or the barbacoa for those delicious Barbacoa Nachos I posted last week.

Loaded Pepper Skins- Vegetarian
Recipe: Alohamora
Active Time: 10 minutes
Inactive Time: 20 minutes
Servings: 6-8  

Ingredients: 
1 (24 oz) pkg. Del Real Arroz aka Rice with Vegetables
1 (15 oz) can black beans, rinsed and drained
1 (4 oz) can diced green chiles
1/2 tsp cumin
1/2 tsp chili powder
1 tsp garlic powder
6-8 bell peppers
Cheese: 4 cheese Mexican, cheddar, monterey jack, or a combination
Optional toppings: guacamole, sour cream, or plain Greek yogurt

Directions: 

  1. Preheat oven to 350 degrees and line a cookie sheet or jelly roll pan with aluminum foil.  Spray the foil with olive oil or a cooking spray of choice. 
  2. Mix the top 6 ingredients together in a large bowl with a large spoon.  You do not need to follow the cooking directions on the Del Real Arroz rice container. Just pour the rice into the bowl and add everything else. 
  3. Wash and cut the bell peppers.  You will want to remove the tops, pull out the seeds (I rinse out any extra remaining seeds), and cut the bell pepper in thirds or fourths depending on the number of ridges/bumps aka lobes on the bottom of the bell pepper.   This will give you your "pepper skins."  
  4. Place your washed pepper skins on the prepared pan.  Using a small spoon scoop the rice mixture into the pepper skins.  I like to fill the pepper skins with as much rice goodness as will fit on the skin. 
  5. Top the pepper skins with cheese.  You can use as much or as little cheese as you desire. 
  6. Bake your pepper skins at 350 degrees for about 20 minutes or until the peppers are soft. 
  7. You can serve guacamole or sour cream along side the pepper skins, place a small dollop on top, or just enjoy them plain.  They are delicious either way. 
  8. Serve warm and enjoy!
  9. Store leftovers in the refrigerator.

Happy Simple, Quick, Easy, and Healthy Loaded Pepper Skins making and eating!


Friday, April 15, 2016

Loaded Barbacoa Nachos {30 Minute Meal}

Easy, simple, and oh so fast Loaded Barbacoa Nachos.  These nachos are quick enough to be an outside party appetizer, fun enough to be a Friday night meal, and hearty enough to be an entire meal.  Use Del Real Barbacoa meat and you have the easiest and most delicious nachos ever.  BBQ sauce, beans, brisket like meat, and more deliciousness. Contest, kid friendly, party, fun food Alohamora Open a Book http://www.alohamoraopenabook.blogspot.com/

Del Real Foods has a recipe contest going on; when I saw the opportunity to get some of their tasty food for free I jumped on it.  I mean, I love creating recipes, I have to cook for my family daily, and who doesn't love delicious black beans, refried beans, or Barbacoa aka brisket like meat?!  Basically, I thought this would be delicious and a lot of fun to do. 

Happy Friday y'all!  I love Friday!  Friday is all about fun, and I'm not sure there are very many other foods as fun as, or more fun than, Nachos!  Growing up, whenever my dad would cook nachos, Friday nights was a frequent nacho night, he'd usually add barbecue/BBQ sauce to the top of it.  I'm not sure his brother, my uncle taught him that, or where he got the idea, but I love the sweetness of the BBQ sauce on the melted cheese and salty chips,  So delicious!  

Those nachos my dad made were great, but these Loaded Barbacoa Nachos are just as quick to make, loaded with protein and good food, and they taste absolutely amazing! 

Also, after May 9th, you can start to vote for these awesome nachos so that everyone knows how delicious they are.  Just giving you a heads up in case you were feeling charitable and wanted to help me win.   

Loaded Barbacoa Nachos
Recipe: Alohamora 
Active Time 10-15 minutes
Inactive Time: 10 minutes or less
Servings: 4-6

Ingredients: 
1 (16oz) Del Real Barbacoa Beef (tho any brisket meat will work)
tortilla chips
2 c. four cheese Mexican blend (tho any cheese will work)
1 (15 oz) can pinto beans, rinsed and drained
1/4 c. red onion, diced
BBQ/barbecue sauce
1/4 c. green onions, diced
Ranch dressing or Salsa Verde Avocado Yogurt Dressing


Directions: 

  1. Preheat oven to 350 degrees.  You can microwave the nachos, but I like the crispiness the oven gives.  If you are microwaving the nachos be sure to place everything on a microwaveable plate. 
  2. Cook the Barbacoa meat in the microwave according to the directions on the package. After cooking it shred the meat with a knife or 2 forks, and remove any excess fat that you desire.  If you don't have Del Real's Barbacoa Beef you can use any brisket like meat, but Del Real's Barbacoa is delicious and so simple.  Plus, the previous link has a "store locator" to help you find where you can buy it near you. I found Costco as well as Safeway/Albertsons sells Del Real in AZ.  
  3. On a large cookie sheet layer tortilla chips over the entire pan.
  4. Cover the chips with 1/2 to 2/3 of your cheese.  I like the 4 cheese Mexican blend, but any mixture will work.  However, something with Monterey Jack and cheddar would be ideal for the best flavor. 
  5. Using a spoon evenly layer across the entire pan of chips the pinto beans, red onion and shredded Barbacoa.
  6. Use the remaining cheese on the top of the loaded nachos. 
  7. Next, lightly to moderately drizzle BBQ sauce over the entire pan of nachos. 
  8. Bake the nachos at 350 degrees for 7-8 minutes until warmed and the cheese is melted.  If you microwave the nachos be sure to use a microwaveable safe plate.  Cook the nachos on high for 1-2 minutes depending on how big your plate is and how loaded your nachos are.  You may have to do a couple plates of nachos to use all of the ingredients.  A special note: You don't want to overcook nachos so I would start with 1 minute and work up in 15 second increments until the cheese is completely melted.  
  9.  After you remove your nachos from the oven or the microwave you can then layer the green onions all over the pan. 
  10. Finally, lightly drizzle ranch dressing or this healthy Salsa Verde Avocado Yogurt dressing over the nachos.  I love both dressings so use whatever you have on hand.  However, this low calorie dressing is delicious and nice to know since it's more diet friendly. 
  11. Enjoy your nachos.  Nachos by the pool is always a great idea.  These make great appetizers or a meal for a kids or adult party. Everyone will love the flavors, and you will love how fast it is to make.    
  12. Store any leftover nachos in the refrigerator. 

Happy Easy and Quick to make Loaded Barbacoa Nachos eating! 


Friday, February 5, 2016

Brie, Bacon, Garlic, and Sun Dried Tomatoes Cheese Dip {Easy} {Quick 30 Minute} and Super Bowl 50 Party Dip Menu

Brie, Bacon, Garlic and Sun Dried Tomatoes Cheese Dip.  Easy, delicious, fast, simple, and perfect dip for Game Night, the Super Bowl, Friends, a Party, Pot Luck, or just Dinner.  Easy to make, but looks and sounds fancy and elegant.  Alohamora Open a Book http://www.alohamoraopenabook.blogspot.com/ gluten free, nut free, less than 30 minutes, quick, speedy, simpl, elegant

I have no problem serving a dip as dinner.  Yes, I am that kind of a mother and wife, and it isn't just the result of feeling slightly stressed from working part-time and having 3 children.  I've been having dip for dinner since my college days.  

Sure, my Mom may be disappointed in my proper dinner/mothering skills, but... dip is oh so delicious.


We've had this oh so Easy Brie Cheese Dip with Bacon, Garlic and Sun Dried Tomatoes a couple time this past week.  It's delicious and I had to "master the recipe." :) 

Luckily, my husband is just as supportive of testing recipes as well as eating an appetizer for dinner.  We really are a match made in heaven.

Grab some Brie at Costco (a great price) or anywhere else and quick and easy whip up this fancy and elegant sounding appetizer in a flash.  You'll be able to get this dip on the table in 30 minutes.  Go ahead and enjoy it's deliciousness with a sliced baguette, chips, crackers, or toasted cubed french bread.  

Brie, Bacon, Garlic and Sun Dried Tomatoes Dip 
{Quick and Easy}
Recipe: Alohamora 
Active Time: 10 minutes
Inactive Time: 20-30 minutes
Servings: 6-8

Ingredients:
1 (8oz) brie, cubed
3 cloves garlic, minced
1/2 c. sun dried tomatoes, drained and diced
1/3 c. bacon, chopped or bits
Serve with: french bread cubed and toasted, crackers, chips, or baguette slices

Directions: 

  1. Preheat your oven to 325 degrees and spray or grease a small oven safe bowl. If you want to toast your bread for the dip, throw your bread on a pan and stick it in the oven while it is preheating.  You can easily spray or brush on some olive oil to get a good toastiness.
  2. Cube your brie on a cutting board. You can barely cut off the rind (the harder crust like part) if you don't like it.  Some people think the rind is bitter, but I honestly can't tasted much of a difference. Cube the brie.
  3. In a small bowl mix the garlic, sun dried tomatoes, and bacon together. 
  4. In the greased bowl layer half of the garlic sun dried tomatoes mixture on the bottom.  Pour all of the cubed brie on top, and then the other half of the garlic tomatoes mixture.  
  5. Place the bowl in the oven and bake the dip at 325 for 20-25 minutes until it is completely melted.  After 10 minutes stir the cheese dip and return it to the oven for the remaining time.
  6. Serve the brie dip hot with crackers, chips or bread. 
  7. Enjoy! 
  8. Store leftovers in the refrigerator in a sealed container.  I prefer to reheat it in the oven rather than the microwave, but either works.  To be honest, I'll be surprised if you have any leftover. 

Happy Delicious Brie Bacon Garlic and Sun Dried Tomatoes Dip eating! 


Happy Game Day, Super Bowl 50 Watching!  
Go Broncos! :)

Some of my other favorite Game Day Dips are... 

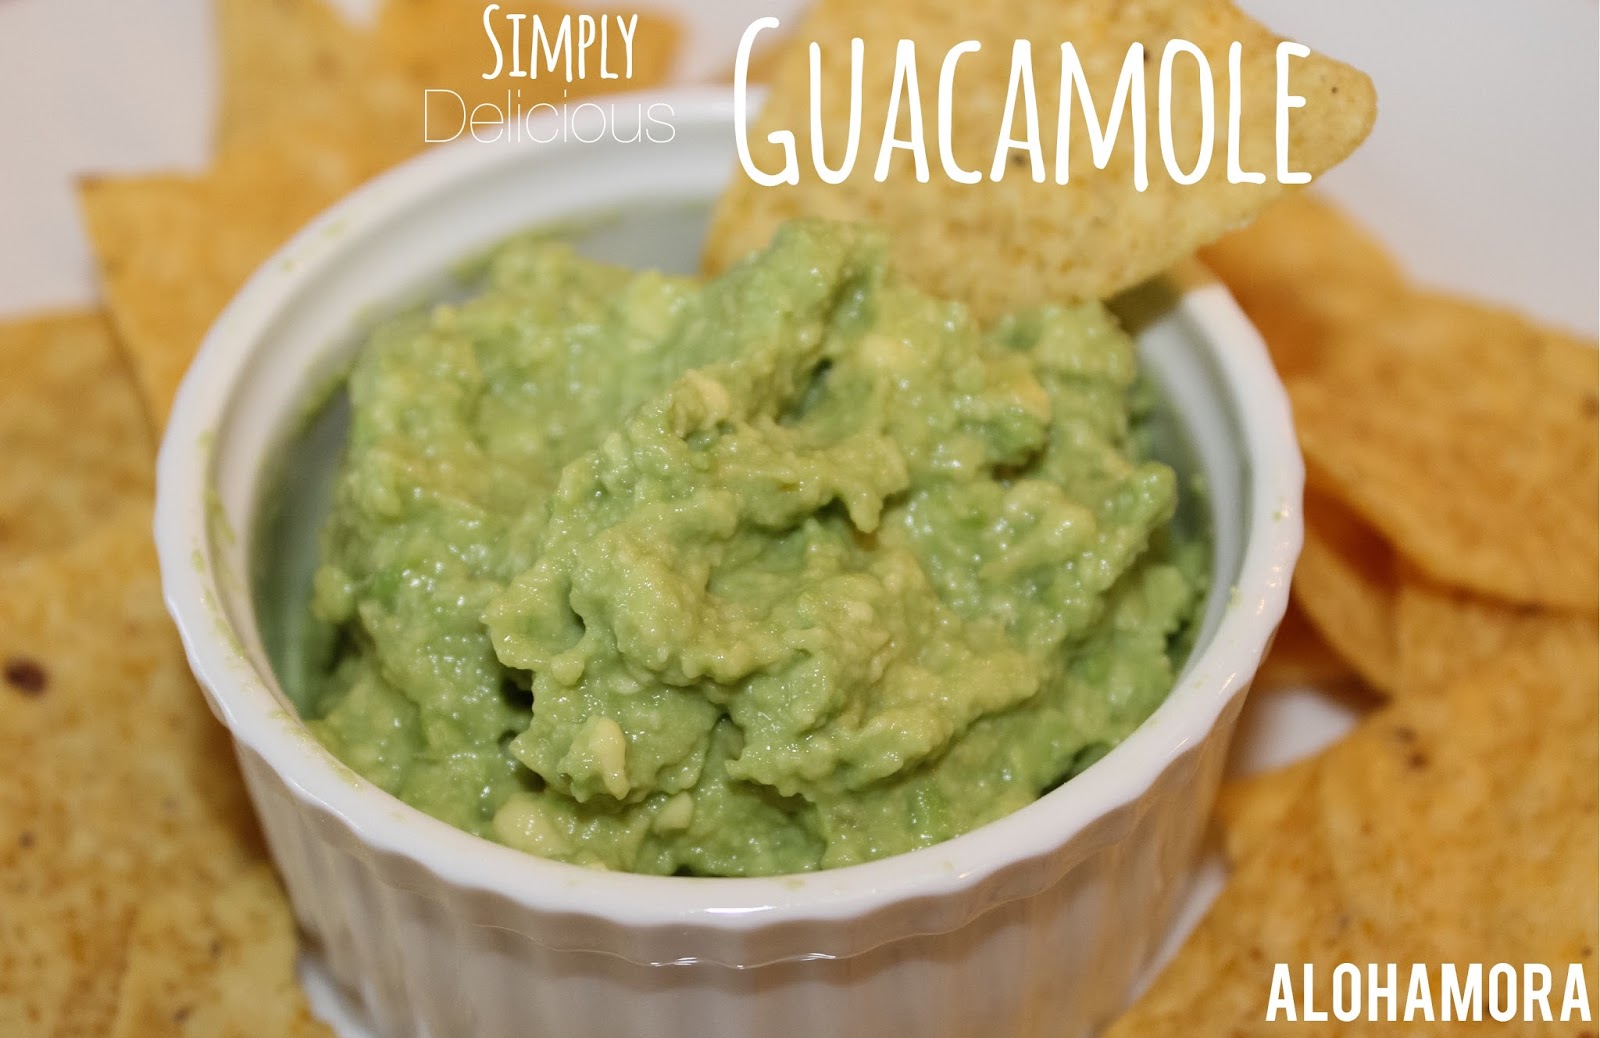
Simply Guacamole- I eat this guacamole at least once a week, if not 3 or 4 times. It is Simply Delicious! 


Restaurant Style White Queso Dip- So Yum!


Colorado Caviar- Bean Salad and Dip- Maybe I should call it Bronco Caviar- Healthy, Gluten Free, and Delicious! 


Skinny Roasted Red Pepper and Black Bean Dip- Healthy dip with some amazing flavors! Love dips that are diet friendly!


Pizza Dip- Pizza is good, but Pizza Dip is fun for a party and gluten free. 


Vegetarian Fajita Dip- Fajitas are good, but Fajita Dip is more fun for a party. :) 


Quick and Healthy Spinach Bean Dip- This dip is popular for a reason.  So easy to make and so very delicious! 


Whether you are throwing a Super Bowl Party or just a party with the family at home, at least one of the above dips should make your party that much better.  

Who are you cheering for Sunday?


Friday, January 29, 2016

Simply Guacamole {Healthy}

The best Guacamole that is simple, easy to make, and clean eating.  No chemicals but only real ingredients for simple, refreshing, and delicious falvor! Alohamora Open a Book http://www.alohamoraopenabook.blogspot.com/ diet friendly, gluten free, easy, fast, appetizer, recipe, snack, potluck, game day, party, fiesta diet friendly, the best, amazing


Guacamole, I know there are a million and one recipes out there, but I think this one is Simply Delicious Guacamole.  It's simple and delicious and the best guacamole.  

When I was trying to photograph this guac I was struggling.  I know I am a very novice photographer, but I don't think guacamole is the most photogenic food. However, when I was struggling to get the shot I thought such deliciousness deserved my husband said that all I needed to tell you was,  


"This guacamole is way better than anything you can buy in the store that tastes fake and full of chemicals."  

This guacamole is the real deal, and you can't beat real clean eating delicious food.  So yum! 

Guacamole
Recipe: Alohamora
Active Time: 5 minutes
Inactive Time: 0 minutes
Servings: 4

Ingredients: 
1 large avocado
1 1/2 tsp dried minced onion or 1 Tbsp minced onion
1 tsp lime juice
1/8 tsp salt

Directions: 

  1. Slice your avocado in half, remove the pit (and save), and remove the delicious innards with a spoon, avocado slicer, or whatever means you desire into a bowl.
  2. Use a fork, spoon, or potato masher (my favorite tool to use) to mash the avocado. 
  3. Add the remaining ingredients and stir to combine everything with a spoon.
  4. Serve immediately with chips, vegetables, or just a spoon. :) 
  5. If you made this guacamole ahead of time, you will want to put the pit/pits if you made multiple avocados in bowl and cover it tightly with saran wrap (which I hate using) or a Tupperware lid of sort and place it in the refrigerator.  The pit will help prevent the guacamole from browning aka changing colors and looking less than appealing.  
  6. When you are ready to serve remove the pit and enjoy.
  7. Leftover guacamole isn't fantastic so I say just eat it all.  However, you can try saving a pit to place in your bowl, or you could attempt to freeze.  I have never saved it longer than 6-8 hours, but if you do please let me know. 
  8. Enjoy!  I love guacamole, and this guac is simply the best! 

Happy Simple, Delicious, Easy, and Fast Guacamole Making and Eating!

   
Go Broncos! :)

Sunday, October 4, 2015

Bison Stuffed Mini Bell Pepper {Elimination Diet Friendly}

Bison or Beef Stuffed Mini Bell Peppers.  Easy Elimination Diet friendly recipe for a healthy appetizer or dinner.  Alohamora Open a Book http://alohamoraopenabook.blogspot.com/ healthy, diet friendly, egg free, dairy free, gluten free, soy free, nut free, corn free, elimination diet

If you follow me on Facebook and/or Instagram you probably saw that I have been on an Elimination Diet.  My doctor prescribed this diet so I can see what food sensitivities I have that have been causing my nausea for the past 1.5+ years.

The elimination diet I was involved with had a lot of restrictions including no sugar, dairy, corn, soy, wheat or gluten, peanuts, peanut butter, eggs, beef, pork, and more.  Later beans and legumes were added to my "restrictions."  Basically, it's a super strict clean eating diet where I have to read every single label and end up eating hardly any of it.   


Bison or Beef Stuffed Mini Bell Peppers.  Easy Elimination Diet friendly recipe for a healthy appetizer or dinner.  Alohamora Open a Book http://alohamoraopenabook.blogspot.com/ healthy, diet friendly, egg free, dairy free, gluten free, soy free, nut free, corn free, elimination diet

I did this diet for a week, and actually just stopped it b/c I was still nauseous every single day.  I honestly think my nausea is connected to my jacked thyroid and hormones which is why even on this super clean eating diet I was still sick.  

I've run/trained for 2 marathons.  I have told myself that I won't do another marathon b/c the training is too hard on my body aka knees.  However, I would happily train and run another marathon rather than do this Elimination Diet again.  It was extremely tough, and absolutely no fun.  I couldn't really bake;  I love baking.  I couldn't eat much of anything at all.  Basically, I was a bit grumpy.  My poor husband and co-workers that had to deal with me. 


Bison or Beef Stuffed Mini Bell Peppers.  Easy Elimination Diet friendly recipe for a healthy appetizer or dinner.  Alohamora Open a Book http://alohamoraopenabook.blogspot.com/ healthy, diet friendly, egg free, dairy free, gluten free, soy free, nut free, corn free, elimination diet

On this diet I could handle breakfast and lunch pretty easily, but dinner was the difficult one.  I didn't want to eat boring food of just baked chicken and veggies every night.  Therefore, I had to get creative.  These Bison Stuffed Mini Sweet Bell Peppers are easy to make and Elimination Diet Friendly.   

This appetizer is great for game day, but also make an easy weeknight meal.  If you are not on a ridiculously strict diet you could easily use ground beef in place of bison.  However, the bison has a pretty great flavor.  

Bison Stuffed Mini Sweet Bell Peppers
Recipe: Alohamora
Active Time: 40 minutes
Inactive Time: 20 minutes
Servings: 2 dozen peppers

Ingredients: 
1 to 1.25 lb ground bison or beef
1 clove garlic, minced
1/4 c. onion, diced
1 1/2 tsp Cajun seasoning*
Optional Topping: shredded cheese

Directions: 

  1. Preheat oven to 350 degrees and pull out a small cookie sheet or pan with edges. . 
  2. Wash at least 2 dozen mini sweet bell peppers. 
  3. Cut 1/3 of the bell pepper off from top to bottom.  You don't want to cut it exactly in half b/c you want to make a little cup/bowl to fill the pepper.  You can then save the 1/3 that you cut up to dip in hummus or guacamole later, or if you are a huge bell pepper fan you can dice it up and add it to the bison filling. 
  4. Spray a large pan with olive oil cooking spray or add a dash of olive oil to your pan and heat it over medium heat. 
  5. Add the bison or beef to the pan and cook it over medium heat until it is thoroughly cooked.
  6. Add the onion and garlic to the pan and cook it for 3-5 minutes until the onions are translucent and soft.  If you like peppers, and you diced your peppers to add to the dish, add them with the onions and garlic and cook them until soft.  
  7. Add the Cajun seasoning and stir to combine everything in the pan.  Cook it all for 1-2 minutes longer to deepen the flavors. 
  8. Remove the meat from the stove and use a spoon to fill the cut peppers with your meat filling.  
  9. If you are not on a dairy restricted diet feel free to top your stuffed mini bell peppers with a little cheese.  The stuffed bell peppers taste great with or without cheese. 
  10. Bake the stuffed peppers at 350 degrees for 10-15 minutes until the pepper shells are soft.  If you added cheese turn the oven to broil and broil the peppers for 3-5 minutes.
  11. Serve these appetizers at a party, pot luck, or for a healthy dinner.  
  12. These stuffed peppers reheat well and make for delicious leftovers. 
  13. Enjoy! 
  14. Store leftovers in the refrigerator. 

Happy Elimination Diet Friendly Bison Stuffed Mini Bell Peppers eating!