Showing posts with label peanut butter. Show all posts

Friday, September 1, 2017

No Bake Chocolate Peanut Butter Cookies {gluten free, dessert, recipe}

No Bake Chocolate Peanut Butter Cookies. Gluten Free. Easy and quick to make.  Not too sweet. So delicious!  easy to make. kid friendly. cookies, dessert. Fun. Alohamora Open a Book, alohamoraopenabook www.alohamoraopenabook.blogspot.com

Gorilla Poo.  This may show my immaturity, but in college (and still with my kids) we'd call No Bake Chocolate Peanut Butter Cookies = Gorilla Poo. 

We thought it was hilarious and awesome.  I think we'd purposely make these cookies just so we could offer Gorilla Poo to friends and cute boys.  

Now that I am a mom of 3, I only use the term Gorilla Poo with my kids.  My oldest two think it is funny but gross at the same time.  However, I hear them using the term, so I must be doing something right with this whole parenting thing.  

In regards to this No Bake recipe, it is gluten free (if you use gf oats) and it is perfectly sweetened.  My college days Gorilla Poo recipe was a bit too sweet, but a few changes and this recipe is perfect.  I may be even daring enough to say it is the Best No Bake Chocolate Peanut Butter Cookie recipe. 

I take my cookies seriously, so when I say this classic No Bake Cookie recipe is the best one out there, it is.  Enjoy!  

No Bake Chocolate Peanut Butter Cookies
Recipe: Alohamora adapted from Food.com 
Active Time: 10 minutes
Inactive Time: 30 minutes
Servings: about 2 dozen with medium scoop

Ingredients: 
1/2 c. butter
1 1/4 c. sugar
1/2 c. brown sugar, packed
1/2 c. milk
1/4 c. cocoa
1/8 tsp salt
1/2 c. peanut butter, creamy
2 tsp vanilla
3 c. quick oats*


*For Gluten Free be sure these are GF*

Directions: 

  1. In a medium to large sauce pot over medium heat add the first six ingredients (butter, sugars, milk, cocoa, and salt).  Stir the mix occasionally until it boils.  
  2. Let the mixture boil for 1 minute and then remove the pan from heat.  
  3. Add the peanut butter and the vanilla to the pot and stir until it is melted and well combined. 
  4. Add the quick oats to the pot and stir to combine everything.  Old Fashioned, aka not quick oats, will work, but I like the taste and texture of these cookies best with the quick oats.  
  5. Lay about a 2 foot section of wax paper on the counter, or you can use parchment paper or a baking mat on the counter or on a cookie sheet. 
  6. Use a medium cookie scoop or a large tablespoons to scoop the cookies onto the prepared wax paper.  
  7. Let the cookies cool completely on the counter before eating.  
  8. Store cookies in an airtight counter or in the refrigerator.  
  9. Enjoy!  

Happy Easily Gluten Free Classic No Bake Cookie eating! 


Wednesday, December 14, 2016

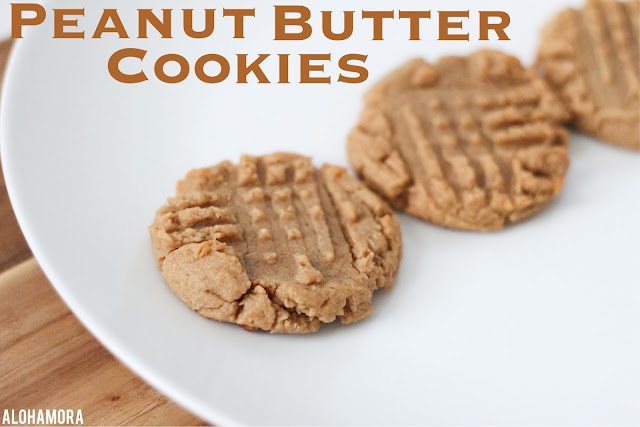
Peanut Butter Cookies {Cookie Week Recipe #5}

Classic Peanut Butter Cookies with the fork pressings and everything.  These cookies aren't too sweet using natural peanut butter, and the flavor is spot on.  Really, everyone (well except those allergic probably don't) need a really amazing class pb cookie recipe, and this one is oh so yummy! recipe, amazing, easy to make, simple, classic, traditional, Alohamora Open a Book

You really can't go wrong with the classics.  Pride and Prejudice, really anything Jane Austen, trucks, apple pie, chocolate cake, Monopoly, chess, and these Peanut Butter Cookies.

These cookies are your good ole' classic peanut butter cookies with the traditional fork imprints.  My kids like to call those imprints "little bumps," but I like to call them their trademark.   

I love peanut butter, but to be honest lately (it must be my old age of 36) I don't like most peanut butter based cookies b/c they are almost too sweet. Yes, things are too sweet for me now; I prefer vanilla Icelandic yogurt over any other yogurt b/c it isn't as sweet.  If you've never had Icelandic yogurt it is delicious!  

However, back to the cookies...this recipe is perfect.  It is perfectly sweet, perfectly soft, and perfectly flavored.  It's just perfect.  

I actually used Natural (No Stir, b/c I hate stirring) Organic Peanut Butter for this recipe, which is not nearly as sweet, and it made the best cookie.  I'm telling you, use the good healthy peanut butter for this recipe, and you'll be a happy camper.  My husband, who has a bigger sweet tooth than anyone I've ever met, could not get enough of these cookies and the dough.  

Basically, these cookies are amazing for the the sweet tooth eater or the picky and not so sweet eater.  Enjoy!  


Peanut Butter Cookies
Recipe: Alohamora adapted from Cooking on the Front Burner
Active Time: 25 minutes
Inactive Time: 25 minutes
Servings: 2 1/2 to 3 dozen cookies with a medium scoop 

Ingredients: 
1 1/3 c. peanut butter (natural no stir pb is my favorite, but any kind will work)
1/2 c. butter
1 1/4 c. brown sugar
3 Tbsp milk
1 Tbsp vanilla
1 egg
1 3/4 c. flour, unbleached
1/2 tsp salt
3/4 tsp baking soda

Directions: 

  1. Preheat oven to 350 degrees and line your cookie sheet with parchment paper or a baking mat.
  2. In a large bowl or a stand mixer cream together the peanut butter, butter, brown sugar, milk, and vanilla. 
  3. Add the egg and beat until just combined. 
  4. Add the dry ingredients, the remaining ingredients, in the order listed on top and mix until just combined.  
  5. Use a medium cookie scoop or a spoon to place dough balls on the prepared pan.  Use a fork and flatten the balls making a criss-cross pattern on top of the ball. 
  6. Bake the cookies at 350 degrees for 6-8 minutes until the cookies look set and not doughy.  Though, you don't want to overbake the cookies; they will cook a little more on the pan when the pan is removed from the oven.  7 minutes was my magic number. 
  7. Let the cookies cool on the pan for 5 minutes before removing them to a cooling rack. 
  8. Enjoy cookies warm or cool! They are delicious!
  9. Store leftovers in airtight container on the counter. 

Happy Classic Peanut Butter Cookie eating!


Friday, May 6, 2016

Alice in Wonderland "Eat Me" Peanut Butter Chocolate Chip Shortbread Cookies

These Alice in Wonderland inspired "Eat Me" Peanut Butter Chocolate Chip Shortbread Cookies are the best shortbread cookies, egg free wahoo, you will ever have.  They seem to melt in your mouth with the smoothiest texture ever.  These cookies, biscuits, or whatever you call them are amazing!  I used them for our book club of Splintered by A.G. Howard, and they were a hit, at least with me.  :) Alohamora Open a Book http://alohamoraopenabook.blogspot.com/

AMAZING!  Seriously, these shortbread, aka egg free, cookies are the best shortbread cookies known to mankind.  These Splintered/Alice in Wonderland  inspired "Eat Me" Peanut Butter Chocolate Chip Cookies are the perfect make-ahead cookies that have the smoothest melt in your mouth texture.  So yummy! 

I made these cookies for our book club since Splintered by A. G. Howard is a modern Alice in a Wonderland with a twist, and in the original story Alice eats a cake that says Eat Me to help her grow again.  Though, Alice had a cake with currant, and that sounded okay.  However, a Peanut Butter Chocolate Chip Shortbread Cookie sounded divine.  

I also felt a shortbread cookie was an English treat, and the author, Lewis Carroll (his pseudonym), was inspired for this story while riding on the Isis river in England.  Congratulations, you have now, hopefully, successfully followed my reasoning for why these amazing cookies were a must for book club night.  

I really felt book club was delicious. If you missed my other Splintered book club recipes here they are: 

Basically, I just wish you all could be in our book club.  Anyone in AZ want to come? 

"Eat Me" Peanut Butter Chocolate Chip Shortbread Cookies
Recipe: Alohamora adapted from The View From Great Island
Active Time: 20 minutes
Inactive Time: 3 hours or 20 minutes + chill time
Servings: 1 1/2 dozen

Ingredients: 
1/2 c. butter, softened
1/2 c. peanut butter, creamy
3/4 tsp vanilla extract
1 1/4 c. flour, all purpose unbleached
1/3 c. powdered sugar/confectioner's sugar
1/4 tsp salt
3/4 c. milk chocolate chips

Directions: 
  1. In a medium to large bowl or a stand mixer cream the butter and peanut butter together until creamy and well combined. 
  2. Add the vanilla and mix until combined. 
  3. Add the flour, sugar, and salt to the butter mixture and mix until it just comes together and no longer crumbly. 
  4. Add the chocolate chips and mix until just combined. If the dough is too greasy add no more than a 1/4 cup of flour more and mix until combined. 
  5. Pull the dough out of the bowl and place it onto a piece of waxed paper that is about a foot in length.  Using your hands form the dough into a log.  I usually make mine about 8 inches long and 3 inches or so in diameter.  If the batter is a bit crumbly you may need to use your hands to pull the dough together; just press the crumbly pieces into the log and work your hands up and down the log to make sure the dough holds it's shape.  Roll the dough log up into the waxed paper smoothing the log shape as you go.  Twist the ends and secure them with a rubber band.  Refrigerate the cookie dough for at least 2 1/2 hours or overnight. 
  6. When the dough has chilled preheat your oven to 350 degrees and line 2 cookie sheets with parchment paper or silicone baking mats.  
  7. Place your chilled dough onto a cutting board, roll it out of the paper, and use a sharp knife to cut the log into slices about 1/4 to 1/3 inch thick.  Don't worry if a slice crumbles a little, just push it back together; you are going for delicious here, not perfection. 
  8. Back your cookies at 350 for 10-11 minutes depending on how thick your cookies are.  The cookies will be barely browned on the edges and possibly look a little undone in the middle.  That's okay, they will finish cooking on the pan outside of the oven.  To keep the smooth melt in your mouth texture you want to be sure to not over bake these cookies. 
  9. Let the cookies cool on the pan outside of the oven.  If you would like your can transfer the cookies to a cooling rack.  
  10. Enjoy your melt in your mouth amazing pb chocolate chip shortbread cookies. 
  11. Store leftovers in an airtight container on the stove, they keep for at least a week.  We've never had them last any longer than that.  :). 

Happy Amazing "Eat Me" Peanut Butter Chocolate Chip Shortbread Cookie eating, and happy fun Alice in Wonderland or Splintered book clubs, parties, or gatherings.  

Monday, March 14, 2016

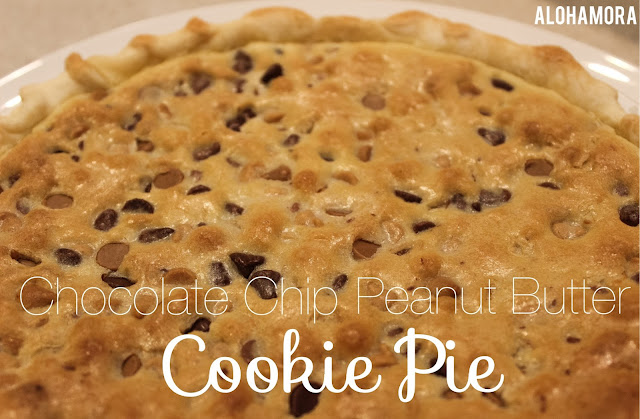
Chocolate Chip Peanut Butter Cooke Pie

Chocolate Chip Peanut Butter Cookie Pie.  A delicious treat that combines the best of both desserts of cookie and pie. The pie is easy to make and takes no more than 20 minutes of effort plus baking time.  Alohamora Open a Book http://www.alohamoraopenabook.blogspot.com/ easy, cookies, pies, recipe, treat, Pi Day celebrating fun.  3.14 Happy Pi Day March 14

3.1415926535897... Happy Pi Day!  

I am a total math nerd.  I minored in math, and the Dewey Decimal System is so fun to me.  I just love numbers and how clear cut math is.  

I also love cookies, but it is Pi(e) Day.  Therefore, I made a Chocolate Chip Peanut Butter Cookie Pie.  This pie is delicious, and according to my Father In-Law, it is amazing and not as rich as he expected.  

This dessert recipe is a tasty ooey gooey treat.  This pie is combining the best of everything.  Chocolate + Peanut Butter; Cookie + Pie.  Everyone wins!  

I am also whipping up one of these Pizza Pi(e)s for dinner. 

How are you celebrating Pi Day?

Chocolate Chip Peanut Butter Cookie Pie
Recipe: Alohamora adapted from Hershey's Cookbook
Active Time: 15 minutes
Inactive Time: 45 minutes + cool time
Servings: 8-10 people, 1 9-inch pie pan

Ingredients:

1 unbaked 9-inch pie crust
1/2 c. butter, softened
2 eggs
2 tsp vanilla
1 c. sugar
1/2 c. flour
1 c. chocolate chips (I prefer milk chocolate)
1 c. peanut butter chips
Extra chocolate and peanut butter chips (about 1/4 c.)
Toppings (optional): sweetened whipped cream or ice cream

Directions: 

  1. Heat oven to 350 degrees. 
  2. Place your pie crust in a 9-inch pie pan and flute the edges. 
  3. In a stand mixer, or medium bowl with a hand mixer, beat the butter on low until smooth. 
  4. Add the eggs one at a time mixing and scraping the edges between each addition. 
  5. Add the vanilla and mix until combined. 
  6. Add the sugar and mix until smooth.  You may have to scrape the sides of the bowl to be sure everything is mixed well. 
  7. Add the flour and mix on low until it is just combined. 
  8. Add the chocolate and peanut butter chips and mix it all together until just combined.  
  9. Pour the cookie dough into the prepared unbaked pie crust.  Use a spatula to even out the dough and top it with about 1/4 cup of combined chocolate and peanut butter chips.
  10. Use either a pie crust cover or aluminum foil pieces to cover the pie crust edges while baking to prevent burned crusts.
  11. Bake the pie at 350 degrees for 30-40 minutes until the top of the pie and the crust is light brown in color.  
  12. Remove pie from oven and cool for at least an hour. 
  13. Serve pie cooled or for extra wow warm (heat for 10 seconds in the microwave), and top it with whipping cream or ice cream. 
  14. Enjoy!
  15. Store leftovers covered on the counter or in the refrigerator.  

Happy Pi Day and happy Delicious Cookie Pie eating!  


Wednesday, July 22, 2015

Chocolate Chip Peanut Butter Fluffernutter Cookies {Flourless} {Gluten Free}

Chocolate Chip Peanut Butter Fluffernutter Cookies.  Flourless cookies so they are naturally gluten free.  Easy and delicious cookies to make that bring your back to fluffernutter sandwich days.  Flourless peanut butter cookies filled with Marshmallow Fluff/Cream is something new and fun, and yet classic enough.  Alohamora Open a Book http://www.alohamoraopenabook.blogspot.com/ gf gluten free dessert recipe cookies unique

I had my first Fluffernutter sandwich on the ski slopes of West Virginia.  The snow, slope length, and riding in general may not have the best I've ever had since I grew up skiing and snowboarding in Colorado and Utah, but the company and lunch delicacies was near the top.

My friends Amanda and Carla, who grew up in a family that instilled quality food dishes, introduced me to the Fluffernutter.  For those that may not know, a Fluffernutter is a sandwich with peanut butter and marshmallow fluff.

My awesome friends grew up in Maine, so I am not sure if it is a Northeast delicacy, or if I was just unlucky throughout my childhood to not have enjoyed the sugary goodness of a Fluffernutter.  

If you were as unlucky as I was you may not know of the Fluffernutter Sandwich goodness.  However, you can now enjoy the naturally gluten free deliciousness of the Chocolate Chip Peanut Butter Fluffernutter Cookie no matter where you are in life.  


Chocolate Chip Peanut Butter Fluffernutter Cookies
Recipe: Alohamora adapted from Cookingclassy.com
Active Time: 35 minutes
Inactive Time: 10 minutes
Servings: Approximately 2 dozen

Ingredients: 

1 c. peanut butter, creamy
1/2 c. sugar
1/3 c. brown sugar, packed
1 egg, extra large (large works, but XL is best for texture and appearance)
1/2 tsp baking soda
1 c. milk chocolate chips
1/2 c. marshmallow fluff/cream (about 1/2 tsp each cookie)

Directions: 

  1. Preheat oven to 325 degrees and line your cookie sheets with a baking mat or parchment paper. 
  2. In a medium bowl hand stir the first five ingredients together.  Do not add too much peanut butter (it will affect the texture of the cookies), and if you only have a large egg that is fine.  The little bit extra in the extra large egg really provides the best texture and cookie appearance, but maybe only crazy people like me notice that. 
  3. Add the chocolate chips and stir to combine everything.  
  4. Using a small cookie scoop, or two spoons, scoop about 2 teaspoons of cookie dough into a ball onto your cookie sheet.  
  5. Push down the center of the cookie dough ball to make a hole/cavern in the middle of the cookie.  Using a spoon add about 1/2 to 1 teaspoon of marshmallow fluff to the hole of the cookie. 
  6. Finally, grab a small about of cookie dough and flatten it between your hands.  This will be the "lid" or "top" for your cookie.  Place the flatten cookie dough on top of one of the cookies with marshmallow fluff in the middle, and seal the edges as best as you can. 
  7. Complete this for all of your cookies on your pan.  
  8. Bake your cookies at 325 degrees for 8-10 minutes.  
  9. Store leftovers in a sealed container on the counter. 
  10. Enjoy!  I prefer to eat these cookies with milk, but we all have our own preferences.   

Happy Fluffernutter Cookie eating! 


Tuesday, June 16, 2015

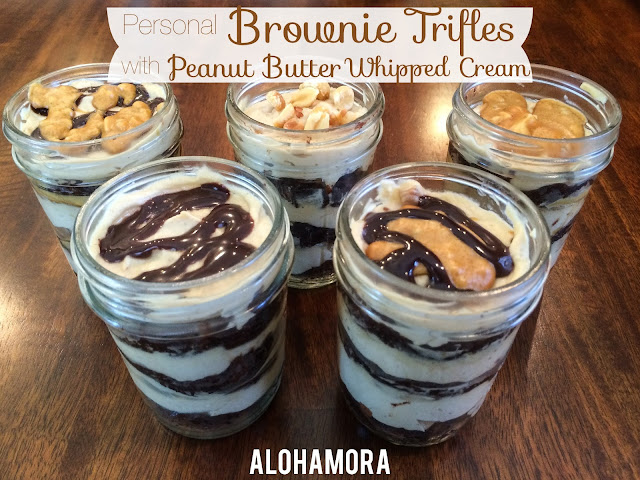
Mason Jar Brownie Trifles with Peanut Butter Whipped Cream

Single serving Personal Brownie Trifles with Peanut Butter Whipped Cream in a Mason Jar.  These trifles are easy to put together, something fun and different, can easily be made ahead of time, and allows for so much variation.  Oh, and you use a brownie mix from a box.  Alohamora Open a Book http://www.alohamoraopenabook.blogspot.com/ easy simple quick fun cold dessert recipe delicious, chocolate and peanut butter, would taste great with cookie butter


Just like chocolate chip cookie recipes I have tried a lot of brownie recipes.  Though, the brownie recipes are good, I have come to know and believe that brownies from a box are simply the best.  They just are.  Plus, how fantastic that they are so easy to make and you can get them on sale for such a great price.

I love brownies, and I love dressing them up aka making them fancy.  If you do a search of brownies on my blog you'll see I have many fancy brownie variations from Root Bear Float Brownies, Mint Brownies, Peanut Butter Brownies, and more.  Plus they all use a brownie mix.

Today, I'm giving you yet another option for what to make using a brownie mix.  These Brownie Trifles with Peanut Butter Whipped Cream is a fun and cold dessert that you can make ahead and personalize in these single serving Mason Jars with a myriad of toppings.

Gluten Free fans, I have made these using a GF brownie mix (which the cheapest mixes I found are at Costco), and they are delicious and just as easy to make.

Whatever brownie mix you use, you will love these brownie trifles.  Guaranteed! 

Personal Mason Jar Brownie Trifles w/ Peanut Butter Whipped Cream
Recipe: Alohamora
Active Time: 20 minutes
Inactive Time: 20 minutes + cooling time (1-2 hours)`
Servings: 5- 8oz jar trifles

Ingredients: 
1 brownie mix (and the ingredients listed on the box aka eggs, oil, and water)
2 c. heavy whipping cream
1/4 c. brown sugar
1/2 c. peanut butter
Optional Toppings; Chocolate syrup, peanuts, M&M candies, melted peanut butter (30 seconds on high in the microwave), sprinkles, etc.  

Directions: 

  1. Preheat oven to 300 degrees, and grease and flour, or spray with a baking spray, a large 11x17 pan aka a cookie sheet with edges. 
  2. Make your brownies according to the directions on the box.
  3. Pour your brownie batter into the prepared pan and evenly spread it out.  It will be a thin layer; that is exactly what we are going for. 
  4. Bake your brownies at 300 degrees for 15-20 minutes.  My gluten free brownies took longer to bake. 
  5. When your brownies pass the toothpick test remove them from the oven and allow them to cool completely.  At this point you can cover your brownies until you are ready for the next steps.  
  6. When the brownies are cooled completely use the top of an 8oz mason jar (or whatever size jar you are using for your trifles), and flip it over to make/cut out your brownie layer circles.  I was able to get approximately 15 circles in my 11x17 pan using an 8oz jar
  7. Now you can make your peanut butter whipped cream.  Using a stand mixer or medium bowl with an electric mixer beat your whipping cream, brown sugar, and peanut butter until almost stiff peaks form.  I actually LOVE using crunchy peanut butter in the whipping cream, but you can use whatever you have on hand or desire.
  8. With your whipping cream done you can assemble your personal jar trifles. 
  9. Layer a brownie circle on the bottom of the jar, top it with some peanut butter whipped cream, and continue alternating up to the top with 2 more of those trifle layers.  You can then top the trifles with whatever you'd like.  
  10. You can also layer your trifles with the toppings in each trifle as well.  For example: brownie layer on the bottom, pb whipped cream second, and then a melted peanut butter and chocolate syrup layer.  Repeat that two more times.
  11. Place the jar lid on top of your Mason jar trifles and place them in the fridge until you are ready to enjoy.  If you are topping your trifles with peanuts be aware that the peanuts will get "soggy" on the trifle.  That's the one topping I'd wait to put on until just before serving. 
  12. Serve the brownie trifles in the jar, and enjoy.  Leftover trifles (part or whole trifle) can stay covered in the refrigerator for up to a week. 
  13. Enjoy!

Happy personal Mason Jar Brownie Trifle w/ Peanut Butter Whipped Cream and a variety of toppings eating! 

What are your favorite things to make with a brownie mix? 


Tuesday, May 19, 2015

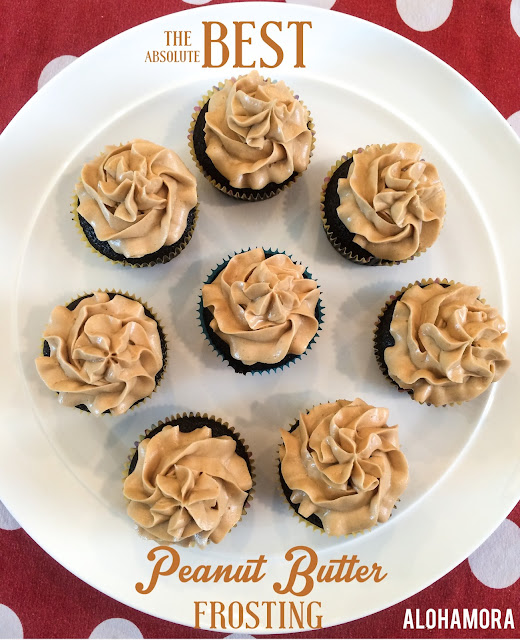
The BEST Peanut Butter Frosting- Light and Creamy

This is the absolute very BEST Peanut Butter Frosting.  It's light and creamy and full of peanut butter goodness.  This pb frosting is amazing with cake and delicious on chocolate cupcake recipe.  The recipe is perfect for a small 6 inch double layer cake or 12 cupcakes... b/c when do you ever need more than 12 cupcakes. Alohamora Open a Book http://www.alohamoraopenabook.blogspot.com/

I'm a huge fan of this moist chocolate cupcake and creamy peanut butter frosting recipe.  I love the amazing chocolate peanut butter flavors, and I love that this recipe makes a small 6 inch double layer cake, or 12 cupcakes.  

I'm a big fan of sweets and treats, but I don't need 24 cupcakes every time I make them, and cake/cupcakes are always best fresh.  Therefore, this small recipe is absolutely perfect.  

Basically, I LOVE this recipe... absolutely and completely.  It makes the perfect amount, and it is the perfect chocolate cake recipe with the perfect frosting.  

For those gluten free friends, I've made this recipe using gluten free flour and it tastes equally delicious. 

The BEST Peanut Butter Frosting (and 12 Chocolate Cupcakes)
Recipe: Alohamora and Cupcake recipe from Elma (my sister's friend)
Active Time: 7 minutes for the Frosting, and 20 minutes for the Cupcakes
Inactive Time: 30 minutes
Servings: 12 cupcakes or 6 inch double layer cupcake. 

Ingredients: 


For the Cake: 
3/4 c. sugar
6 Tbsp oil
1 egg
1 c. all purpose flour
1/4 c. unsweetened cocoa powder
3/4 tsp baking soda
1/4 tsp salt
3/4 c. boiling water
1 tsp vanilla extract

PB Frosting:
1 c. powdered sugar
1 c. peanut butter, creamy
5 Tbsp butter, softened
3/4 tsp vanilla extract
1/4 tsp salt
1/3 c. heavy cream

Directions: 
  1. Preheat oven to 325 degrees.  Place 12 cupcake liners in a muffin tin, or grease and flour (I use a combine spray like Bakers) two 6 x 2 inch round cake pans well.
  2. In a large bowl or a stand mixer add your first three cake ingredients and mix it on low until well combined. 
  3. Add your flour, cocoa, baking soda, and salt in that order on top of your sugar mixture.  On low, mix it all together until it is well combined.  It will seem somewhat dry to you. 
  4. With your mixer on low slowly pour in the boiling water.  You may need to use a spatula halfway through the mixing to make sure the water is combining with all of the cake mixture.  It will appear quite soupy at this point.    
  5. Finally, add the vanilla and mix until well combined.
  6. Using a large cookie scoop to fill your 12 cupcakes, or evenly distribute the cake batter between the two prepared 6 x 2 inch pans.  Bake the cupcakes at 325 for 19-24 minutes (19 was my magic number), or bake the 6 inch cake for 25-30 minutes (25 minutes was my magic number) or until a toothpick comes out clean.
  7. When the cupcakes are done take it out and let it cool completely before frosting. 
  8. For the frosting: In a stand mixer mix the first five ingredients (everything except the heavy cream) on low until it is light and creamy scraping the bowl as necessary. 
  9. Add the heavy cream to the frosting and mix it on high for 3-5 minutes until it is light and smooth. 
  10. Frost the cupcakes as you choose.  I think frosting cupcakes is easiest and quickest with a tip and bag, but you can go old school like my mom usually did.  This recipe makes enough frosting for a 6 inch cake as well. 
  11. Enjoy! 
  12. Store cupcakes or cake leftovers in the fridge or on the counter in a sealed container.  
  13. This cake and frosting recipe freezes well.  I like to make this recipe using my gluten free flour and freeze it in pieces to take out and enjoy as I please.  


Happy absolutely delicious and the very best Peanut Butter Frosting and Chocolate Cupcakes


Wednesday, March 11, 2015

Earthquake Cake w/ Endless Combinations

Earthquake Cake aka chocolate peanut butter pecan cream cheese gooey layers of goodness chocolate cake.  So delicious!  The best cake ever, easy to make, anyone can make it look good, and all around winner dessert recipe.   If you like sweets you'll love this cake! Alohamora Open a Book http://www.alohamoraopenabook.blogspot.com/

This cake is amazing. Period. 

Seriously, it's so so good, and the combinations of flavors you can pull off is endless.  Therefore, it's flexibility makes it even better, if that is possible.   

I LOVE chocolate and peanut butter so I went that route.  However, my husband (who as I've stated several times before) who doesn't like chocolate but LOVES this cake and requested it again instead of cheesecake (that is HUGE for him) has been saying I need to make it with toffee (Heath bar bits) and caramel.  I'm thinking add toffee and caramel to the chocolate and peanut butter and you have a ridiculously deliciously rich cake. 

Basically, if you like coconut throw it in there with chocolate and nuts.  If you like mint and chocolate do that.  You can make it whichever way works for you.  No matter the "flavor" combinations you throw together this cake is still going to be moist, delicious, and full of great layers of goodness.  


You may ask why it's called an Earthquake Cake.  That's because it has soft moist layers of goodness (pecans, chocolate, peanut butter, chocolate cake, and cream cheese frosting) and canyons can occur during the baking process bc of shifting tectonic plates aka layers.  

Basically, just go with it and know that this cake is GOOD!

Another bonus, this cake tastes delicious the next day.  Therefore, it is the perfect "Make Ahead" cake the day before you need it.  That extra day on your counter lets the flavors really meld together for ideal and prime yumminess! 


Earthquake Cake aka chocolate peanut butter pecan cream cheese gooey layers of goodness chocolate cake.  So delicious!  The best cake ever, easy to make, anyone can make it look good, and all around winner dessert recipe.   If you like sweets you'll love this cake! Alohamora Open a Book http://www.alohamoraopenabook.blogspot.com/


Earthquake Cake
Recipe: Alohamora adapted from The First Year
Active Time: 25 minutes
Inactive Time: 45 minutes
Servings: 12-16, 9x13 pan

Ingredients: 
2/3 c. pecans, chopped
1 c. chocolate chips (milk is my favorite)
2/3 c. peanut butter chips
1/2 c. butter
1 (8oz) pkg cream cheese, softened
1 (16.5oz) box Devil's Food Cake Mix 
1/3 c. oil
3 eggs
1 1/3 c. water
1 lb (approximately 3 3/4 c.) powdered sugar

Directions: 

  1. Preheat oven to 350 degrees, and grease/flour or baking spray a 9x13 inch pan. 
  2. On the bottom of the pan evenly layer your pecans. 
  3. Next, sprinkle the chocolate chips on top of the pecans, and the peanut butter chips on top of that.  If you want to substitute different flavors do it here with the chips. You could also add toffee bits to the chocolate and peanut butter chips. 
  4. In a small saucepan over low to medium heat, melt the butter and soften the cream cheese.  If your cream cheese melts completely that is fine; mine never did.
  5. While your butter and cream cheese is melting make your cake layer.  In a medium bowl mix the cake mix with the oil, eggs, and water.  Your cake batter will be more liquidy.  Don't fret; that helps make the cake so delicious. 
  6. Evenly pour the cake mix on top of the pecan, chocolate chip, and peanut butter chip layer.
  7. In a stand mixer or medium bowl pour your melted butter and either melted or super softened cream cheese into the bowl.  Add the powder sugar on top and beat it until the frosting is smooth. 
  8. Spread (using large spoonfuls or just pouring) the frosting on top of the uncooked devil's food cake in the pan. 
  9. Using a butter knife swirl the frosting into the uncooked cake.  As a tidbit, when you swirl a top layer into the next layer down you are barely pushing the knife into the cake (no more than 1/4 inch) and swirling it up and down and all around in whatever design you desire.  Though if you get a little swirl crazy it ends up not looking as cute. Less is more in this case.  If you push your knife too far down into the cake it'll mix the top two layers rather than swirl it. This will give it a different taste and look. 
  10. Bake your cake at 350 degrees for 35-45 minutes (my magic number was 38)  until the cake doesn't wobble and move a lot (a little is fine) when you lightly shake the pan back and forth. This cake is a bit more soft, moist, and gooey in nature.  That's all part of it's tastiness. 
  11. Enjoy this cake warm with milk, ice cream, caramel topping, whipping cream, or just plain.  You can also make this cake and then enjoy it the next day cold for ideal flavor deliciousness. 
  12. Store leftovers in the fridge or one the counter covered. 
       
Happy moist, gooey, amazing Earthquake Cake eating!  

Tuesday, October 14, 2014

Double Chocolate Peanut Butter Reese's Pieces Cookies- Non Pumpkin Halloween/Fall Cookies

Double Chocolate Peanut Butter Reese's Pieces Cookies- Not everything in the Fall or during Halloween needs to be Pumpkin.  These soft, big, chocolate pb cookies are AMAZING!  Alohamora Open a Book http://alohamoraopenabook.blogspot.com/

Sure, I like pumpkin treats, but I LOVE chocolate and peanut butter.  I'll personally OD (overdose) on pumpkin before Thanksgiving if I have too much during September and October.  Therefore, I have to pace myself.  I can't be the only person to feel this way about pumpkin, right?

I also believe that it is possible to have Fall/Halloween cookies that don't involve pumpkin or some googly monster eyes.

Reese's Pieces are the perfect Fall candy that you can buy at any store.  They are naturally Fall/Halloween colors.  Using Reese's Pieces in these cookies not only make them festive, but they add to the deliciousness of an already amazing cookie. 

I've been tweaking this recipe for a couple years now, but I have finally perfected it.  These Double Chocolate Peanut Butter Reese's Pieces Cookies are "Freaking Amazing" according to my friend. 

These cookies have the perfect sweetness of chocolate (not too sweet, but a good darker/deeper chocolate flavor) with just the right amount of peanut butter.

Besides having amazing chocolate peanut butter flavor these cookies are soft and big and taste delicious for days... if you can find yourself not eating them all at once. 

Double Chocolate Peanut Butter Reese's Pieces Cookies
Recipe: Alohamora
Active Time: 40 minutes
Inactive Time: 20 minutes
Servings:  1 1/2 dozen large or 3-4 dozen medium cookies

Ingredients: 
1/2 c. bittersweet or dark chocolate chips 
1/2 c. butter, softened
3/4 c. creamy peanut butter
3/4 c. sugar
3/4 c. brown sugar, packed
2 eggs
2 tsp vanilla
1 1/2 c. flour, unbleached all purpose
1/2 c. cocoa powder 
1 tsp baking soda
1/8 tsp salt
1 c. Reese’s Pieces, Mini or a bit more of the regular size.

Directions:
  1. Preheat oven to 325 degrees. 
  2. On 2 cookie sheets lay baking mats or parchment paper and set aside.
  3. Melt the dark/bittersweet chocolate chips on the stove or in the microwave and then set aside.   
  4. In a large bowl or stand mixer cream the butter and peanut butter for 2-3 minutes on low.
  5. Add the sugars and mix it until it is light and fluffy.  
  6. Add the melted chocolate and mix until just combined. 
  7. Add the eggs and the vanilla one at a time briefly mixing after each addition.  
  8. You may need to scrape the sides of the bowl to be sure everything is mixing well.
  9. Add the flour, cocoa, baking soda, and salt in order on top of the butter mixture and mix until just combined. 
  10. Add about 3/4 c. of Reese's Pieces to the dough either by hand or briefly mix in the stand mixer for no more than 20 seconds. You are going to save the remaining Reese's Pieces to place on top of the cookie dough balls. 
  11. Using a large cookie scoop, or with a spoon, make cookie dough balls that are about 3 Tbsp in size and place them on the prepared cookie/baking sheet.   
  12. Flatten the cookie dough balls slightly and place the extra 1/4 c. of Reese's Pieces on top among all of the cookie dough balls. 
  13. Bake cookies at 325 degree for 8-10 minutes or until the cookies are no longer shiny. 8 minutes was my magic number.  Do not over bake.  If your cookies are smaller, using a medium cookie scoop, bake for 68 minutes. 
  14. Cool cookies on the baking sheet and/or cooling rack.  
  15. Enjoy with or without milk. 
  16. Store leftovers in an airtight container, though if you want the cookies to last longer or you plan on shipping/mailing them place them in the freezer for a couple hours.  


Happy Double Chocolate Peanut Butter Reese's Pieces Cookies eating!  Just try and not eat more than 2 cookies at a time.  :) 


Wednesday, July 9, 2014

No-Bake Creamy Peanut Butter & Chocolate Pudding Bars w/ Oreo Crust

No-Bake Creamy Peanut Butter and Chocolate Pudding Bars with Oreo Crust is delicious, super easy to make, and a cold treat for a potluck or nightly treat. Alohamora Open a Book http://alohamoraopenabook.blogspot.com/

No- bake treat= perfect for summer time.  Cold pudding like dessert= perfect for the hot summer days.  Crunchy Oreo crust= tasty texture. Peanut Butter and Chocolate combination= no better combination according to my taste buds there is .  

I came up with these No-Bake PB & C as my husband calls it, aka Peanut Butter and Chocolate Pudding Bars yesterday b/c Oreo cookies are on sale at Target this week for $2 (awesome!), I wanted to try out the new Reese's Oreo cookies, cold pudding as a dessert has been awfully appealing lately with the soaring temperatures in AZ, and really b/c I love making up new recipes. 

This Creamy PB&C Pudding Bars with Oreo crust is delicious, cold, and so so easy to make!  Plus, it is like a pudding version of a Reese's.  Delicious! 

If you are not a peanut butter fan or have nut allergies you could totally use regular Oreos and replace the peanut butter in the recipe with Cookie Butter from Trader Joes b/c that would be delicious!  Gluten Free individuals should use the GF Joe-Joes from Trader Joes and enjoy this pudding bar tastiness.

No-Bake Creamy Peanut Butter and Chocolate Pudding Bars with Oreo Crust is delicious, super easy to make, and a cold treat for a potluck or nightly treat. Alohamora Open a Book http://alohamoraopenabook.blogspot.com/

Now, my take of these Reese's Oreo cookies... they are okay.  However, to be fair I never eat Oreos plain, I only bake with them.  So, my skewed taste of the one cookie I had is probably not highly credible. They aren't bad, but I didn't have a "Wow!" moment eating them.  

On a positive side, and maybe b/c I get super exciting for baking items, I did try this Chicago Metallic Silicone Baking Mat in my 9x9 pan for the first time.  I got it at JoAnns, but the price on Amazon is cheaper than my coupon deal at JoAnns.    

No-Bake Creamy Peanut Butter and Chocolate Pudding Bars with Oreo Crust is delicious, super easy to make, and a cold treat for a potluck or nightly treat. Alohamora Open a Book http://alohamoraopenabook.blogspot.com/

I've used baking mats in my cookie sheets for years.  I love the way they bake the cookies evenly on the bottom.  I've also lined my baking pans with parchment paper so I could pull them out of the pan to either cool or cut easily like I do for this Peppermint Bark.  This baking mat does exactly what parchment paper does without the hassle of pulling out the parchment paper and getting it to stay in the pan.  However, you do have to wash this after, and you don't wash parchment paper so... you decide which is worse.  

I'm just saying I thoroughly enjoyed using this mat for this pudding bar recipe, and I plan to use it more often now b/c I can easily pull the finished product out of the pan, and cut/serve them all cute looking without the struggle of the first bar coming out ugly. 


No-Bake Creamy Peanut Butter and Chocolate Pudding Bars with Oreo Crust is delicious, super easy to make, and a cold treat for a potluck or nightly treat. Alohamora Open a Book http://alohamoraopenabook.blogspot.com/

Alright, onto the easy no-bake recipe deliciousness...

Creamy Peanut Butter and Chocolate Pudding Bars
Recipe: Alohamora
Active Time: 30 minutes
Inactive Time: 4+ hours
Servings: 8-10

Ingredients: 
For the Crust:
1 pkg Oreos (Reeses, PB, plain, or double stuff)
1/4 c. butter, melted

For the PB layer:
1/2 pkg (4oz) cream cheese, softened
1 Tbsp sugar
1 Tbsp milk
1 c. peanut butter, creamy
1/2 container (8oz) of cool whip 

For the Chocolate layer: 
1 box (5.9oz) chocolate pudding, instant
1 1/2 c. milk
1/2 container (8oz) of cool whip

Directions: 

  1. In a 9x9 inch pan line with parchment paper or baking mat.  Though, neither are necessary. 
  2. Crush 18 Oreo/chocolate sandwich type of cookies using a bag and rolling pin or a food processor to speed up the process. 
  3. In a small bowl stir to combine the crushed Oreos with the melted butter and press the mixture into the bottom of the prepared pan using the back of a spoon or your hand. 
  4. For a true no-bake place the Oreo crust into the fridge for 1 hour.  However, to speed the setting of the crust up you can bake it at 325 for 10 minutes. 
  5. Place pan aside or in the fridge to cool while you make the peanut butter and chocolate layers.  
  6. In a medium bowl using a hand mixer or a stand mixer beat the cream cheese, sugar, milk and peanut butter together for about 2-3 minutes until it is smooth. 
  7. Stir half of the Cool Whip container into the peanut butter mixture and set aside. 
  8. In another medium bowl whisk the chocolate pudding and milk together for about 2-3 minutes or until smooth. 
  9. Stir the rest of the Cool Whip into the chocolate pudding and set aside. 
  10. Evenly layer the peanut butter mixture over the Oreo crust in the pan, and then layer the chocolate pudding on top of the pb layer.
  11. Finally, roughly crush at least 4 Oreo cookies, but you can do more, and evenly distribute them on top of the pudding mixture.  
  12. Refrigerate the pudding bars for at least 3 hours before serving. 
  13. Store leftovers in the fridge. 
  14. Enjoy! 

Happy Creamy PB&C Pudding Bars eating that is cold, delicious, easy to make, and perfect for a hot summer day!