Showing posts with label make ahead. Show all posts

Monday, January 9, 2017

Cinnamon Ice Cream {Egg, Nut, and Gluten Free}

Cinnamon Ice Cream. Homemade ice cream is easy to make, healthier than regular ice cream with a Cinnamon Roll Oreo crunch. Recipe. Egg Free. Alohamora Open a Book http://alohamoraopenabook.blogspot.com/

When I shared the oh so delicious Pumpkin Ice Cream recipe with you I shared how far ice cream makers have come.  I even included our ice cream maker on My Favorite Kitchen Toys, I mean Tools, of 2016. 

We have been exploring with many ice cream flavors, and today I am sharing another amazing one.  Cinnamon Ice Cream, I honestly never knew how delicious cinnamon ice cream could be until we made this one.  Before, if I had been at an ice cream parlor I would've never selected it, but now this ice cream is one of my favorites.  It's amazing. 

As a bonus, this ice cream is a little healthier than store bought ice cream b/c of the extra milk we added instead of heavy cream. Tho, we probably ruined our healthier aspect by adding some crunch in the ice cream through the Cinnamon Bun Oreos (Golden tastes delicious as well).  I guess you can't win them all.  ;) 

If you are wanting this to be gluten free be sure to leave out the cookies, or add GF cookies. 

Cinnamon Ice Cream
Recipe: Alohamora
Active Time: 5-10 minutes
Inactive Time: 2 1/2 hours + 8 hrs for firmness
Servings: About 5 cups

Ingredients: 
2 c. heavy whipping cream
1 c. milk (we use skim, but whatever you have)
3/4 c. sugar
1 1/2 tsp cinnamon
1/4 tsp vanilla

Optional Mix-Ins: 
10-15 crushed Golden Oreo or Cinnamon Bun Oreo cookies

Directions: 

  1. In a small bowl mix all of the ingredients, except the mix-ins, together.
  2. Cover and place it in the fridge for at least 2 hours the longer you leave it in the fridge the creamier the ice cream.  
  3. Turn the ice cream maker on, and pour the cream mixture into the ice cream maker.  Let the ice cream maker do all of the work for 20-30 minutes. 
  4. When the ice cream is just about done you can add any mix-ins you desire and let the machine stir it all.  You can also remove the ice cream to an airtight ice cream storage bowl and add the mix-ins then.  Stir your desired mix-ins with a spoon. 
  5. Your ice cream will be soft serve at this point.  We enjoy a scoop now, and then place the rest in a airtight container in the freezer.  The hard ice cream will set in about 8 hours.
  6. Enjoy! 
  7. Store leftovers in the freezer in that airtight container. 

Thursday, December 22, 2016

German Chocolate Pecan Pie

German Chocolate Pecan Pie.  A classic pecan pie with a delicious chocolate coconut twist.  Easy to make, homemade from scratch, and oh so delicious!  Original recipe. Alohamora Open a Book http://alohamoraopenabook.blogspot.com/

I know most people focus on cookies during Christmas time, and don't get me wrong I do love my cookies.  I recently had cookie week with S'mores Cookies, Cake Batter Funfetti Cookies, Peanut Butter Cookies, Soft Batch Chocolate Chip Cookies, and White Chocolate Peppermint Cookies shared.  Those new recipes are all oh so delicious; definitely give them a try.  Yummy!  

Though, I have many older cookie recipes that are just as delicious and ones you should definitely check out: the World's Best Soft Sugar Cookies, Molasses Free Gingerbread Cookies, award winning Cookies and Cream Cookies, Death by Chocolate Cookies,  Oatmeal Chocolate Chip Cookies, Swig Sugar Cookies- Copycat, and the Best Snickerdoodles are just a few.  I really seem to have a thing for cookies, but I think it is a good thing.  I mean, cookies are convenient desserts you can eat on the run.  To be honest, cookies may be my favorite desserts.

However, I have a special place in my heart for pies.  My grandmas were both amazing pie makers.  One Gma made an amazizng Coconut Cream Pie, and the other Gma made the best Banana Cream Pie. 

Growing up, there were many Sunday evenings we had pie for dessert.  I come from some serious pie fans, and so I of course love pie as well.  It's only logical.  


German Chocolate Pecan Pie.  A classic pecan pie with a delicious chocolate coconut twist.  Easy to make, homemade from scratch, and oh so delicious!  Original recipe. Alohamora Open a Book http://alohamoraopenabook.blogspot.com/

Growing up we always had turkey for Thanksgiving and Christmas.  We also had a myriad of pies for Thanksgiving and Christmas.  It was a tradition; it was what we did.  Thanksgiving and Christmas had both turkey and pies.  

I have found as I have gotten older, that there are some traditions from my childhood that are hard to give up.  Pie is one of those difficult ones for me.  I feel an obligation of sort to have pie at Christmas.  

Of the classic pies, Pecan Pie may be my favorite.  One day I was experimenting with some of my cute single serving pie pans ($2 at Michaels- score!) and I came up with this pie creation.  

This German Chocolate Pecan Pie is amazing!  If you like pecan pie, chocolate, and coconut then you should most definitely give this pie a go.  


German Chocolate Pecan Pie
Recipe: Alohamora
Active Time: 25 minutes
Inactive Time: 30-45 minutes
Servings: 1- 9 inch pie.  

Ingredients: 
1 pie crust shell, unbaked
3 eggs
1 c. brown sugar
1/2 tsp salt
6 Tbsp butter, melted
1 tsp vanilla
1 c. light corn syrup (can use dark if you like the molasses flavor)
1 c. pecan pieces/roughly chopped

1/2 c. coconut, unsweetened flakes
2/3 c. bittersweet chocolate chips
1- 1 1/2 c. pecan halves

Directions: 

  1. Prepare your unbaked pie crust shell and place it in a deep pie pan.  Crimp the edges. 
  2. Preheat oven to 375 degrees, though if your oven allows it (digital) preheat the oven to 360 degrees. 
  3. In a stand mixer, or a medium bowl beat the eggs, brown sugar, salt, butter, vanilla, and corn syrup together until well combined.  
  4. Add the pecan pieces and mix until just combined. 
  5. In the bottom of the pie pan evenly distribute the coconut flakes.  If you aren't a huge coconut fan you can use as little as 1/3 cup of coconut flakes.   
  6. Top the coconut flakes with the bittersweet chocolate chips.
  7. Pour the the pie batter into the prepared pie crust shell.
  8. Arrange the pecan halves on top of the batter with the rounded side of the pecans up.  Arrange in whatever pattern you desire. 
  9. Place a pie crust shield, or aluminum foil around the crust edges.  
  10. Bake the pie at 375 for 30-35 minutes or until the filling is set.  If your oven allows it, bake your pie at 360 for about 35-40 minutes until the filling is set but not burned.  
  11. Remove pie and let cool completely before eating.
  12. This pie is perfect to make ahead.  
  13. Store the pie covered on the counter.  You can store it in the refrigerator if you'd like as well.  
  14. Enjoy!

Merry Christmas, Happy Hanukkah, and Happy Holidays.  I hope however you celebrate that you get to spend time with the people you love.  

My son is a fan of the pie tradition as well.  He's definitely excited for pie, and Christmas... but mostly pie!  ;)


A boy and his German Chocolate Pecan Pie. Tasty!  A classic pecan pie with a delicious chocolate coconut twist.  Easy to make, homemade from scratch, and oh so delicious!  Original recipe. Alohamora Open a Book http://alohamoraopenabook.blogspot.com/

Happy delicious German Chocolate Pecan Pie eating and Happy Holidays! 


Monday, November 21, 2016

Pecan Pie {Classic}

Classic Pecan Pie recipe.  This classic Thanksgiving pie is delicious with the perfect amount of richness, but it isn't too sweet.  It's the perfect recipe, and it's all thanks to my Mom.  Pie, Pecan, Classic, Easy to make. Alohamora Open a Book http;//alohamoraopenabook.blogspot.com

How do you say this pie?  Is it Pee-can or Pa-cawn?  I grew up saying it Pa-cawn, but after living in North Carolina I can't help but say it Pee-can.  

Pecan Pie is right there with pumpkin and banana cream as pies we always had at Thanksgiving dinner every year growing up, and I always had a little pecan and a little banana cream. Mmmmm!  

Yesterday I told you about Pie Crust Cookies.  You will definitely want to make some of those delicious cookies with any extra crust dough you have. 

I realize there are a million pecan pie recipes out there, but I am not exaggerating when I say this Pecan Pie recipe is the best.  You most definitely want to save this recipe.  

This recipe has the perfect amount of sweetness and richness.  Traditionally, pecan pies are normally far too rich for the majority of society.  However, this recipe has just the right amount of sweetness and richness.  You'll satisfy your sweet tooth, but you won't feel like you are giving yourself a cavity after eating it.  Plus, the brown sugar in the pie helps give this pie amazing flavor.   

A quote from my husband after eating this exact pie, "I could eat a piece of your pecan pie everyday for the rest of my life."  Even my father in law was heard saying, "I don't even like pecan pie, but I can't get enough of this one." 

I'm telling you, it's a good recipe. Enjoy! 

Pecan Pie
Recipe: Alohamora slightly adapted from my Mom
Active Time: 20 minutes
Inactive Time: 30-40 minutes
Servings: 1- 9 inch pie.  

Ingredients: 
1 pie crust shell, unbaked
3 eggs
1 c. brown sugar
1/2 tsp salt
6 Tbsp butter, melted
1 tsp vanilla
1 c. light corn syrup (can use dark if you like the molasses flavor)
1 c. pecan pieces/roughly chopped
1- 1 1/2 c. pecan halves

Directions: 

  1. Preheat oven to 375 degrees, though if your oven allows it (digital) preheat the oven to 360 degrees. 
  2. In a stand mixer, or a medium bowl beat the eggs, brown sugar, salt, butter, vanilla, and corn syrup together until well combined.  
  3. Add the pecan pieces and mix until just combined. 
  4. Pour the the pie batter into the prepared pie crust shell.
  5. Arrange the pecan halves on top of the batter with the rounded side of the pecans up.  Arrange in whatever pattern you desire. 
  6. Place a pie crust shield, or aluminum foil around the crust edges.  
  7. Bake the pie at 375 for 30-35 minutes or until the filling is set.  If your oven allows it, bake your pie at 360 for about 35-40 minutes until the filling is set but not burned.  
  8. Remove pie and let cool completely before eating.
  9. This pie is perfect to make ahead the day before.  
  10. Store the pie covered on the counter.  You can store it in the refrigerator if you'd like as well.  
  11. Enjoy!


What pies are you having for Thanksgiving?

Happy Classic, and the Best, Pecan Pie eating!


Thursday, July 28, 2016

Leaky Cauldron's Sumptuous Milk Chocolate Pudding {Gluten Free}

Luxurious Milk Chocolate Pudding inspired by the Leaky Cauldron in Harry Potter and the Prisoner of Azkaban. Smooth gluten free decadent cold pudding.  Perfect treat for the summer.  Easy to make.  No bake, all done on the stove top.  dessert easy homemade from scratch kid friendly Alohamora Open a Book http://alohamoraopenabook.blogspot.com

In Harry Potter and the Prisoner of Azkaban the Weasley's, Hermione, and Harry were staying at the Leaky Cauldron the night before taking the train to Hogwarts.  They had a 5 course dinner and topped off the meal with sumptuous chocolate pudding.

My Leaky Cauldron's Milk Chocolate Pudding is smooth, decadent, and luxurious, and even though it is from scratch it really isn't hard to make.  Now, I will say that the English Chocolate pudding is more like a steamed cake almost resembling a lava cake of sort.  It's delicious, but it is over 110 degrees here in Arizona, and cold desserts are a thousand times more enticing.  So, I opted for a luxurious milk chocolate pudding that is dairy based and therefore gluten free.  You'll love this cold dessert, and come winter time I will share a proper English pudding.   

This homemade milk chocolate pudding is incredibly smooth, rich, and decadent.  Way better than boxed puddings... so make sure you give this one a go.  So very yummy! 

Luxurious Milk Chocolate Pudding
Recipe: Alohamora slightly adapted from The Unofficial Harry Potter Cookbook
Active Time: 25 minutes
Inactive Time: chill time, 3+ hours
Servings: about 4 cups

Ingredients: 
1/2 c. sugar
1/4 c. cornstarch
2 Tbsp cocoa powder
1/8 tsp salt
2 1/2 c. milk
1 c. heavy whipping cream
1 c. bittersweet chocolate chips
2 Tbsp butter
1 tsp vanilla
Optional Toppings: whipped cream, chocolate shavings, sprinkles, melted peanut butter, etc. 

Directions: 

  1. In a medium saucepan whisk the sugar, cornstarch, cocoa powder, and salt together until combined.
  2. Add the milk (I used skim, but 1%, 2%, or whole would work just as well) and the heavy whipping cream to the pan and stir to combine it with a wooden spoon.  
  3. Cook the mixture over medium to high.  Stir it constantly until the cocoa powder is dissolved.
  4. Remove the pan from the heat and add the bittersweet chocolate chips to the mixture.  Stir the chocolate until it is melted.  You won't be able to see when they are melted so try and feel or scoop up any chocolate chips.  When you can't you will know they are melted.  
  5. Return the pudding mixture to the stove and cook it over medium heat. Stir the pudding constantly but gently until it thickens and begins to bubble (aka boil).  When thickened and a good consistency remove the pan from the heat. 
  6. Add the butter and the vanilla to the pudding.  Stir the pudding gently until the butter is melted and everything is combined.  
  7. Pour the pudding into a small mixing bowl, and place a piece of plastic/saran wrap on the surface of the pudding. I also placed a lid on the bowl, but that step isn't necessary.  Place the pudding in the refrigerator to chill for 2-3 hours or until it is set.  This is a great dessert to make ahead.  
  8. Enjoy this rich, smooth, and cold milk chocolate pudding plain or topped with whipped cream, chocolate shavings, sprinkles, melted peanut butter, or whatever other decadent toppings you desire. . 
  9. Store leftover pudding in the fridge. 

Happy Harry Potter Week and Happy Sumptuous Milk Chocolate Pudding eating! 


Have you entered the Harry Potter Pop Funko Giveaway? Easy to enter and fun to win! 


Friday, May 6, 2016

Alice in Wonderland "Eat Me" Peanut Butter Chocolate Chip Shortbread Cookies

These Alice in Wonderland inspired "Eat Me" Peanut Butter Chocolate Chip Shortbread Cookies are the best shortbread cookies, egg free wahoo, you will ever have.  They seem to melt in your mouth with the smoothiest texture ever.  These cookies, biscuits, or whatever you call them are amazing!  I used them for our book club of Splintered by A.G. Howard, and they were a hit, at least with me.  :) Alohamora Open a Book http://alohamoraopenabook.blogspot.com/

AMAZING!  Seriously, these shortbread, aka egg free, cookies are the best shortbread cookies known to mankind.  These Splintered/Alice in Wonderland  inspired "Eat Me" Peanut Butter Chocolate Chip Cookies are the perfect make-ahead cookies that have the smoothest melt in your mouth texture.  So yummy! 

I made these cookies for our book club since Splintered by A. G. Howard is a modern Alice in a Wonderland with a twist, and in the original story Alice eats a cake that says Eat Me to help her grow again.  Though, Alice had a cake with currant, and that sounded okay.  However, a Peanut Butter Chocolate Chip Shortbread Cookie sounded divine.  

I also felt a shortbread cookie was an English treat, and the author, Lewis Carroll (his pseudonym), was inspired for this story while riding on the Isis river in England.  Congratulations, you have now, hopefully, successfully followed my reasoning for why these amazing cookies were a must for book club night.  

I really felt book club was delicious. If you missed my other Splintered book club recipes here they are: 

Basically, I just wish you all could be in our book club.  Anyone in AZ want to come? 

"Eat Me" Peanut Butter Chocolate Chip Shortbread Cookies
Recipe: Alohamora adapted from The View From Great Island
Active Time: 20 minutes
Inactive Time: 3 hours or 20 minutes + chill time
Servings: 1 1/2 dozen

Ingredients: 
1/2 c. butter, softened
1/2 c. peanut butter, creamy
3/4 tsp vanilla extract
1 1/4 c. flour, all purpose unbleached
1/3 c. powdered sugar/confectioner's sugar
1/4 tsp salt
3/4 c. milk chocolate chips

Directions: 
  1. In a medium to large bowl or a stand mixer cream the butter and peanut butter together until creamy and well combined. 
  2. Add the vanilla and mix until combined. 
  3. Add the flour, sugar, and salt to the butter mixture and mix until it just comes together and no longer crumbly. 
  4. Add the chocolate chips and mix until just combined. If the dough is too greasy add no more than a 1/4 cup of flour more and mix until combined. 
  5. Pull the dough out of the bowl and place it onto a piece of waxed paper that is about a foot in length.  Using your hands form the dough into a log.  I usually make mine about 8 inches long and 3 inches or so in diameter.  If the batter is a bit crumbly you may need to use your hands to pull the dough together; just press the crumbly pieces into the log and work your hands up and down the log to make sure the dough holds it's shape.  Roll the dough log up into the waxed paper smoothing the log shape as you go.  Twist the ends and secure them with a rubber band.  Refrigerate the cookie dough for at least 2 1/2 hours or overnight. 
  6. When the dough has chilled preheat your oven to 350 degrees and line 2 cookie sheets with parchment paper or silicone baking mats.  
  7. Place your chilled dough onto a cutting board, roll it out of the paper, and use a sharp knife to cut the log into slices about 1/4 to 1/3 inch thick.  Don't worry if a slice crumbles a little, just push it back together; you are going for delicious here, not perfection. 
  8. Back your cookies at 350 for 10-11 minutes depending on how thick your cookies are.  The cookies will be barely browned on the edges and possibly look a little undone in the middle.  That's okay, they will finish cooking on the pan outside of the oven.  To keep the smooth melt in your mouth texture you want to be sure to not over bake these cookies. 
  9. Let the cookies cool on the pan outside of the oven.  If you would like your can transfer the cookies to a cooling rack.  
  10. Enjoy your melt in your mouth amazing pb chocolate chip shortbread cookies. 
  11. Store leftovers in an airtight container on the stove, they keep for at least a week.  We've never had them last any longer than that.  :). 

Happy Amazing "Eat Me" Peanut Butter Chocolate Chip Shortbread Cookie eating, and happy fun Alice in Wonderland or Splintered book clubs, parties, or gatherings.  

Wednesday, May 4, 2016

Alice in Wonderland "Drink Me" The Best Lemon Water

Alice in Wonderland "Drink Me" Lemon Water is the absolute best drink for any party, shower, or book club.  This delicious Lemon Water is amazing, and even better when you use Sonic Ice (which is pretty much the best). We enjoyed this drink for book club to discuss "Splintered" a YA series by A.G. Howard.  Drink, easy, soda/pop free, flavorful. Alohamora Open a Book http://alohamoraopenabook.blogspot.com/

I am 100% honest with you when I say this Lemon Water is the absolute best drink ever.  It is perfect for parties, bridal or baby showers, receptions, or even Alice in Wonderland/Splintered book clubs like mine.  Basically, this drink is good anytime.  So yummy! 

I made this "Drink Me" Lemon Water for our Splintered book club. The book may not have been my favorite (a review can be found here), but making all of the food for the book club fun was a blast.  

If you remember the Alice in Wonderland story you know that soon after Alice goes down into the rabbit hole there's a cookie/cake/biscuit that says "Eat Me" and a drink that says "Drink Me."        

For the book club fun I made... 

"Grow Me" Spinach Artichoke Stuffed Mushrooms
and 
"Shrink Me" Mushroom Shaped Sugar Cookies. 

I'll share the delicious "Eat Me" cookies with you on Friday, but today you get the most delicious drink that has no soda or pop in it.  I first had it years ago at a baby shower my friends threw me when I was prego with my son.  I am not a soda drinker, or even anything other than water drinker.  However, I couldn't get enough of this Lemon Water.  Yum!

It's even better that this drink is made in 5 minutes and it can be prepared ahead of time.   Plus, if you are wondering, I found the cute glass milk bottles, shown above, at JoAnns while using a coupon of course, and the cute straws I got a while ago at Target. 

"Drink Me" Lemon Water
Recipe: Alohamora and my friend Tasha P.
Active Time: 5 minutes
Inactive Time:  0 minutes
Servings: 1 gallon

Ingredients: 
1 gal water
2 cup sugar
Heaping 1/2 Tbsp citric acid powder
1/2 tsp lemon extract
Sonic ice


Directions: 


  1. You can make this lemon water right before your party or the night before.  
  2. Mix the top four ingredients in at least a gallon pitcher and stir everything together with a long spoon.  A word about the citric acid powder, I usually buy it in the bulk sections at Sprouts or Sunflower market for a great price. 
  3. If you are making your drink ahead of time place it in the fridge at this point.  
  4. If you are serving your drink add the ice to a punch bowl or small milk bottles first, and then add the lemon water on top.  Sonic ice is the best with this lemon water b/c of it's size; if you can get Sonic ice that is ideal.
  5. Store leftovers in a pitcher in the fridge.  
  6. Enjoy! 

Happy The Most Delicious "Drink Me" Lemon Water!


Monday, April 11, 2016

Fudge Bottomed Cookies and Cream Pie aka Frosting Pie


Fudge Bottomed Layer Cookies and Cream Pie.  This delicious cake is practically no bake, and the chocolate cream pie filling is light and rich. Even non-chocolate fans love this pie. Alohamora Open a Book http://www.alohamoraopenabook.blogspot.com/ easy pie, cream pie, my kids call it frosting pie, Oreo, Almost cheesecake like.

One day I just whipped this pie up; I pretty much made it up as I went along with ingredients that I felt sounded tasty.  I mean, can you really go wrong with Oreo crust, a fudge layer, and a rich and light no bake chocolate cookies and cream filling?  I didn't think so; they all sound yummy to me.    

I was hopeful that this pie would be tasty, but I was honestly surprised with how delicious it really was.  I mean, it is pretty darn fantastic.  It was loved so much by friends and family that it was requested to be made multiple times for multiple occasions in a span of a week.   

The chocolate cookie sandwich crust is not your typical Oreo crust, and the filling is rich like cheesecake yet light like a pudding cream pie.  It really is in a league of it's own.  

I was also surprised by the reactions I received from others.  My kids refer to this Fudge Bottomed Chocolate Cookies and Cream Pie as Frosting Pie; they couldn't get enough of it.  I was also surprised that my anti-chocolate friends and family absolutely LOVED this pie too.  

Basically, this pie is amazing, and it's practically no-bake (an optional baking of the crust) so it's simple and easy to make.  


So yum!  


Fudge Layered Cookies and Cream Pie
Recipe: Alohamora
Active Time: 40 minutes
Inactive Time: 3-4 hours
Servings: 8-10

Ingredients: 
Crust
2 c. chocolate sandwich cookie crumbs (about 2/3 of an Oreo package)
1/4 c. sugar
4 Tbsp butter, melted

Fudge Layer
2 Tbsp milk
1/2 c. chocolate chips

Cookies and Cream Chocolate Filling
1 1/2 c. mini-marshmallows
2/3 c. chocolate chips 
1/4 c. milk
1 1/2 c. heavy whipping cream
1 Tbsp sugar
2 (4.2 oz) Oreo pudding box

Toppings (Optional): Oreo cookie chunks and/or whipped cream

Directions: 

  1. In a medium pot melt the first three filling ingredients, the mini-marshmallows, chocolate chips, and milk, over medium heat.  Stir it constantly until melted; it should take about 5 minutes.  Remove pot from the heat and let the mixture cool. 
  2. Preheat oven to 300 degrees.  You don't have to bake the crust, but I prefer to for the perfect texture.  If you aren't baking the crust obviously don't turn on the oven.  
  3. In a small bowl mix 2 cups of Oreo, or chocolate sandwich cookie, crumbs, 1/4 cup of sugar, and 1/4 cup of melted butter with a spoon or fork.  
  4. Press the mixture into a deep pie pan forming a crust on the bottom and sides of the pan.  You can use the back of a spoon or the palm of your hands to press the crust in the pan. If you are baking the crust place it in the oven and bake it at 300 degrees for 5-8 minutes. 
  5. Remove pan from oven and place aside to cool. 
  6. In a microwaveable bowl melt the fudge ingredients together in the microwave.  Either melt it on a "chocolate  melt" setting or melt it at 50% power for 30 seconds.  Stir it.  If it isn't melted and smooth, microwave for 15 seconds/50% power intervals stirring between each interval.  When it is smooth and melted spread the fudge on the bottom of the crust.
  7. In a large bowl or stand mixer whip the heavy whipping cream and 1 tablespoon of sugar together until stiff peaks form. 
  8. Using a spoon or the paddle on your stand mixer add the dry Oreo pudding boxes to the whipping cream until just combined. 
  9. Finally, add the cooled marshmallow mixture to the bowl and stir/mix until just combined.
  10. Pour the chocolate cookies and cream filling into the prepared fudge bottomed pan and evenly spread it around. 
  11. Place the pie in the refrigerator for at least 3-4 hours or longer.  This is a great dessert to make ahead for a party or gathering.   
  12. Enjoy your Fudge Bottomed Chocolate Cookies and Cream Pie! I prefer to enjoy it with milk, but my kids are purists and just like to gobble it up. 
  13. Store leftovers in the refrigerator! 

Happy Frosting Pie aka Fudge Bottomed Cookies and Cream Pie eating! 


Friday, March 25, 2016

Lemon Buttermilk Pudding {Gluten Free}

Lemon Buttermilk Pudding. Easy, light, and refreshing dessert.  No bake, gluten free, and everyone loves pudding.  Great Easter dessert or a treat for any time of year especially spring and summer on those warm nights.  Alohamora Open a Book www.alohamoraopenabook.blogspot.com pudding, nut free, gf, yummy, easy to make, simple, sweet

I know Easter is coming up, and it is all about carrots.  I was actually working on some carrot themed cookies, but they are not quite up to my perfect cookie standards.  However, a few friends claim they're delicious, but I'm looking for the wow factor.  You'll get it soon; I promise.  
Speaking of wow factor, this savory Carrot Soup is down right delicious.  It's a creamy soup that is easily made in a crock-pot.  If you are in the same situation as many of my friends in Denver (they had a major blizzard Wednesday and Thursday with 20+ inches of snow and blowing winds) a warm and simple soup sounds perfect.  Though, if you are anything like me, you enjoy soup year round (even when it is 100+ degrees). 

Now, if you are looking for a dessert, and you are hoping for a more traditional Easter dessert you should make the most delicious and absolute best Carrot Cake ever.  If you are looking for a carrot cake recipe (cupcakes or cake) you need to look no further.  The recipe linked above is the best carrot cake recipe known to mankind.  I'm not even exaggerating; it's amazing.

However, if you are over the whole carrot themed Easter and are looking for something easy that you can make ahead of time and a bit more unique you should make this Lemon Buttermilk Pudding.  

This pudding is cold, refreshing, light, and yet rich enough to almost remind you of a lemon mousse.  Basically, this pudding is yummy!  The lemon seems very spring/summer like and therefore perfect for this happy and sunny time of year.  

Enjoy! 

Lemon Buttermilk Pudding
Recipe: Alohamora adapted from foodandwine.com 
Active Time: 30 minutes
Inactive Time: 4 hours
Servings: 4-6 people/approximately 2-3 c. 

Ingredients:
4 egg yolks, large
6 Tbsp sugar
1 1/2 Tbsp cornstarch
1/2 tsp salt
1 1/2 c. heavy whipping cream
1/2 c. buttermilk
1 tsp vanilla
1/2 tsp lemon zest
3 Tbsp lemon juice
1 c. whipped cream or 3/4 c. heavy whipping cream
Optional Toppings: fruit, berries, graham cracker crumbs

Directions: 


  1. In a medium book whisk the yolks, sugar, cornstarch and salt until well blended. 
  2. In a medium pan over medium heat bring the heavy cream, buttermilk and vanilla to a boil and let it simmer for 3-5 minutes. 
  3. Drizzle 1/4 cup of the cream mixture in the whisked egg yolks ingredients. 
  4. Whisk in the rest of the cream mixture and then pour everything mixed together back into the pan, 
  5. Cook the pudding mixture over low to medium heat whisking/stirring about 7-9 minutes until it thickens.
  6. Turn off the heat whisk in the lemon zest and lemon juice. 
  7. Pour the pudding into a medium bowl with a lid if you have it. Press plastic wrap onto the surface of the pudding and allow it to cool to room temperature on the counter for about 45 minutes.  I like to place the bowl lid on top.  The saran wrap will help prevent a thin skin like layer forming on top of the pudding.  
  8. Place the pudding into the refrigerator for at least 3 hours, or overnight, 
  9. In a separate bowl, using the whisk attachment on a stand mixer or a hand mixer beat 3/4 cup of heavy whipping cream until stiff peaks form.  You can use 1 cup of already whipped cream, but I prefer to have unsweetened whipped cream for this recipe.  
  10. Remove the pudding from the fridge and pull off the saran wrap. 
  11. Using a large spoon or spatula fold the whipped cream into the pudding.
  12. Serve your pudding with berries, fruit, graham cracker crumbs, shortbread cookies, whatever else you can come up with or naked. 
  13. Enjoy! 
  14. Store leftovers in the refrigerator.  

Happy rich and smooth Lemon Buttermilk Pudding eating!


Friday, January 29, 2016

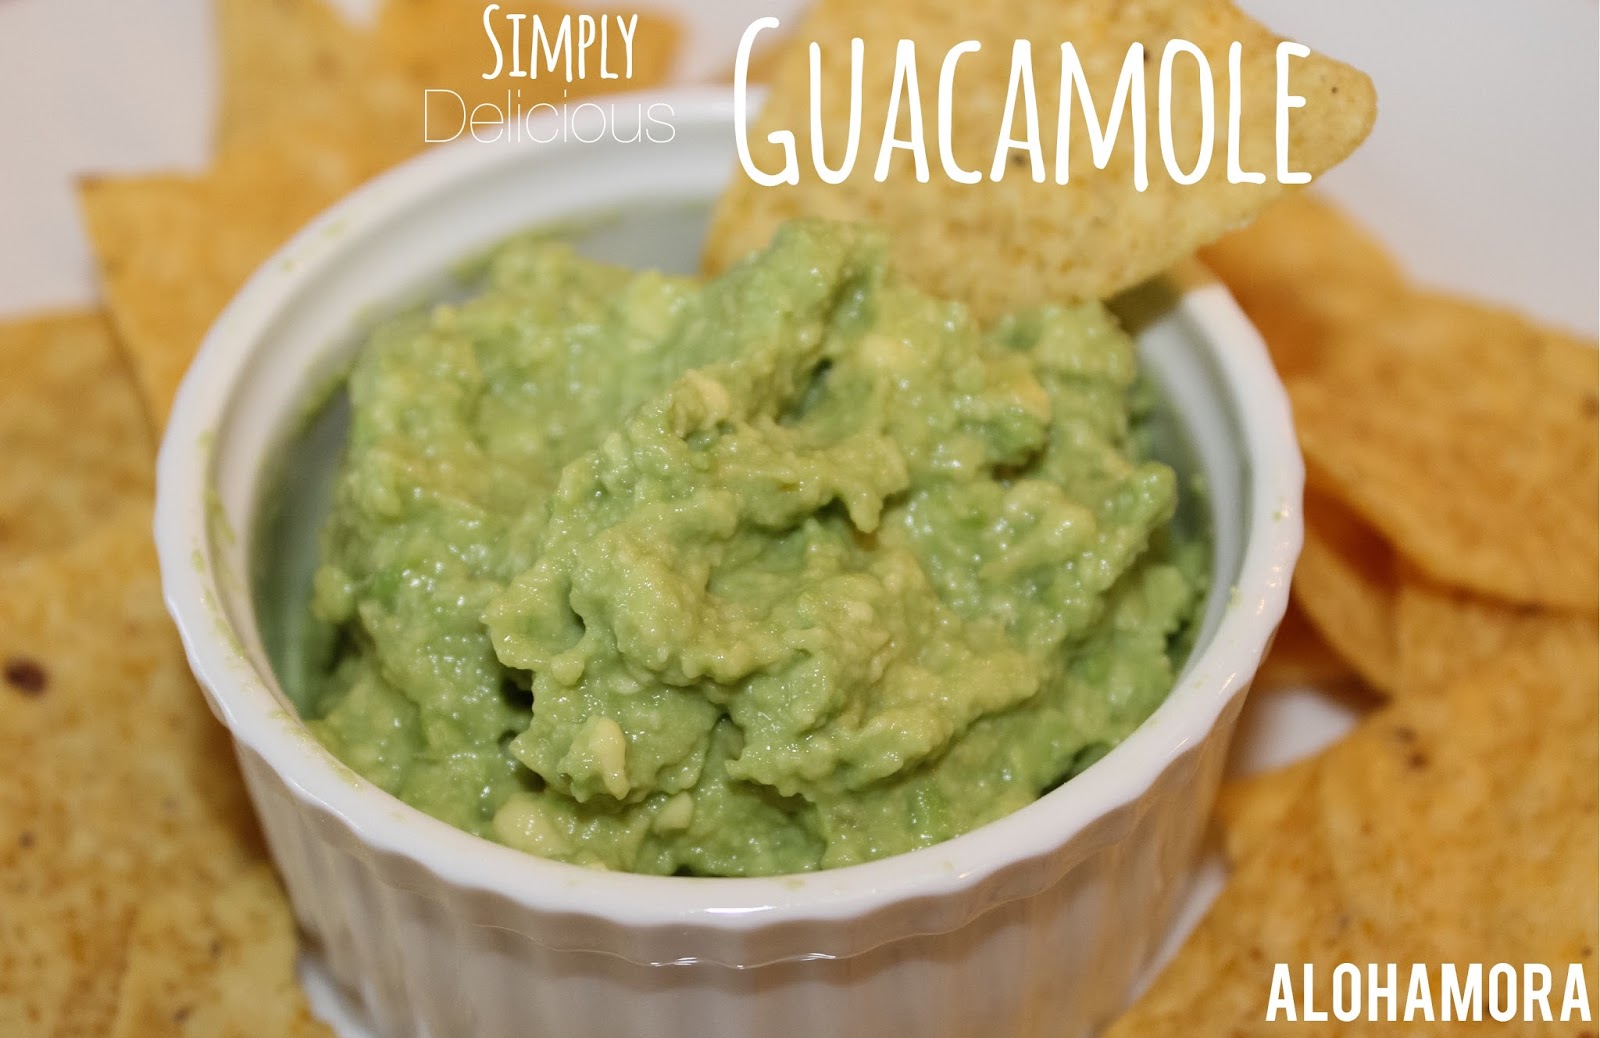
Simply Guacamole {Healthy}

The best Guacamole that is simple, easy to make, and clean eating.  No chemicals but only real ingredients for simple, refreshing, and delicious falvor! Alohamora Open a Book http://www.alohamoraopenabook.blogspot.com/ diet friendly, gluten free, easy, fast, appetizer, recipe, snack, potluck, game day, party, fiesta diet friendly, the best, amazing


Guacamole, I know there are a million and one recipes out there, but I think this one is Simply Delicious Guacamole.  It's simple and delicious and the best guacamole.  

When I was trying to photograph this guac I was struggling.  I know I am a very novice photographer, but I don't think guacamole is the most photogenic food. However, when I was struggling to get the shot I thought such deliciousness deserved my husband said that all I needed to tell you was,  


"This guacamole is way better than anything you can buy in the store that tastes fake and full of chemicals."  

This guacamole is the real deal, and you can't beat real clean eating delicious food.  So yum! 

Guacamole
Recipe: Alohamora
Active Time: 5 minutes
Inactive Time: 0 minutes
Servings: 4

Ingredients: 
1 large avocado
1 1/2 tsp dried minced onion or 1 Tbsp minced onion
1 tsp lime juice
1/8 tsp salt

Directions: 

  1. Slice your avocado in half, remove the pit (and save), and remove the delicious innards with a spoon, avocado slicer, or whatever means you desire into a bowl.
  2. Use a fork, spoon, or potato masher (my favorite tool to use) to mash the avocado. 
  3. Add the remaining ingredients and stir to combine everything with a spoon.
  4. Serve immediately with chips, vegetables, or just a spoon. :) 
  5. If you made this guacamole ahead of time, you will want to put the pit/pits if you made multiple avocados in bowl and cover it tightly with saran wrap (which I hate using) or a Tupperware lid of sort and place it in the refrigerator.  The pit will help prevent the guacamole from browning aka changing colors and looking less than appealing.  
  6. When you are ready to serve remove the pit and enjoy.
  7. Leftover guacamole isn't fantastic so I say just eat it all.  However, you can try saving a pit to place in your bowl, or you could attempt to freeze.  I have never saved it longer than 6-8 hours, but if you do please let me know. 
  8. Enjoy!  I love guacamole, and this guac is simply the best! 

Happy Simple, Delicious, Easy, and Fast Guacamole Making and Eating!

   
Go Broncos! :)

Monday, November 23, 2015

Dark Chocolate Pecan Pie

Chocolate Pecan Pie. This classic holiday/Thanksgiving pie has a fresh new look.  The dark/bittersweet chocolate pecan pie is a chocolate lover's dream.  Absolutely delicious, rich, decadent, and the perfect addition to your meal. Alohamora Open a Book http://alohamoraopenabook.blogspot.com/ Make Ahead, recipe, pie, dessert,

I have had some good friends through the years that have thrown some pretty fantastic parties.  In college there were friends that threw a Pie Fest party.  All you had to bring to the party was a fork and an appetite for pie.  

When I lived in Denver a friend threw a Pumpkin Party every year the weekend before Thanksgiving.  She had a plethora of dishes all made out of pumpkin; everything was delicious!

Now that I live in Arizona one of the same friends from college throws an annual Pie Fest every year.  I'm telling you, friends that throw delicious food parties are the best kind of friends to have.  

My friends Pie Fest party is also a pie baking competition to earn a coveted Golden Fork.  I won a Golden Fork my first year for a Chocolate Raspberry Fig Pie (which I definitely need to share that recipe with you soon).  Last year I brought my Pumpkin Cheesecake, and this year I brought this Chocolate Pecan Pie.  

I totally say Pecan as Pee-can.  How do you say it?  

Pecan Pie is a classic pie that should be at every Thanksgiving or Holiday feast.  However, I am a big Chocolate Fan and feel a dark chocolate pecan pie would make the perfect addition to any meal.  As a bonus, make this pie ahead of time for a less stressful baking/cooking day.   
I 've always liked pecan pie, but I absolutely love the rich decadence in this Bittersweet Chocolate Pecan Pie.  Absolutely delicious!


Chocolate Pecan Pie
Recipe: Alohamora adapted from my Mom
Active Time: 25 minutes
Inactive Time: 35 minutes + cooling time. 
Servings: 8-10

Ingredients: 
1 (9") pie crust, unbaked
1/3 c. butter
1/3 c. bittersweet chocolate chips
3 eggs
2/3 c. brown sugar
1/2 tsp salt
1 tsp vanilla
1 Tbsp cocoa
1 c. light corn syrup
1 c. pecan pieces, chopped
1 c. pecan halves

Directions: 

  1. Preheat oven to 360 degrees.  I know that is a random number, but I like random and actually kind of the perfect temperature to not burn the crust but still cook the pie. 
  2. In a normal 9 inch pie pan lay your crust down; you do not need a deep dish pie pan.  You can use a store bough pie crust or make this super easy homemade pie crust.  
  3. In a small microwaveable bowl or saucepan melt the butter and chocolate chips together.  After melted stir to combine it and make the mixture smooth.  
  4. In a stand mixer or a medium to large bowl with a hand mixer beat the eggs, sugar, salt, vanilla, cocoa, corn syrup, and the melted butter/chocolate mixture together until well combined 
  5. Add the chopped pecan pieces and mix to combine everything in the pie filling.  
  6. Pour the pie filling batter into the unbaked pie crust shell. 
  7. Arrange the pecan halves on top, rounded side up, in whichever design your choose. I went with the swirl. 
  8. Use a pie crust shield or aluminum foil to cover the edges of the pie crust. 
  9. Bake the pie at 360 degrees for 30-40 minutes until the filling is set but not burned.  
  10. Remove pie from oven and let it cool until you are ready to serve.  
  11. Enjoy!
  12. Store leftover pie, or the fresh pie you made ahead of time b/c you are smart and a planner, covered on the counter or in the refrigerator.

Happy Classic Pie with a Twist, Dark Chocolate Pecan Pie eating! 


Do you have any favorite pies?