Showing posts with label kids. Show all posts

Thursday, November 5, 2015

Christmas with Kids gets 3 Stars Christmas

Christmas with Kids: Recipes, Activities, and Crafts for Amazing Family Memories is a non-fiction e-book/kindle full of fun.  It is a collaborative bloggers project, and it earned 3 out of 5 stars in my book review.  Alohamora Open a Book http://alohamoraopenabook.blogspot.com/ activities, fun with kids, crafts
A bunch of bloggers, not me b/c I'm not cool like that, got together made this cool book (which I totally think the cover of the book is gorgeous) full of activities, recipes, and traditions you can do with your family to make the holiday season less stressful, more meaningful, and all around more fun for everyone.  

I was lucky enough to read this book before it's release date, Wednesday November 10th.  You can purchase Christmas with Kids: Recipes, Activities, and Crafts for Amazing Family Memories from the editor of the e-book's website, A Whimsical Life and get bonus content of three videos to go along with the book, or you can purchase the Amazon Kindle edition now. 

I give Christmas with Kids 3 out of 5 Stars; however, I will state that I am brutal reviewer.  I notice things most people don't even think to notice or fret about.  However, when you are a librarian and review books ALL the time it is part of the territory. 

Frist off, I will again say the cover is gorgeous.  Second, I will also say that there were some fun activities, recipes, and crafts that I'm planning on trying.  I LOVED the Christmas Light Scavenger Hunt idea: I definitely think it'd make a fun couple's date.  Now if only my husband and I could find some friends ;).  I also think the extra touches in the Cookie Exchange Party was super cute and made it unique.  The blackberry bread pudding recipe sounds delicious and the recipe appears sound.  All in all, it is a fun book (that is totally inexpensive) and would make a great addition to a family's holiday traditions.  

Now, I did say I'm a brutal book reviewer, and I wanted to stay true to who I am, so I have to give you the parts of the book that lost points for me.  I realize the book is full of different bloggers with different writing styles, different photography skills, and detailed instructions, but I would hope in a book the writing and layout would feel more cohesive.  I would hope the pictures, and depth of instructions be similar with mention of age activity or craft best for.  I would hope the explanation of the text would be similar in style, and the look of the book be similar to really tie the book together.  

Overall, the writing seemed unpolished, but I may be the only person to think of that.  In regards to layout, I would've liked to have the book more organized and labeled as the crafts section, recipes section, and activities section.  I would've liked to have seen the table of contents more clearly define the different sections of the book, and an index would be awesome.  One aspect of the book that bothered me, but maybe it is just my computer, is the hyperlinks did not consistently work the way they intended.  I was sent to all different sites, and some didn't work.  I feel the links to supplemental materials would've been best to have all in the same area. 

Some of the crafts, activities, and recipes I was super excited about, and others I could care less about; though I'm not super crafty..  However, I will say I wish the last activity/tradition was awesome and unique (like the Christmas Light Scavenger Hunt) rather than something almost everyone does already (Christmas Eve pjs.).  

To be honest, Christmas with Kids is an affordable book with some really great ideas to make Christmas that much more fun with your family.  

If you're looking for some Kid crafts or activities to do then this book is a good find.  Go check it out. 


What are some of your favorite things to do with your family during the Holiday Season?  


Friday, August 8, 2014

DIY Homemade Beanbags Tutorial w/ Free Printable Pattern

Easy DIY Homemade Beanbags tutorial with a free printable pattern for square, circle, and triangle beanbags.  Easy to make, cheap (dry beans and scrap fabric are your only costs), and the kids LOVE playing with them.  Easy sewing pattern for beginners.  Alohamora Open a Book http://www.alohamoraopenabook.blogspot.com/

 If have sewed anything you probably have extra fabric just laying around.  I have a pile that just keeps growing and growing and bursting out of a few large plastic bags.  I swear I need to figure out a better/cuter way to organize my fabric scraps, but that's for another day.  

A little bit ago I showed y'all how to make The Perfect Tablecloth using awesome Ikea fabric.  Ikea fabric is thicker aka sturdier and comes in at a very good price.  Win-win for projects like tablecloths and beanbags.

I've made several things using the sturdy and affordable Ikea fabric.  Therefore, I have a lot of extra scraps that are just waiting to be used.  

Awhile back for a Mommy Preschool I was teaching about the letter O and I made some quick O aka circle beanbags for an Obstacle Course we were doing.  

After that fun preschool day playing with beanbags I thought it would be fun and super easy to make bean bags of a few different shapes.  The kids could have fun, and we could practice our shapes knowledge as well as motor skills. 

These easy homemade beanbags have been a win for everyone.  The kids love to play with these beanbags, and I love to use some of those scraps I have hanging out in my sewing room. 

Without further ado, here's an easy DIY Shaped Beanbags tutorial for you.   

The max amount of time, if you can work on it all at once, it should take you to finish these beanbags is 2 hours for 11 bags of various shapes. 

Directions: 

1. Cut out the Beanbag pattern using the free printable found here.  Do not cut the lines that touch together on the square and triangle.

2. Using the pattern cut out as many shaped (square, circle, and triangle) beanbags as you would like.  Your square will look like a large rectangle, and your triangle will look like a large trapezoid.  You will have two circles for every one circle beanbag.   

3. Pin right sides (aka the pattern side) together and sew.  I used a simple straight stitch.  Leave a small opening (no smaller than 1 inch or you will be hating life) so you can turn the bag right side out and fill. 


4. After sewing the bag together, but before you turn it right side out, cut wedges along the edge of the circle bean bags.  


5.  On the triangle and square corners you need to cut a small diagonal.  Then taper the diagonal.  This will help your corners to look better.


6. There is one corner on your triangle and squares that is not sewn yet.  At that corner cut a small slit on the fold.  This slit will help you turn the beanbag right side out.  

7.  Turn the beanbags right side out. 

8. Fill the beanbags with uncooked dry beans (I used pinto) or uncooked rice and pin it closed tucking the edges inside the beanbag.  For my circle beanbags I used 1/3 cup of dry pinto beans. For my triangles I used no more than 2 tablespoons.  For my square beanbags I used just over 1/2 cup.  You don't want to fill your beanbags too full otherwise you will have to hand sew a ladder stitch to close your edges.  I found the above bean amounts allow the bag to feel plenty full, but it still allows me to sew the beanbags closed using a machine.  


9.  Using a simple stitch, and back stitching to secure the edges, sew the openings closed.  

10.  Enjoy your beanbags, and let your kids enjoy them as well.  Just FYI, I went with a darker fabric scrap to hide the dirt from kids hands.   

The final products that my kids love to toss into targets and bowls, but I'm sure when they get older they will throw them at each other.  At this point I may wonder why I made them. ;)  


Happy easy DIY Homemade Beanbag making! 

Easy DIY Homemade Beanbags with a free printable pattern for square, circle, and triangle beanbags.  Easy to make, cheap (dry beans and scrap fabric are your only costs), and the kids LOVE playing with them.  Easy sewing pattern for beginners.  Alohamora Open a Book http://www.alohamoraopenabook.blogspot.com/


Holler with any questions/clarifications you may need.  


Friday, January 17, 2014

Muddy Buddies aka Gluten Free Chocolate Peanut Butter Chex Mix

Muddy Buddies aka Gluten Free Chocolate Peanut Butter Chex Mix deliciousness- Alohamora http://alohamoraopenabook.blogspot.com/
The other day I was making dinner for a friend b/c she unfortunately broke her foot and has 4 little ones at home.  I went with Butternut Squash Enchilada (which is delicious) and then these Muddy Buddies for dessert.  My friend is Gluten Intolerant, therefore meals need to be Gluten Free.  Muddy Buddies are a fast and easy gluten free dessert which everyone loves.  

I was deciding between a flourless chocolate cake or Muddy Buddies, but then I was reminded of the deliciousness of Muddy Buddies and how everyone, young or old or chocolate fans or not, love Muddy Buddies.  Muddy Buddies was the obvious winner, but flourless chocolate cake will probably go down this weekend.    

Some people call Muddy Buddies, and some call it Puppy Chow.  Basically it's chocolate and peanut butter covered Rice Chex with a healthy covering of powdered sugar.  Whether it's Muddy Buddies or Puppy Chow it apparently depends what part of the country you live in; is that true?   What is this mix called where you live?

I was a Muddy Buddies virgin until 5 years ago.  How I went 28 years of my life without knowing the deliciousness of this mix I don't know.  It makes me sad.  I guess I need to make up for all those years with lots of Muddy Buddy making.  It's a good thing it's super easy to make.  

If you are one of the few, like me for far too long, that have never had this addicting chocolate peanut butter Chex mix you need to gather the ingredients and make it now.  You probably have almost all of it.

This Chex mix is quick and easy, it takes maybe 10 minutes to make, makes a ton, and enjoyable as a snack anytime of day.  Trust me, I know.  I was thorough and tested it in the morning, mid-morning, lunch, mid-afternoon, dinner, and late at night.  It's good no matter when.

Now, if you are like me and you don't trust yourself to not eat the entire mix in one sitting, then feel free to give plenty of it away.  It'll make someone's day, and you'll still have plenty left over to enjoy.    

What's better than a fast, easy, and crowd-winning treat?  Not much.  Hence the reason for the awesomeness of Muddy Buddies aka Puppy Chow aka whatever other term you know it as.  
Muddy Buddies aka Gluten Free Chocolate Peanut Butter Chex Mix deliciousness- Alohamora http://alohamoraopenabook.blogspot.com/

Muddy Buddies (aka Chocolate Peanut Butter Chex Mix)
Alohamora: Open a Book recipe from Chex.com
Active Time: 10 minutes
Inactive Time: 0 minutes
Servings: 10-15 servings


Ingredients:
9 c. Rice Chex cereal (almost entire box, but don't be tempted to throw it all in b/c then there will be less chocolate peanut butter goodness)
1 c. milk chocolate chips (semisweet or bittersweet works too if you prefer that)
1/2 c. creamy peanut butter
1/4 c. butter
1 tsp. vanilla
pinch of salt
1 1/2 c. powdered sugar

Directions: 
  1. Place Rice Chex in a large bowl.  Large bowls with measurements on the side are awesome for Chex Mix. 
  2. In a medium microwaveable bowl (I prefer my large 4 cup Pyrex measuring cup) place chocolate chips, peanut butter, butter, vanilla, and salt.
  3. Microwave chocolate peanut butter mixture for 1 minute at 50% power.  Stir every 20 seconds until the mixture is completely melted and smooth. You may need to microwave 20 seconds longer if it's not smooth.
  4. Pour the chocolate mixture over the cereal in the large bowl and mix it gently until all the cereal is coated.  I found a large rubber spatula was best for stirring everything together.
  5. Pour the chocolate coated cereal into a large gallon size bag that seals completely and add the powdered sugar on top.  Seal the bag and shake the mixture until the cereal is coated completely with powdered sugar.  
  6. Taste the cereal to make sure it reaches your standards :) and then pour it onto a wax, parchment, silpat lined pan to cool.  
  7. When you are not eating the snack mix store it in a sealed container in the fridge.  

Saturday, December 28, 2013

The Strange Case of Origami Yoda


Book review, for the Origami Yoda book.  Perfect for boys from 3-6th grade. http://alohamoraopenabook.blogspot.com/
The Strange Case of Origami Yoda by Tom Angleberger has been on my reading list for a few years now.  I would like to say that it's rare for books to stay on my reading list for that long, but some books do unfortunately.

There are too many books to read and not enough time when I am baking and raising two kids and trying to be active so I can eat what I bake.  There are too many things to do.

However, my kids gave me a most awesome Christmas present; no it wasn't a book though everyone in my family did get at least one book for Christmas.

On Christmas day they took a decent enough nap and played with all of their new toys for long enough for me to start and finish this book.  Sure, it's less than 150 pages and it is geared to for 3-6 graders, but it's still a book I read in one sitting.

To be able to read a book in one sitting it has to be interesting and a decent book.  I think for a chapter book geared to young readers this was a great read.  I would give it 4.5 out of 5 stars.

The Strange Case of Origami Yoda is funny; it reminded me a lot of Diary of a Wimpy Kid but with a unique story line.  If your son, or daughter but it is geared more towards boys, is a fan of the Wimpy Kid books then give this series a try.  If your kid likes funny books, Star Wars, and fast easy reads then give this series a try.  If you just want a funny book to read to see what a Origami Yoda book is all about then give this a try.  It's funny.

Origami Yoda has a unique and interesting story line, once you get into it, the characters are relatable, and for the most part Angleberger did a great job telling the story.  The only reason this book lost half a star is b/c at times a scene was portrayed a bit quickly and it was confusing (I think that is new author writing), and I found myself struggling to get into the book at the beginning.  However, I am a tough grader.  This book is really good; it just wasn't a perfect 5 star book.  Those are rare.

Amazon had the following book review:
"For Tommy, the only question is whether or not Origami Yoda is real. Of course he's real as a small puppet on Dwight's finger. But does the oracle possess magic power? In order to find out, he decides to compile scientific evidence from the experiences of those who asked Origami Yoda for help. His friend Harvey is invited to comment on each story because he thinks Yoda is nothing but a "green paper wad." Tommy also comments because he's supposedly trying to solve the puzzle. In actuality, the story is about boys and girls in sixth grade trying to figure out how being social works. In fact, Tommy says, "…it's about this really cool girl, Sara, and whether or not I should risk making a fool of myself for her." The situations that Yoda has a hand in are pretty authentic, and the setting is broad enough to be any school. The plot is age-old but with the twist of being presented on crumpled pages with cartoon sketches, supposed hand printing, and varying typefaces. Kids should love it.—Sheila Fiscus, Our Lady of Peace School, Erie, PA" 
  
First four of the Origami Yoday series- http://alohamoraopenabook.blogspot.com/
Origami Yoda is a fun book.  The following book titles are hilarious and make my nerdy Star Wars side laugh every time I see or read the cover (maybe that is why I had to buy them).  The remaining books in the series are: Darth Paper Strikes Back, The Secret of the Fortune Wookiee, Art2-D2's Guide to Folding and Doodling, The Surprise Attack of Jabba the Puppet, and Princess Labelmaker to the Rescue.

This book is a perfect book if you need a light book to enjoy over the holiday or you are a Star Wars fan.  You'll enjoy them.

Plus, if you are third grade teacher, even fourth, this would be a fun class read-aloud.  Everyone would get into it (even you), enjoy the story, and you can discuss the technique Tommy is using to determine the validity of Origami Yoda.

Have you read the series?

Happy Reading!

Monday, December 16, 2013

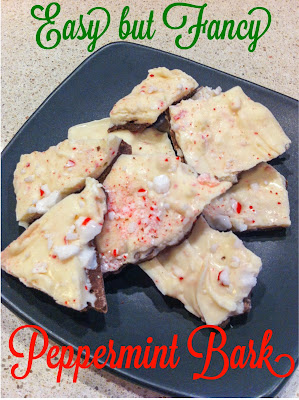
Easy yet Fancy Peppermint Bark

Easy but fancy peppermint bark- http://alohamoraopenabook.blogspot.com/
I have declared Peppermint Bark to be the Christmas neighbor gift of choice this year.  It's easy to make, you can store it in your fridge until you are ready to deliver (which with cookies you have deliver pronto for ideal freshness and taste), and it looks oh so fancy.  I've already done two batches so far, and it has made Christmas "baking" easy, painless, and stress free.  Plus, if you whip up a batch of these bad boys your neighbors will love you.  Who doesn't love chocolate and peppermint at Christmas time?

As if an easy but fancy Christmas treat isn't enough, this peppermint bark is kid friendly.  My oldest was a fan of watching the chocolate melt.  Personally I think she was just attempting to sneak a finger lick, but yet she appeared completely fascinated by the process.  Watching chocolate melt is perhaps a tad more exciting than watching grass grow, but to each his/her own.  

With chocolate melting on the stove my kids were more than willing to "help."  Since Peppermint Bark includes dark and white chocolate I had to wash pots.  My kids felt a good licking of the bowls was necessary before washing the pot out.  Apparently, it only takes two Peppermint Bark batches for my kiddos to become expert chocolate pot scrappers.  Though, we may have to work on keeping the chocolate IN the mouth not ON the mouth.

Now for the recipe.  It's quick and easy, especially with the few tips I have provided below.  You can now make this yumminess and impress your family, friends, and neighbors with this oh so fancy and festive treat.  The steps to delicious Peppermint bark are truly easy: Prepare pan, melt chocolate, freeze, melt more chocolate, throw in peppermint pieces, freeze, and eat.   
  
Easy Peppermint Bark 
Active time: 40 minutes max
Inactive time: 1 hour minimum

Ingredients: 
  • 4 cups chocolate chips (bittersweet, semi-sweet, or milk chocolate) 
  • 4 cups of white chocolate chips
  • 1/2- 1 tsp peppermint extract
  • 1/2 cup + decoration toppings of chopped candy canes or peppermint candies

Process:
1- Line a 11x17 sheet pan with wax or parchment paper.  I like to use a piece of masking tape on the long edges to secure the paper down; it just seems to make it a tad easier.  

2- Fill a double boiler with 1/2 inch of water.  If you don't have a double boiler you can finagle one with two pots of different sizes.  The larger pot fill with a bit of water and the smaller one will rest on top.of the larger one with water.  You will be melting the chocolate in the top pot.  

3- Melt the dark chocolate over low-medium heat; be sure to stir every few minutes to get ideal smoothness and prevent overcooking. As far as chocolate is concerned I really like all bittersweet, all semi-sweet or a mixture of the two.  However, I have done it with milk chocolate, but the white chocolate is so sweet I like to have a balance with the bittersweet.  Basically, just melt what you have on hand.  Now, if you really don't like to melt chocolate over the stove (though I think it is actually easier and harder to burn/ruin on a stove) then you can melt chocolate in the microwave.  Just use a large glass bowl and melt the chocolate in 30 second intervals.  Be sure to always stir the chocolate every 30 seconds even if you think it needs it or not; this will help prevent the chocolate from burning or being ruined.  Really, I have found stirring it frequently, whether in the microwave or on the stove, is the best and easiest way to melt chocolate b/c the goal here is smooth delicious chocolate.  Stirring frequently is the way to that smooth and delicious chocolate. 

3- At this point you can taste it for a bit of quality control if you would like.   Quality control is always an important step. :)  

4- When the chocolate is smooth, pour the melted chocolate into the lined pan.  I prefer to have a towel on hand to wipe the bottom of the pot so the water doesn't have to mix with the melted chocolate.

5- Evenly spread the chocolate around the entire pan.

6- Place the dark chocolate in the freezer to set for at least 30 minutes.  If you leave it in the freezer for longer than 30 minutes be sure to take it out just as you are starting to melt the white chocolate. 

7-  Now, melt the 4 cups of white chocolate.  You can use almond bark if you would like, but I think white chips are usually cheaper and taste delicious.

8- When the white chocolate is melted all of the way stir in the peppermint extract while the white chocolate is still in the pot.  The extract isn't really necessary, but it just adds a bit more of the peppermint flavor.  If you love peppermint add closer to the 1 teaspoon. 

9- Stir in a 1/2 cup of chopped peppermint candy.  You can chop/crush the candy using either a food processor or a ziploc bag and a hammer/rolling pin.  Unless I have some anger to get out I prefer to use a food processor.  It's easy, and allows me to control how small I chop the candies.  Plus it is fast.   

10- With the peppermint and candy pieces all mixed into the melted white chocolate pour that mixture over your frozen dark chocolate.  I like to pour the white chocolate out all over the dark chocolate rather than just all in the middle.  I have found you want to spread out the white chocolate as quick as possible.  No need for perfection here.  Resist the urge to keep spreading, as soon as it looks spread out stop.  The more you spread the white chocolate around the quicker it melts the dark chocolate; therefore you can end up with some dark chocolate swirled in the top white chocolate layer and it doesn't look as pretty.

11- Top your white chocolate layer with some more candy pieces.  I like to do mostly bigger pieces but mix in small pieces as well.  At this point just make it look pretty.  I find pressing the candies down into the chocolate a bit really helps to set the candies in the bark.  

12- Freeze your peppermint bark pan for at least 30 minutes.  You can also place your bark in the fridge at this point for at least 3 hours, but it can be left for days.  That is the joy of peppermint bark; there is so much flexibility.  

13- When you are ready, use a knife and your clean hands to break the peppermint bark into pieces.  I have found the random bark size pieces is easier to do and looks more legit than exact square sizes.

You are now done with at least 7-8 good family size bags of peppermint bark treats for your neighbors.  I like to put them in those cute treat bags you can get at JoAnns/Michaels for cheap, tie a ribbon and attach a tag.  Easy, peasy, and oh so fancy.  Peppermint bark is most definitely a winner this year!  So yum!     

Friday, December 13, 2013

Felt Christmas Tree

What Christmas tree can handle the destruction of an 18 month year old boy?  Why a durable, cheap, and easy to construct felt Christmas tree fit the bill perfectly. Plus, we really like the book Chicka Chicka Boom Boom... there isn't too much of a difference between a coconut tree or Christmas tree, right?!

Felt Alphabet Christmas Tree- cheap, easy, DIY http://alohamoraopenabook.blogspot.com/

 I have a 2 1/2 year old girl and a 1 1/2 year old boy.  Olivia, my little girl, likes everything to be in it's place (my OCD librarian tendencies for sure).  Lucas, my little boy just likes to destroy things.  I knew our little boy would love to destroy our real Christmas tree.  I knew that if I had another, or even two, Christmas trees that could handle his destruction maybe he would not destroy our real tree as much.  Maybe.  Plus, then my 2 1/2 year old can have a tree she can protect and keep it in the way she prefers. 

Those thoughts led me to the fast and easy Felt Christmas Tree construction one afternoon.  Seriously, this tree is fast (less than 30 minutes), no sewing is required, a hot gun can be used if you want to go "all out," and it can all be made for less than $10 (and that is only if you live in an expensive location, otherwise you are looking closer to $5 if that).  Plus with JoAnn's or Hobby Lobby coupons you are looking  at a super cheap craft and educational toy. 

What you will need: 
  • 1/2 yard of green felt (this is your tree). 
  • felt of as many colors as you desire (they sell small 8x10 sheets of felt for about a quarter, but I just used scraps on hand)
  • hot glue and glue gun if you are getting fancy
  • scissors
  • cookie cutters for templates or other objects to trace though you can free hand it if you are skilled and gifted that way
  • blue sewing pen (that washes off) or a marker of any kind b/c it's felt and not that fancy, plus this will be for your kids to play with so it doesn't matter how perfect it is (at least that is my motto)
  • masking or painters tape
  • 1 clean vegetable brush or other stiff brush (optional, not necessary)
You can cut any of these out in any order you so desire.  

First, lay out your felt and draw or just free cut a Christmas tree.  As you can see from my beautiful tree it lacks symmetry and it is far from the professional look, but yet again my kids love me the same.  Plus, a little imperfection gives this tree/craft the "homemade" look.   

Second, brush your felt tree with a vegetable or bristle brush.  You don't have to do this, but brushing it pulls the felt fibers up a bit and allows the felt to stick to each other a bit better.

Third, hang your tree up where ever your heart desires using tape.  I am sure you could get fancy and use command strips, but painters tape is cheap and reusable and works wonderful.  I found that I went a little heavy on the tape, but I figured too much tape was better than too little.  


Fourth, cut out the ornaments you would like.  I used cookie cutters as my templates to draw on the felt before cutting them out.

Fifth, use a glue gun to embellish your ornaments as much as you'd like.  Be careful to not go over board embellishing your ornaments b/c if you make them too heavy they will have a difficult time sticking.  

Sixth, brush your ornaments just to help them stick. Yet again, if you don't have a brush you'll be fine.  It's just an added benefit.  


Seventh, let your kids put up the "ornaments." You are done, and their fun begins!

I actually made two trees.  Initially I had thought each kid could have a tree in their room, which still may happen in the coming years.  However, for now I have one tree in the upstairs play area and one tree downstairs.  The upstairs tree is loaded with letters.  I love having the letters as ornaments b/c we can have learning/teaching moments as we practice our letters.  O is the favorite letter as of lately for my daughter Olivia... so surprising huh?  

Felt Christmas Tree- DIY, Easy, Fun, Kids, Fast- http://alohamoraopenabook.blogspot.com/

The downstairs tree we cut out any and all shapes the kids wanted and in the colors they wanted.  My little girl insisted on the pink dinosaur and the pink truck while my son was all about the snowman and plane.  I made sure to throw in the shapes and various colors so we can practice our shapes and colors for more of those teaching/learning moments.

Bummer for my kids to have a mom that was a teacher and a librarian.  I'm always trying to find ways to teach them in fun ways.  This felt Christmas tree fits the bill for the kids and me this Holiday season.