Showing posts with label lunch. Show all posts

Monday, April 10, 2017

Instant Pot Hard Boiled Eggs aka The BEST Way to Cook Eggs

Instant Pot Pressure Cooker Hard Boiled Eggs. The absolute best and easiest way to cook eggs.  5 minutes cooking time.  Easy, Quick, fast, and simple.  gluten free, healthy snack, simple, perfect, flawless, Alohamora Open a Book http://alohamoraopenabook.blogspot.com/

Have you been on the fence about spending the $100 on an Instant Pot.  However, the ease with the way the shells come off, and the fact that it takes only 5 minutes to cook is reason enough to get an electric pressure cooker.

Cooking eggs with an Instant Pot is absolutely amazing.  Cooking eggs with an Instant Pot is so easy, so simple, so what you need.  


Instant Pot Pressure Cooker Hard Boiled Eggs. The absolute best and easiest way to cook eggs.  5 minutes cooking time.  Easy, Quick, fast, and simple.  gluten free, healthy snack, simple, perfect, flawless, Alohamora Open a Book http://alohamoraopenabook.blogspot.com/

If you cook/hard boil eggs for a healthy snack, or if you just cook eggs once a year for Easter cooking it in an IP is the way to go.  Cooking 12 eggs perfectly, and having their shells come off easily, simply, and smoothly is the reason I sold my husband on why we needed yet another cooking appliance.

Sure, I love cooking applesauce in minutes, and I love how tender pork chops are (recipe coming soon), but hard cooked eggs... amazing! 

Instant Pot Hard Boiled/Cooked Eggs
Recipe: Alohamora
Active Time: 3 minutes
Inactive Time: 15 minutes
Servings: up to 12 eggs/1 dozen

Ingredients: 
1 c. water
12 eggs, at most

Directions: 

  1. Place 1 cup of water in the bottom of your Instant Pot or electric pressure cooker.  
  2. Place the pot rack, that came with the Instant Pot, in the bottom.  A picture of the rack is shown above.
  3. Lay as many eggs as you want on top of the rack.  I was able to create a tight fit with 12 eggs. 
  4. Seal your pressure cooker, and set your Instant Pot to Manual for 5 minutes on High Pressure.  
  5. Once it reaches pressure and cooks for 5 minutes, let it naturally release for 5 minutes.  That means just let the pressure cooker cool on its own without touching anything for 5 minutes.  
  6. After a 5 minute natural release do a quick release and then use tongs to remove the eggs and place them in a bowl of cool water for 5 minutes to stop the eggs from cooking.  If you let the eggs naturally release longer than 5 minutes, or if you don't place them in cold water the eggs will keep cooking and that is when you will get the green edging around the yolk.
  7. Simply and easily remove the shells and enjoy.  
  8. I love a simple deviled egg recipe, but this healthier version is delicious as well. Tho, egg salad is always amazing as well.  
  9. Store cooked eggs in the refrigerator.  I prefer to keep the eggs in the shell cooked until ready to use or eat.  


Happy The Absolute Best Way to Cook Eggs Ever cooking and egg shell pealing! 


Don't the eggs look beautiful cooling after a quick cook in the Instant Pot. 


Instant Pot Pressure Cooker Hard Boiled Eggs. The absolute best and easiest way to cook eggs.  5 minutes cooking time.  Easy, Quick, fast, and simple.  gluten free, healthy snack, simple, perfect, flawless, Alohamora Open a Book http://alohamoraopenabook.blogspot.com/

Monday, January 2, 2017

The Ultimate Grilled Cheese


The Ultimate Grilled Cheese Sandwich kids enjoy buy adults absolutely love.  This sandwich has the best flavors.  So flavorful with honey, basil, tomatoes, and havarti cheese.  Delicious. Alohamora Open a Book http://alohamoraopenabook.blogspot.com/ simple, fast to make, easy to make, amazing, comfort food, lunch, dinner, quick, fun, warm

Happy 2017!  What better way is there to start off the new year than with the best?!
  
This sandwich is the absolute best grilled cheese sandwich. Ever.  It is truly The Ultimate Grilled Cheese.  

The flavors are perfect with the honey, basil, tomatoes, and Havarti cheese.  The soft and gooey center goes perfectly with the crunchy buttery bread.  The entire flavor and texture combination make it the best grilled cheese sandwich.

This is the perfect sandwich for those cold days, days you need a quick lunch or dinner, and days you just need a little extra comfort found in a delicious meal.  Kids will enjoy this grilled cheese, but adults will love it. 

My sister shared this recipe with me, and I am forever grateful.  My grilled cheese days will never be the same again.  My sister apparently got the recipe or idea for the recipe from Oprah about 13 years ago.  My family went to visit her family in Nebraska this last October.  It gets a lot colder than Arizona and the wind cuts through you. One day for lunch after we had been outside with the kids, and I was a little chilled, she introduced me to this.  It was amazing!  My taste buds were happy.   

I almost bought a panini/sandwich maker for this sandwich alone b/c that is how my sister made the sandwich and I had to recreate it.  My husband helped prevent that impulse purchase, and, as a result, I learned I could get the same texture and look from my grill pan.  You could do this on a griddle as well.  Basically, you can make this sandwich with whatever you have.  Basically, you just need to make this sandwich.   

The Ultimate Grilled Cheese
Recipe: My Sister
Active Time: 10 minutes
Inactive Time: 0
Servings: 1

Ingredients: 
2 bread slices
butter
honey
2 Havarti cheese slices
2 tomato slices
dash basil, dried (can do fresh)

Optional: thin ham slices

Directions: 

  1. Heat your griddle or grill pan to medium to low heat.  If you have a panini/sandwich maker heat that up.  
  2. Butter the outside of both slices of bread.  
  3. Evenly spread honey on the inside of both slices of bread. 
  4. Place Havarti cheese on top of the honey on both slices of bread. 
  5. Place your tomato slices on one side of the sandwich.  I've used sliced grape tomatoes, and it works just as marvelously. 
  6. If you want to add ham to your sandwich do this on the bread slice without tomatoes. 
  7. Place fresh basil on top of the tomatoes, or sprinkle dried basil on top of the tomatoes. 
  8. Put your bread slices together to build your sandwich, and place the sandwich butter side down on the heated pan.  
  9. Cook your sandwich to your desired crispiness. 
  10. Enjoy! 

Happy Ultimate Grilled Cheese sandwich eating!


Saturday, July 30, 2016

B.L.A.FT sans Dementors aka Bacon Lettuce Avocado Fried Tomato

BLAFT aka Bacon Lettuce Avocado Fried Tomatoes sandwich aka the best and richest BLT flavors.  Easy and quick to make.  Harry Potter inspired recipe.  Dementors and fried tomatoes in HP and the Prisoner of Azkaban. recipe, delicious, Alohamora Open a Book http://alohamoraopenabook.blogspot.com/

Tomorrow is the last day of the Harry Potter Pop Funko Giveaway here on my blog, Instagram, and Facebook.  Have you entered yet?  Click here to enter and for more awesomely easy details.

Today, you get another recipe from Harry's 3rd year at school, Prisoner of Azkaban.  That year Harry encountered quite a few Dementors, and after one occassion enjoyed some fried tomatoes with sausage.

I personally felt fried tomatoes on a BLT sounded amazing, and after enjoying this rich and flavorful B.L.A.FT- Bacon Lettuce Avocado Fried Tomatoes I was right.  This sandwich is amazing; even my husband said it was the best BLT he's ever had.


BLAFT aka Bacon Lettuce Avocado Fried Tomatoes sandwich aka the best and richest BLT flavors.  Easy and quick to make.  Harry Potter inspired recipe.  Dementors and fried tomatoes in HP and the Prisoner of Azkaban. recipe, delicious, Alohamora Open a Book http://alohamoraopenabook.blogspot.com/


Fried Tomatoes really aren't all that hard to make, and they really do add the richest flavor this classic sandwich.

Give them a go.  You won't be disappointed with this quick and easy weeknight meal.     

B.L.A.FT aka Bacon Lettuce Avocado Fried Tomatoes Sandwich
Recipe: Alohamora
Active Time: 15-20 minutes
Inactive Time: 15-20 minutes
Servings: 3-4 sandwiches (easily double for more)

Ingredients: 
bacon
lettuce
avocados
bread, toasted
4 Tbsp oil
2 tomatoes, medium sized
1/3 c. flour
salt/pepper
1/4 tsp basil, dried

Directions: 


  1. Preheat your oven to 400 degrees, and line a cookie sheet with parchment paper.  Lay the bacon down. 
  2. Lay the bacon on the prepared pan.  I actually used turkey bacon and it tasted great as well as being a little bit healthier. 
  3. Cook your bacon at 400 degrees in the oven for 12-20 minutes or until desired done-ness.  I'm a crispy bacon fan so I cooked it longer than 15 minutes.
  4. While the bacon is cooking slice and begin to fry the tomatoes.  Slice the tomatoes into medium sized slices. .
  5. Pour the oil into the a medium to large skillet and turn the stove up to medium to high heat so the oil can heat.
  6. In a small and shallow boil mix the flour, salt, pepper, and dried basil together.  You can add more basil if you are a lover of it.    
  7. While the oil is heating up dunk the tomato slices into the flour coating mixture.  Be sure to flip the tomato slice over.
  8. Place fried tomatoes in the heated oil, and flip them over to cook both sides.  Most people like to flip their tomatoes when the sides are a golden color; I like mine a little extra fried.
  9. Place fried tomatoes on a plate lined with a paper towel.  This will help soak up the extra oil. 
  10. Toast your bread, slice your avocado, and assemble your Bacon Lettuce Avocado Fried Tomatoes sandwiches.  
  11. The sandwich is absolutely amazing if you can get the bread, bacon, and tomatoes served when hot.  
  12. Enjoy your BLAFT! Store leftovers in the refrigerator, but serve them in different pieces and assemble the sandwich at times of serving.  

Happy B.L.A.FT eating, and Happy Harry Potter Week!  


This is the last recipe I'm sharing with y'all this Harry Potter Week, but check back for more book reviews, recipes, and even a giveaway.  


Wednesday, August 5, 2015

Fruit and Nut Salad {Healthy} {Gluten Free}

Fruit and Nut Salad with a Lemon Vinaigrette is refreshing delicious full of proteins and all healthy foods.  This is clean eating at its finest.  Alohamora Open a Book http://www.alohamoraopenabook.blogspot.com/ salad, easy, diet friendly, blueberries, sunflower seeds, feta, bell peppers, spinach, romaine, and more

Weird tidbit about me, I hate meat on salads.  It seriously makes me gag.   Well, I can handle bacon, but meat like chicken or salmon or anything else is really gross to me.  My sister laughs at me and thinks I am weird, and my husband just goes with it b/c he is used to it by now.  

The other day my husband and I were out to eat on a date night.  Date nights where you don't have to put the kids to bed are the best!  At dinner I had the most amazing salad.  When I got home, okay the next day really, I tweaked it and made this banging Fruit and Nut Salad.  It's gluten free, but most importantly meat free.  However, it's still super healthy and full of protein.  

Top this salad with yesterday's Lemon Vinaigrette and you will have one refreshing, hearty, healthy, diet friendly salad to enjoy for a meal, as a side dish, or just when you are needing a little protein and nutrients in your body.  This is clean eating at its finest!


Fruit and Nut Salad
Recipe: Alohamora 
Active Time: 10 minutes
Inactive Time: 0 minutes
Servings: 1 large salad bowl

Ingredients: 
2-3 c. baby spinach
1 head Romaine lettuce, chopped
1-2 c. blueberries
1 red bell pepper, diced
1 c. feta cheese
1/2 c. sunflower seeds (Trader Joes has unsalted shelled sunflower seeds for cheap)

Toss with Lemon Vinaigrette

Directions: 

  1. Combine all of the ingredients and toss it.  Feel free to change and tailor the amounts of each ingredient to fit your needs and desires.   
  2. Either toss the vinaigrette dressing before serving, or leave it on the side. 
  3. Enjoy! 
  4. Store leftovers in the refrigerator if you are a fan of leftover salad.  I know some can do leftover salad, and some can't.  What boat are you in?  
Happy Healthy Fruit and Nut Salad eating! 


Tuesday, April 7, 2015

Egg Salad Lettuce Wraps {Gluten Free}

Classic egg salad just the way grandma made them, but on crisp lettuce leafs for a healthy touch.  Quick and easy lunch or dinner full of protein, and it's a great way to use up leftover hard boiled eggs from Easter. Alohamora Open a Book http://www.alohamoraopenabook.blogspot.com/

I think of my Grandma every time I eat or make egg salad.  My gma, who pretty much made everything delicious (she was an amazing cook) always made egg salad sandwiches for road trips.

There were many random parks or rest stops on various interstates I remember eating an egg salad sandwich.  It was what we did.

I love egg salad sandwiches, but I didn't always make it.  For years, I only had egg salad when grandma or my mom made it. Weak sauce, I know.  It's so quick and easy I'm not sure why I didn't. 

Luckily there was one summer when I was in college where I went to live with my older sister.  She was playing professional soccer and I thought it would be fun to spend the summer with her.

We had a blast that summer, and we made many memories.  That summer is when I started to make egg salad sandwiches.  That summer my sister and I ate a lot of egg salad sandwiches and Double Dippers (aka chocolate covered peanuts).  I think that could be declared the summer of egg salad sandwiches and double dippers.  

That summer with my sister we usually enjoyed our egg salad sandwich on warm toasted bread.  Which is delicious.  However, I don't eat as much bread these days.  Now, I enjoy egg salad on crisp lettuce leafs.  It's also delicious and I'd say pretty much amazing.  Plus, it's healthy, full of protein, and few carbs.

Bonus, you can use up any leftover hard boiled eggs you may have from Easter.

Egg Salad Lettuce Wraps
Recipe: Alohamora and Gma J
Active Time: 5 minutes
Servings: 2 (easily adjust for needs)

Ingredients: 
4 eggs, hard boiled, peeled, and chopped
2 Tbsp mayonnaise (olive-oil mayo works as well)
2 tsp prepared yellow mustard
1 Tbsp green onions, diced
garlic powder, seasoning salt (or regular salt), and pepper to taste
4 Romaine Lettuce leafs washed
Optional: paprika as a topping

Directions: 

  1. In a small bowl add the eggs, mayo, mustard and green onions. Stir to combine everything. 
  2. Add a dash of garlic powder, seasoning salt, and black pepper to taste and stir to combine. 
  3. Divide the egg salad among the four lettuce leafs and add a pinch of paprika to the top if you so desire. 
  4. Enjoy your egg salad lettuce wraps!
  5. Store leftovers in the refrigerator. 

Happy Classic, Simple, and Delicious Egg Salad Lettuce Wraps eating!


Friday, March 13, 2015

An Epic Pi Day 3.141592653 aka 3/14/15 Menu

I'm a total nerd.  I'm a librarian, and I love math.  I was a math minor in college, and absolutely love math.  The combination of librarian and math geek may possibly be the worst combination for "being cool."  

Such it is.  I've come to embrace my nerdiness.  

With that nerdiness comes a baker and food lover that is uber excited for tomorrow.
This Epic Pi Day Menu includes a quick and easy breakfast pizza, the best thin crust and pizza sauce recipe, butternut squash pizza, strawberry pie and lemon pie.  All delicious items you can quickly and easily make. Alohamora Open a Book http://www.alohamoraopenabook.blogspot.com/

Today is Pi Day! It is actually an Epic Pi Day.  It not only is your normal 3-14 Pi Day fun, but it is 3-14-15, and at 9:26:53 in both the AM and the PM you can have quite the Epic Pi Day extravaganza. 

This Epic Pi Day Menu includes a quick and easy breakfast pizza, the best thin crust and pizza sauce recipe, butternut squash pizza, strawberry pie and lemon pie.  All delicious items you can quickly and easily make. Alohamora Open a Book http://www.alohamoraopenabook.blogspot.com/

I plan to start this epic day with a delicious, nutritious, and healthy 5 minute Breakfast Pizza Pie.

This Epic Pi Day Menu includes a quick and easy breakfast pizza, the best thin crust and pizza sauce recipe, butternut squash pizza, strawberry pie and lemon pie.  All delicious items you can quickly and easily make. Alohamora Open a Book http://www.alohamoraopenabook.blogspot.com/

Lunch and/or dinner can consist of an Actually Thin Crust Homemade Pizza. I LOVE this thin crust and pizza sauce recipe.  


This Epic Pi Day Menu includes a quick and easy breakfast pizza, the best thin crust and pizza sauce recipe, butternut squash pizza, strawberry pie and lemon pie.  All delicious items you can quickly and easily make. Alohamora Open a Book http://www.alohamoraopenabook.blogspot.com/
Butternut Squash, Bacon, and Spinach Pizza on a thin crust, b/c that is the best (and a bit healthier), is amazing and will make a perfect dinner, snack, or lunch.  Plus Pizza is also known as "Pie" so it is perfect for this Epic Pi Day!


This Epic Pi Day Menu includes a quick and easy breakfast pizza, the best thin crust and pizza sauce recipe, butternut squash pizza, strawberry pie and lemon pie.  All delicious items you can quickly and easily make. Alohamora Open a Book http://www.alohamoraopenabook.blogspot.com/

 I'm of the belief that dessert can and should be enjoyed several times throughout the day.  Therefore, Pie, and especially "fruit pie" is pretty close to being good for you since it has fruit in it.  Don't bother to think of all the sugar. ;)

This Sweet and Simple Strawberry Pie with the uber easy homemade Pie Crust is perfect for this epic Pi Day!
This Epic Pi Day Menu includes a quick and easy breakfast pizza, the best thin crust and pizza sauce recipe, butternut squash pizza, strawberry pie and lemon pie.  All delicious items you can quickly and easily make. Alohamora Open a Book http://www.alohamoraopenabook.blogspot.com/

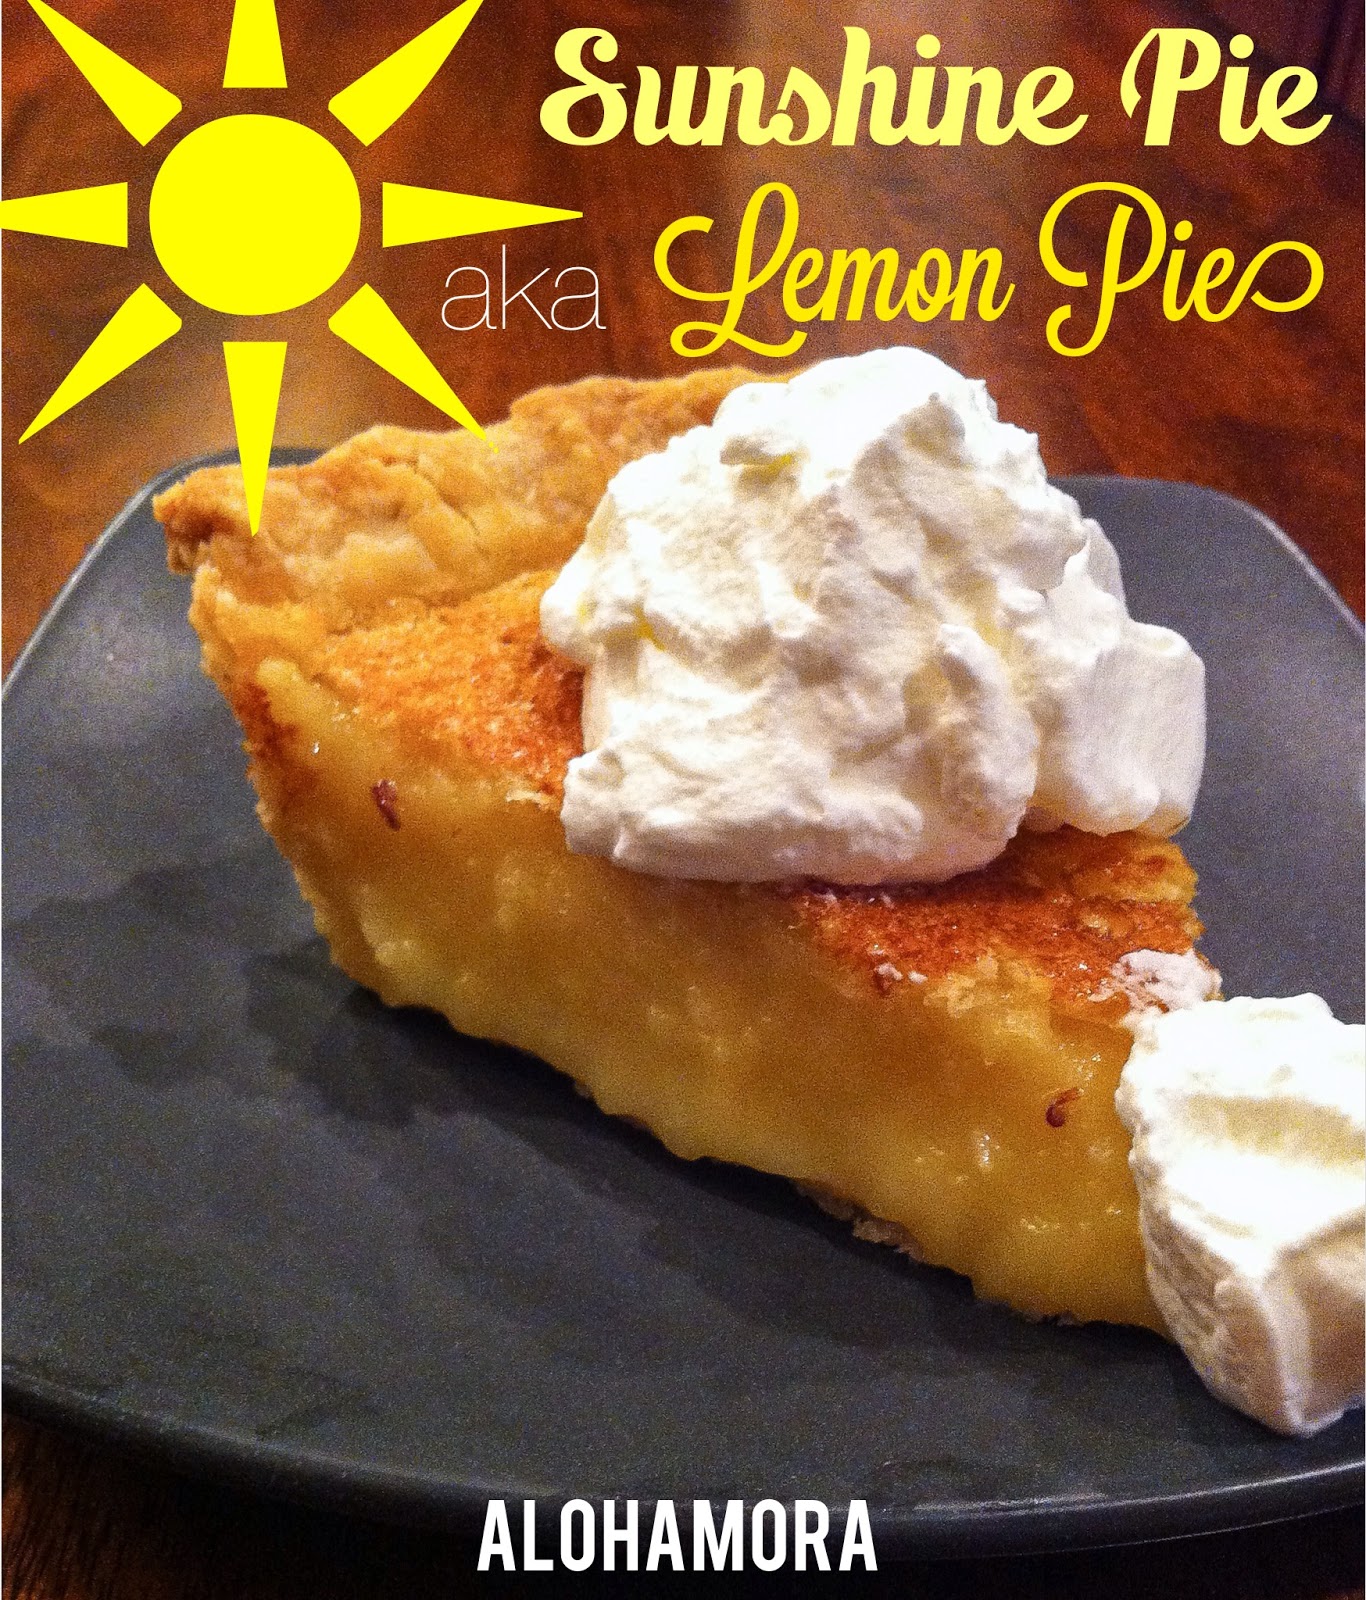
Lemon Pie aka Sunshine Pie is always delicious, creamy, and perfectly sweet and tart. 


This Epic Pi Day Menu includes a quick and easy breakfast pizza, the best thin crust and pizza sauce recipe, butternut squash pizza, strawberry pie and lemon pie.  All delicious items you can quickly and easily make. Alohamora Open a Book http://www.alohamoraopenabook.blogspot.com/

I love Pi Day! I love that math nerds unite and truly embrace their nerdiness.  I love that you have good reason to eat delicious pies, including pizza pies, for breakfast, lunch, dinner, and dessert.  

Happy Epic Pi Day celebrating and eating!

Monday, September 8, 2014

Cornbread, The Absolute Best Cornbread!

The Absolute Best Cornbread.  Amazing flavor.  Easy to make in one bowl, and absolutely delicious with chili.   Easiest bread to make. Alohamora Open a Book http://www.alohamoraopenabook.blogspot.com/

We are full on into the month of September now.  Even though it's still 100 plus degrees here in AZ I've started to pull out some of the "Fall" recipes in my repertoire.  I feel a week into September means I can start cooking like it's Autumn even if it is way too hot here.

Growing up we always made cornbread from a Jiffy box.  It was good, but it was all I ever knew.  However, now that I am so much older and wiser ;) I know that Jiffy cornbread doesn't even compare to the sweet delicious taste of The Absolute Best Cornbread recipe I'm hooking you up with today.  

This Cornbread is amazing, absolutely amazing!  

Besides amazing taste, this cornbread is so very easy to make.  I dare say it is the easiest bread ever.

Easy to make, tastes AMAZING, and you only have to dirty one bowl and spoon.  Can it get any better?  I say no.   

Cornbread
Recipe: Alohamora slighly adapted from Mel's Kitchen Cafe
Active Time: 10 minutes
Inactive Time: 30 minutes
Servings: 8-10   

Ingredients: 
1/2 c. cornmeal
1 1/2 c. flour
2/3 c. sugar
1 Tbsp baking powder
1/4 tsp salt
1/3 c. oil
3 Tbsp butter, melted
2 eggs
1 1/4 c. milk

Directions: 
  1. Preheat oven to 325 degrees and grease/flour a 9x9 inch square pan. 
  2. In a medium bowl mix the cornmeal, flour, sugar, baking powder, and salt together with a fork, whisk, or spoon.  
  3. Make a well in the middle of the dry ingredients.  
  4. Add the oil, butter, eggs, and milk into the center of the well. 
  5. Stir the wet and dry ingredients together until they are combined well.  The batter may be a little runny, but don't you worry about that.  Trust the recipe.  
  6. Pour batter into the prepared pan.
  7. Bake at 325 degrees for 30-35 minutes until a toothpick comes out clean. 
  8. Let cornbread cool for a few minutes before cutting into it, but you should know that I consider warm cornbread one of the most delicious things ever.  
  9. Enjoy with butter, plain, or over chili!  Just enjoy it!
  10. Store leftover cornbread covered in the fridge for 3 to 5 days. 


Happy Absolute Best Cornbread eating, and may your Fall weather be a million times better/cooler than mine. 

Monday, July 28, 2014

Weasley's Easy English Muffin Bread

Actually easy and surpringsly simple English Muffin Bread to make from scratch and completely homemade.  This bread is so much cheaper than English Muffins, and it tastes a million times better.  Eat bread and butter just like the Weasleys in Harry Potter.  Alohamora Open a Book http://alohamoraopenabook.blogspot.com/

Happy Harry Potter week... aka it's HP's birthday on Thursday and I'm a super big nerd so all of my recipes this week will connect to Harry Potter.  

Besides all of the recipes having to do with Harry Potter, they are also all absolutely delicious and things you should make right away.   

At the Weasley home they often had the classic bread and butter.  Since HP is in the UK it's only fitting that we have English muffins.

Therefore, this Actually and Surprisingly Easy English Muffin Bread is perfect to share with you today.  

I've made it several times.  It's so so easy to make and everyone loves it.  We eat this bread for breakfast all the time.  I mean, hello, it's English muffin bread so it tastes absolutely amazing toasted with butter melting into its deliciousness just like English muffins.  Doesn't everyone love warm toasted English Muffins?  Jam (this one is so easy) is also delicious and oh so fabulous with this bread.  

This bread, b/c it's homemade and looks oh so fancy, is also delicious at dinner.  It's a bread for all occasions.

You can pretty much enjoy this English Muffin Bread with butter for dinner, or toasted for breakfast.  Even using two slices for peanut butter and jelly lunch would be amazing, or to make grilled cheese.  Oh the possibilities are endless.  

Did I mention this English muffin bread is super super easy and simple to make.  Give this one a shot, even if bread intimidates you.

Think of the Weasley's when you sit down to enjoy this English Muffin bread all toasted and delicious!
Actually easy and surpringsly simple English Muffin Bread to make from scratch and completely homemade.  This bread is so much cheaper than English Muffins, and it tastes a million times better.  Eat bread and butter just like the Weasleys in Harry Potter.  Alohamora Open a Book http://alohamoraopenabook.blogspot.com/

Actually Easy Homemade English Muffin Bread
Recipe: Alohamora slightly adapted from One Good Thing
Active Time: 20 minutes
Inactive Time: 3 hours
Servings: 2 large (9x5) loaves

Ingredients: 
2 3/4 c. warm water
3 1/2 tsp active yeast .
1 Tbsp salt
1 1/2 Tbsp sugar
5 1/2 c. bread flour (though all-purpose unbleached works as well) 


Directions: 


  1. In a large bowl or stand mixer add the ingredients in the order listed.  
  2. Mix all ingredients together with the dough hook (regular paddles will work too) until the dough is mostly smooth.
  3. Lift up the mixer hook/beater and cover the bowl with a towel.  Let the dough rise for about an hour until the dough reaches about two-thirds up the bowl. 
  4. With a baking spray, grease two large loaf pans (9x5). 
  5. Split the dough in half and place each half in the two pans.  Gently knead aka push the dough down while the dough is in the pan. 
  6. Again, cover the two pans with a kitchen towel and let it rise for another hour or until the dough reaches the top of the pans.  I have faster rising times when my house is warmer, so take the time of year or temperature of your home in consideration when planning rising times.  
  7. Preheat oven to 325 degrees. 
  8. Remove the towel, and place the bread pans into the oven for 30-35 minutes or until the bread is golden brown. 
  9. During the last 5 or 10 minutes use a basting brush to spread a 1/2 tablespoon of melted butter onto the two loaves. 
  10. Take the bread out of the oven and allow it to cool for at least 15 minutes before turning it onto a cooling rack and removing the pan.  The bread will be moist.  Let it cool completely before cutting.  
  11. Enjoy this bread as toast with butter or with whatever toppings you want. 
  12. Store leftovers in a ziploc bag on the counter.  You can freeze this bread as well.   

Happy delicious and ridiculously easy homemade from scratch English Muffin Bread eating for breakfast, lunch, or dinner just like Harry Potter did at the Weasley home. 

Tuesday, June 10, 2014

Easy Homemade Strawberry Jam without Pectin

Easy to make Homemade Strawberry Jam without using Pectin.  So delicious, store in fridge until ready to use.  Alohamora Open a Book http://www.alohamoraopenabook.blogspot.com/

Whether you go strawberry picking or just enjoy buying your strawberries cheap at the farmer's market or grocery store this Easy Homemade Strawberry Jam that's Pectin Free should be made pronto.

My kiddos usually request a hot dog or peanut butter and jelly sandwich for lunch.  We ran out of jam, and I put it on our list to buy.  However, when I got to the store I didn't like how expensive Strawberry Jam was, and Grape Jelly just doesn't do it for me.  I then saw the pound of strawberries I had in my cart for 99 cents and I decided I'd make some jam.  

I don't know why I haven't made Strawberry Jam in so long.  It tastes AMAZING, it's super cheap, and so very easy and simple to make.  Plus, with this recipe there is no need to buy fancy Pectin for this jam.  Because let's be honest, who readily has Pectin on hand? 

So, grab some strawberries on sale or pick them yourself b/c that is oh so fun and come home to easily make this strawberry jam.  You should have everything else at home, and you will love the final result.  This jam is AMAZING!  

I do have to give a shout out to my friend that dropped off this amazing bread this weekend.  It doesn't matter if it is cookies (which another friend brought Sunday and I ate the whole plate myself:), cake, brownies, or bread, everyone loves to be thought of and eat something yummy.

 My friends often ask how I stay thin while baking so much.  Besides working out I bring a lot of goodies to friends and neighbors.  They love the thought and the tastiness, and I love sharing the joy of something homemade and delicious!

Enjoy all of this jam yourself, share some with a friend, or give it away as a gift.  Everyone will be happy!    
Easy to make Homemade Strawberry Jam without using Pectin.  So delicious, store in fridge until ready to use.  Alohamora Open a Book http://www.alohamoraopenabook.blogspot.com/


Easy Homemade Strawberry Jam that's Pectin Free
Recipe: Alohamora slightly adapted Barefootandbluejeans 
Active Time: 25 minutes
Inactive time: 2 hours 
Servings: 3 8oz jars 

Ingredients: 

1 lb fresh strawberries, washed and cut
(about 2 c. strawberries mashed)
2 c. sugar
2 Tbsp lemon juice
3 (8 oz) jars

Directions: 

  1. In a medium bowl use a potato masher or a food processor to mash your strawberries.  The more you mash the fewer strawberry chunks you will have; therefore, mash to your hearts content and to whatever "chunky" state you like your jam.  
  2. Add the mashed strawberries, sugar, and lemon juice to a medium pot.  
  3. Over medium to low heat stir mixture until sugar is dissolved.  It should take less than a minute. 
  4. Increase heat to medium-high and bring the mixture to a boil.
  5. Leave it on the stove boiling while you stir it occasionally for 10 minutes.  However, if you have a candy thermometer you can also heat the mixture until it reaches 220 degrees or ten minutes max.  I wouldn't cook it any longer. . 
  6. Using a funnel, or your amazing skills, pour the jam evenly between 3 8 oz jars, or containers of your choice.  
  7. Secure the lids to the jars and place them in the refrigerator for 2 hours. 
  8. Place any of the jam jars you are not immediately using in the freezer, and pull them out when you are ready to use. 
  9. Finally, enjoy your jam with a spoon, on fresh homemade bread, or in a pb and jam sandwich. 
  10. This recipe easily doubles or triples depending on how much jam you want to make.   


Happy Pectin free, easy to make, homemade from scratch strawberry jam eating!

MeganRuth