Showing posts with label leftovers. Show all posts

Wednesday, April 12, 2017

The BEST Roasted Sweet Potatoes and Veggies {healthy, side dish, gluten free}


Roasted Sweet Potatoes. Oven Baked.  Amazing. Delicious.  Add any other vegetables/veggies you want.  My Favorite and the BEST way to cook healthy vegetables kids and the whole family loves. Gluten Free, Diet Friendly, Healthy, Macro. .Alohamora Open a Book http://alohamoraopenabook.blogspot.com/

"Wow!  What is that?" "That smells amazing!" are just a couple phrases I hear each and every time I reheat a bowl of these at work.  The leftovers are amazing, but the fresh out of the oven is even better.  

These Roasted Sweet Potatoes are oven baked, gluten free, healthy, and hands down the BEST way to cook sweet potatoes and veggies.  Seriously, this recipe and the marinade for these veggies is delicious.

Enjoy!  

I, of course, wouldn't say no to any comment love after you taste how amazing these vegetables are. ;)

Roasted Sweet Potatoes and Veggies
Recipe: Alohamora adapted from Elavegan
Active Time: 15 minutes
Inactive Time: 50 minutes
Servings: 4-6 people, but you can add more vegetables to feed more

Ingredients:
3-4 sweet potatoes, washed and chopped
1-2 carrots, peeled and chopped
1/2 onion, chunked
2 Tbsp olive oil or avocado oil
2 Tbsp balsamic vinegar
2 Tbsp soy sauce or Tamari sauce
1 Tbsp Italian seasoning*
1 tsp garlic powder
1 tsp onion powder
1 tsp paprika powder
dash smoked paprika
dash salt/pepper

*Check for Gluten Free

Directions: 

  1. Preheat oven to 400 degrees and line a baking sheet with parchment paper, aluminum foil, or a baking mat.  If you are using aluminum foil be sure to spray it with olive oil spray so the vegetables do not stick. 
  2. Place all of your vegetables in a medium bowl.  You can add as many vegetables as you want, and any variety of veggies.  Many people will do russet potatoes, and those taste delicious, but I like to be a little bit healthier w sweet potatoes. 
  3. In a mug or small bowl mix the remaining ingredients and seasonings together with a whisk or a fork.
  4. Pour the sauce marinade over the vegetables in the bowl.  Use a large spoon to coat the vegetables in the yummy marinade. 
  5. Pour the coated vegetables onto your prepared pan, and bake for 20-25 minutes at 400 degrees, flip them/stir them and then bake for another 20-25 minutes until slightly crispy and smelling amazing.  This second baking time is crucial. 
  6. Remove from the oven and enjoy! 
  7. Store leftovers in the refrigerator.  
  8. Leftovers are delicious too!  Enjoy! 

Happy Healthy and Delicious Roasted Sweet Potatoes and Veggies eating! 


Sunday, November 20, 2016

Pie Crust Cookies

Pie Crust Cookies just like Grandma used to make them.  Using leftover pie crust dough to make light and flaky cookies with simple cinnamon/sugar or pumpkin pie spice/sugar topping.  Delicious.  Simple. Easy to Make. Thanksgiving leftovers. Alohamora Open a Book http://alohamoraopenabook.blogspot.com

My Grandma, who I share a name with, died just over 6 years ago.  I've missed her, but this past month I have been thinking a lot more about her.  My Grandma was an amazing cook.  Her simple peas and carrots were amazing. Her turkey sandwiches were the best ever.  I even loved her meat loaf sandwiches, and those normally sound not super appealing.  

My Gma was the best pie baker ever.  Her pumpkin pie and banana cream pie were my absolute favorite pies she made.  I am currently attempting to master her banana cream pie.  My Gma was a pie baker, not a cookie baker.  She didn't eat chocolate, it made her sick, so the only cookies she ever made were these Oatmeal Cookies and these Pie Crust Cookies.  

My Gma made a lot of pies, and with any and all pie dough leftovers she made these cookies.  I loved walking into Grandma's kitchen and sneaking a pie crust cookie.  

Now, I know some amazingly creative people cut their pie crust cookies into exotic shapes like pumpkins, trees, and leaves.  However, with my Gma nostalgia as of late I wanted to make and share these pie crust cookies just like Grandma made them.  Plus, we all don't need to go Pinterest extreme; these are probably more delicious b/c of how simple, light, and flaky they are.  

With Thanksgiving this week I wanted to make sure you had this recipe.  It's a big pie week, and this is the absolute best way to use any and all leftover pie crust dough. 

If you are making your own crust please make this one.  This pie crust is so simple and easy to make, and it makes such a delicious and flaky crust.  This pie crust is just as easy as buying a store bough crust, but it tastes a million times better.  So much yumminess!   

Pie Crust Cookies
Recipe: Alohamora inspired by Grandma
Active Time: 10 minutes
Inactive Time: 15 minutes
Servings: varies on your leftover amount. 

Ingredients: 
Pie crust dough
2 Tbsp sugar
1 tsp cinnamon or pumpkin pie spice

Directions:

  1. Preheat your oven to 350 degrees. 
  2. Make the pie crust dough.  This recipe is my absolute favorite for an easy, light, and flaky crust.
  3. Roll out any leftover pie crust dough to the same level of thickness as you did for your pie into a circular or rectangular shape.  
  4. Pick up the dough and place it in a 9 inch round cake pan (just like my Gma always did it), or any metal pie pan or cookie sheet.
  5. In a small bowl or ramekin mix the sugar and cinnamon together.  If you are going for festive pumpkin flavors a mixture of sugar and pumpkin pie spice is delicious as well.   
  6. Sprinkle the top of your pie crust cookies with your sugar and spice mixture.  Don't use all of it, but use as much as you want.  I usually use about 2/3rds.  
  7. Use a knife or a pizza cutter and slice your cookies into small squares or whatever shapes you desire.
  8. Bake your pie crust cookies at 350 degrees for 12-15 minutes until a light golden color.  Don't over cook the cookies.  
  9. Remove the cookies from the oven and sprinkle the remaining sugar and spice mixture on top.  This extra sprinkling isn't necessary, but I feel it gives the cookies an extra level of deliciousness.  
  10. Enjoy your cookies hot, warm, or cold.  
  11. Store leftovers in an airtight container. 

Happy Simply Delicious Pie Crust Cookies Eating


Monday, November 7, 2016

Gma's Banana Muffins

Grandma's Banana Muffins this recips is easy and quick to make, the absolutely tastiest way to use up those ripe bananas, and some say they could pass for banana cupcakes.  Recipe, easy, use overripe, frozen bananas, yummy, simple recipe, Gma Alohamora Open a Book www.alohamoraopenabook.blogspot.com

My youngest child was my banana kid.  She loved bananas from when she was about 6 months to 18 months old.  However, these last 6 months of her life she just has not been downing them like she used to.  With her lack of banana consumption I have had a lot of bananas going nice and brown/black on the counter.

I've been using those ripe/overripe bananas for these Gma Banana Bread Muffins, and my kiddos have been happily eating them.  It's a win-win.  We use the otherwise no good bananas, and I have an extra treat to enjoy. 

Throughout the years, I've made a lot of banana bread recipes. My grandma has a really good recipe that I swore was the best, but this recipe comes from my Mother In-Law and it is my new favorite. Every time I make these muffins the kids call them "Grandma Muffins!"  They LOVE these banana muffins, and I do too!

Gma says these Banana Muffins are more like cupcakes, and I have to say the cake flour gives it a great smooth texture and the sugar gives it the sweetness of cupcakes.  Whether they are cupcakes or muffins, they are delicious! 

My MIL got the recipe from a friend who apparently got them from a restaurant called Queen's Surf in Hawaii.  I have made a few adaptations, and I think it makes them that much better, and a touch healthier aka I got rid of the trans-fats.  .

Enjoy using the black and brown bananas for something truly delicious, and enjoy having the very best banana bread muffins recipe ever. .  

Gma's Banana Muffins
Recipe: Alohamora adapted from Elaine/Queen's Surf
Active Time: 15 minutes 
Inactive Time: 20 minutes
Servings: 15-18 muffins

*A note about your bananas.  Use those ripe/overripe bananas that are black and brown.  You can even peel the bananas and freeze them in bags with 3 bananas each.  If you are using bananas frozen in your freezer make sure you thaw them before.  There will be thawed juice and soggy bananas in your bag, but that is okay, just mash them in the bag and dump the bananas right in your bowl. 

Ingredients: 
1 c. sugar
1/2 c. butter, softened
3 ripe bananas, mashed
2 eggs, large
1 c. flour
1/4 c. cake flour
1/4 tsp salt
1 tsp baking soda

Directions: 

  1. Preheat oven to 350 degrees.  Either grease/flour 18 muffin cups or place cupcake liners/papers in your muffin/cupcake tin. 
  2. In a medium bowl or a stand mixer cream the sugar and butter together until light and fluffy. 
  3. Add the ripe bananas one at a time mixing between each addition. 
  4. Add the eggs one at time mixing between additions. 
  5. Add the remaining ingredients in the order listed.  Mix the batter together until everything is just combined.  Don't over mix the batter. 
  6. Use a large cookie scoop, or pour approximately 3 tablespoons of batter into each muffin cup.  You don't want the muffins more than 3/4 full.   
  7. Bake the muffins at 350 for 15-20 minutes or until a toothpick comes out clean.  17 minutes was my magic number. 
  8. Remove pans from the oven and allow them to cool.
  9. Enjoy banana muffins warm or cold. 
  10. Store your completely cooled muffins in an airtight container on the counter or in the refrigerator.  You can freeze banana muffins in small freezer bags and take them out of the freezer as you desire. 

Happy Delicious Gma Banana Muffin eating

Monday, September 26, 2016

Bacon Butternut Squash Spinach Frittata {Gluten and Dairy Free} {30 Minute Meal}

Bacon Butternut Squash Spinach Frittata recipe is a quick 30 minute meal, gluten free, packed with protein and vegetables, and delicious.  Kid friendly, fast and easy to make. Alohamora Open a Book www.alohamoraopenabook.blogspot.com

Now that I have a kid in school, and we have dance, swimming lessons, soccer practice, and doctor appointments after school life is busy.  I once thought that when my kids were all in school life would be a little easier, and I could go back to working full time.  However, now I am starting to realize that life with 3 young kiddos all at home with no extra activities may have been a tad easier than what is to come .

Though, maybe I'm just forgetting how crazy it is to have kiddos tugging at your feet plus one needing to be held all while trying to make dinner.  I could also be forgetting how working full time, training for a marathon, and trying to have a social life can be busy as well.   

Okay, so maybe life in general is crazy and busy.  We all, no matter what stage of life we are in, need to have quick, easy, and healthy meals.  That is where this Bacon Butternut Squash Spinach Frittata comes into play to save to the day, or at least healthy home cooked dinner, for us all to feel a little less hagrid and stressed. 

I also love that a frittata is a crust free, carb free, gluten free version of a quiche, and my family loves quiches.  It really is a dinner win.   

Bacon Butternut Squash Spinach Frittata
Recipe: Alohamora
Active Time: 15 minutes
Inactive Time: 15 minutes
Servings: 4-6

Ingredients: 

2 tsp olive oil
2 cloves garlic, minced
1/4 c. onion, diced
1 1/2 c. spinach, chopped
1/4 c. bacon, bits or cooked bacon diced
1 1/2 - 2 c. butternut squash, diced
7 eggs, large
1/4 c. water
Dash salt/pepper

Directions: 

  1. Preheat oven to 400 degrees. 
  2. Add the olive oil to a large, oven proof pan, over medium to low heat. 
  3. Add the garlic, onion, spinach, bacon, and butternut squash to the pan and saute it all for 5-7 minutes, or until the squash is browned and softer.  You don't need it all the way cooked.  If you are using leftover roasted butternut squash, do not add the squash until just before adding the eggs.  If you are using cooked butternut squash you only need to saute the vegetables until the onions are transparent.
  4. Add the eggs and water to a large bowl and mix until frothy.  Add a dash of salt and pepper to the eggs.  Don't add too much salt, unless you are omitting the bacon for vegetarian purposes.
  5. Pour the eggs into the pan, stir until the ingredients are all evenly distributed, and cook in the pan for 5 minutes. 
  6. Place the pan in the preheated oven for 10-15 minutes until the edges are browned slightly and the eggs are cooked and set.  
  7. Pull the pan out of the oven, serve, and enjoy hot, warm, or cold. 
  8. Store leftovers in the refrigerator. 

Happy Delicious, Quick, and Easy to Make Fall Frittata eating!    

Tuesday, March 8, 2016

BBQ Chicken Pizza- 5 Ingredients {Easy} {CPK Copycat}

BBQ Chicken Pizza- 5 Ingredient Pizza.  Super easy to make, use your leftover crock-pot chicken, and it's a meal everyone enjoys.  I love the thin pizza crust as well.  Alohamora Open a Book http://www.alohamoraopenabook.blogspot.com/ homemade pizza

We LOVE homemade pizza, and this Actually Thin Crust Pizza recipe is our very favorite.  I've made a variety of pizzas using this crust recipe.  We often do the classic cheese and pepperoni, and in the fall we make this Butternut Squash, Bacon, and Spinach Pizza at least a couple times a month.

However, this time I wanted to re-purpose some leftover Rosemary Chicken (well the recipe is for a turkey, but I just made it using a whole chicken), and I wanted to make a pizza.  Easy BBQ Chicken Pizza using only 5 ingredients was created in less than 30 minutes, and let me tell you... It is sweet and delicious!  

BBQ Chicken Pizza
Recipe: Alohamora
Active Time: 10 minutes
Inactive Time: 10 minutes
Servings: 1, 12-14 inch pizza

Ingredients: 
1 Actually Thin Pizza Crust  
1 c. cooked chicken, diced or shredded
1 c. barbecue/BBQ sauce (any variety/jar)
1/4 c. red onion, diced
1-2 c. cheese, shredded (I like a mixture of mozzarella and cheddar)

Directions: 

  1. Preheat the oven to 500 degrees, and place parchment paper on top of a large cookie sheet.  
  2. Make the pizza crust according to the recipe here.  You can also use any pizza crust (the one in the tubes or any for that matter). Roll out the crust and prepare it on the pan.  
  3. In a small bowl mix the leftover cooked chicken and the BBQ sauce together. You can use any jar BBQ sauce variety; however, don't do a sauce that is too sweet if you don't want an overly sweet pizza. 
  4. Spread the chicken mixture over the pizza crust. 
  5. Spread a little cheese on top of the chicken mixture, then spread the red onion over the pizza.  Finish the pizza adding the rest of the cheese; you can add as much or as little cheese as you would like. 
  6. Bake the pizza at 500 degrees for 5 minutes.  Pull the pizza out, and then using a spatula remove the parchment paper from under the pizza and discard the paper.
  7. Rotate the pizza and bake for another 3-5 minutes until the crust is golden-brown and the cheese is toasty and melted. 
  8. Remove the pizza the from the oven and let it cool for a few minutes before cutting and serving. 
  9. Enjoy!
  10. Store leftovers in the refrigerator. 

Happy BBQ Chicken Pizza eating!  No need to head out to California Pizza Kitchen; you can enjoy this copycat recipe at home.  


Friday, January 22, 2016

How and Why of Roasted Tomatoes {Healthy}

Roast Tomatoes.  Recipe and how to roast them, and why you should roast them.  They are delicious, quick to make in less than 30 minutes, and you can save money by not wasting food.  Delicious and nutritious. Alohamora Open a Book http://www.alohamoraopenabook.blogspot.com/ healthy, diet friendly, easy and simple to make, flavorful, gluten free, nut free, allergy free delicious, use on pasta, pizza, salads, appetizer, dinner and more.

If you are not roasting tomatoes you should.  They help the budget minded, taste delicious, super simple and easy to make, gluten free, and ready in less than 30 minutes. 

Often times I will buy a pint or even a Costco size container of grape tomatoes.  I often can never finish them in time before they start to get a bit wrinkly.  If you find yourself looking in the fridge at wrinkly or a bit old tomatoes (grape, cherry, or plum, or any tomato variety) don't throw them away; roast them instead.  You'll save money, waste less food, and enjoy delicious tomatoes.   

Roasted Tomatoes are quickly made and they are extremely versatile.  You can eat roasted tomatoes plain, simply toss them in pasta, add them to homemade pizza, use them on a green salad, enjoy in eggs, and so much more.  They are delicious, easy on the budget since you aren't wasting food, and store in the fridge quite well. 


The above is just a handful of reasons "Why" Roasted Tomatoes are deliciously fantastic, and below you will find the recipe which provides the How to.  Enjoy! 

Roasted Tomatoes
Active Time: 5 minutes
Inactive Time: 20 minutes
Servings: varies with use

Ingredients:
1 pint (approximately  2 c.) grape or cherry tomatoes- if you have larger tomatoes slice them
1 Tbsp olive oil
1/8 tsp salt
1/8 tsp black pepper
2 cloves garlic, minced

Directions: 
  1. Preheat oven to 400 degrees and line a pan with aluminum foil or a baking mat. 
  2. Wash and dry your tomatoes and place them in a medium bowl. If you don't have grape or cherry tomatoes then slice your larger tomatoes in thicker slices. 
  3. Toss the tomatoes with the olive oil, and then add the remaining ingredients stirring to combine everything.  
  4. Pour the tomatoes on the prepared pan, spread them out, and cook them at 400 degrees for 20-25 minutes until they are soft. 
  5. Enjoy the tomatoes plain, tossed with pasta, on a pizza or salad hot, cold, or room temperature. 
  6. Store leftovers in the refrigerator. 
  7. You can adjust the measurements according to the amount of your tomatoes. 

Happy Healthy and Delicious Roasted Tomatoes eating! 


Sunday, October 4, 2015

Bison Stuffed Mini Bell Pepper {Elimination Diet Friendly}

Bison or Beef Stuffed Mini Bell Peppers.  Easy Elimination Diet friendly recipe for a healthy appetizer or dinner.  Alohamora Open a Book http://alohamoraopenabook.blogspot.com/ healthy, diet friendly, egg free, dairy free, gluten free, soy free, nut free, corn free, elimination diet

If you follow me on Facebook and/or Instagram you probably saw that I have been on an Elimination Diet.  My doctor prescribed this diet so I can see what food sensitivities I have that have been causing my nausea for the past 1.5+ years.

The elimination diet I was involved with had a lot of restrictions including no sugar, dairy, corn, soy, wheat or gluten, peanuts, peanut butter, eggs, beef, pork, and more.  Later beans and legumes were added to my "restrictions."  Basically, it's a super strict clean eating diet where I have to read every single label and end up eating hardly any of it.   


Bison or Beef Stuffed Mini Bell Peppers.  Easy Elimination Diet friendly recipe for a healthy appetizer or dinner.  Alohamora Open a Book http://alohamoraopenabook.blogspot.com/ healthy, diet friendly, egg free, dairy free, gluten free, soy free, nut free, corn free, elimination diet

I did this diet for a week, and actually just stopped it b/c I was still nauseous every single day.  I honestly think my nausea is connected to my jacked thyroid and hormones which is why even on this super clean eating diet I was still sick.  

I've run/trained for 2 marathons.  I have told myself that I won't do another marathon b/c the training is too hard on my body aka knees.  However, I would happily train and run another marathon rather than do this Elimination Diet again.  It was extremely tough, and absolutely no fun.  I couldn't really bake;  I love baking.  I couldn't eat much of anything at all.  Basically, I was a bit grumpy.  My poor husband and co-workers that had to deal with me. 


Bison or Beef Stuffed Mini Bell Peppers.  Easy Elimination Diet friendly recipe for a healthy appetizer or dinner.  Alohamora Open a Book http://alohamoraopenabook.blogspot.com/ healthy, diet friendly, egg free, dairy free, gluten free, soy free, nut free, corn free, elimination diet

On this diet I could handle breakfast and lunch pretty easily, but dinner was the difficult one.  I didn't want to eat boring food of just baked chicken and veggies every night.  Therefore, I had to get creative.  These Bison Stuffed Mini Sweet Bell Peppers are easy to make and Elimination Diet Friendly.   

This appetizer is great for game day, but also make an easy weeknight meal.  If you are not on a ridiculously strict diet you could easily use ground beef in place of bison.  However, the bison has a pretty great flavor.  

Bison Stuffed Mini Sweet Bell Peppers
Recipe: Alohamora
Active Time: 40 minutes
Inactive Time: 20 minutes
Servings: 2 dozen peppers

Ingredients: 
1 to 1.25 lb ground bison or beef
1 clove garlic, minced
1/4 c. onion, diced
1 1/2 tsp Cajun seasoning*
Optional Topping: shredded cheese

Directions: 

  1. Preheat oven to 350 degrees and pull out a small cookie sheet or pan with edges. . 
  2. Wash at least 2 dozen mini sweet bell peppers. 
  3. Cut 1/3 of the bell pepper off from top to bottom.  You don't want to cut it exactly in half b/c you want to make a little cup/bowl to fill the pepper.  You can then save the 1/3 that you cut up to dip in hummus or guacamole later, or if you are a huge bell pepper fan you can dice it up and add it to the bison filling. 
  4. Spray a large pan with olive oil cooking spray or add a dash of olive oil to your pan and heat it over medium heat. 
  5. Add the bison or beef to the pan and cook it over medium heat until it is thoroughly cooked.
  6. Add the onion and garlic to the pan and cook it for 3-5 minutes until the onions are translucent and soft.  If you like peppers, and you diced your peppers to add to the dish, add them with the onions and garlic and cook them until soft.  
  7. Add the Cajun seasoning and stir to combine everything in the pan.  Cook it all for 1-2 minutes longer to deepen the flavors. 
  8. Remove the meat from the stove and use a spoon to fill the cut peppers with your meat filling.  
  9. If you are not on a dairy restricted diet feel free to top your stuffed mini bell peppers with a little cheese.  The stuffed bell peppers taste great with or without cheese. 
  10. Bake the stuffed peppers at 350 degrees for 10-15 minutes until the pepper shells are soft.  If you added cheese turn the oven to broil and broil the peppers for 3-5 minutes.
  11. Serve these appetizers at a party, pot luck, or for a healthy dinner.  
  12. These stuffed peppers reheat well and make for delicious leftovers. 
  13. Enjoy! 
  14. Store leftovers in the refrigerator. 

Happy Elimination Diet Friendly Bison Stuffed Mini Bell Peppers eating! 


Tuesday, September 15, 2015

Butterfinger Cookies aka Candy Bar Cookies

Butterfinger Cookies aka Candy Bar Cookies.  Use the new Butterfinger Baking Chips/Bits or cut up your favorite candy bar to make these delicious treats.  Use any leftover or extra candy bar from Halloween or candy around the house to make a tasty dessert.  Alohamora Open a Book http://www.alohamoraopenabook.blogspot.com/ cookies, dessert, holiday, simple, kid friendly

I often will walk the baking aisle of grocery stores or superstores like Target just looking for fun things that inspire me.

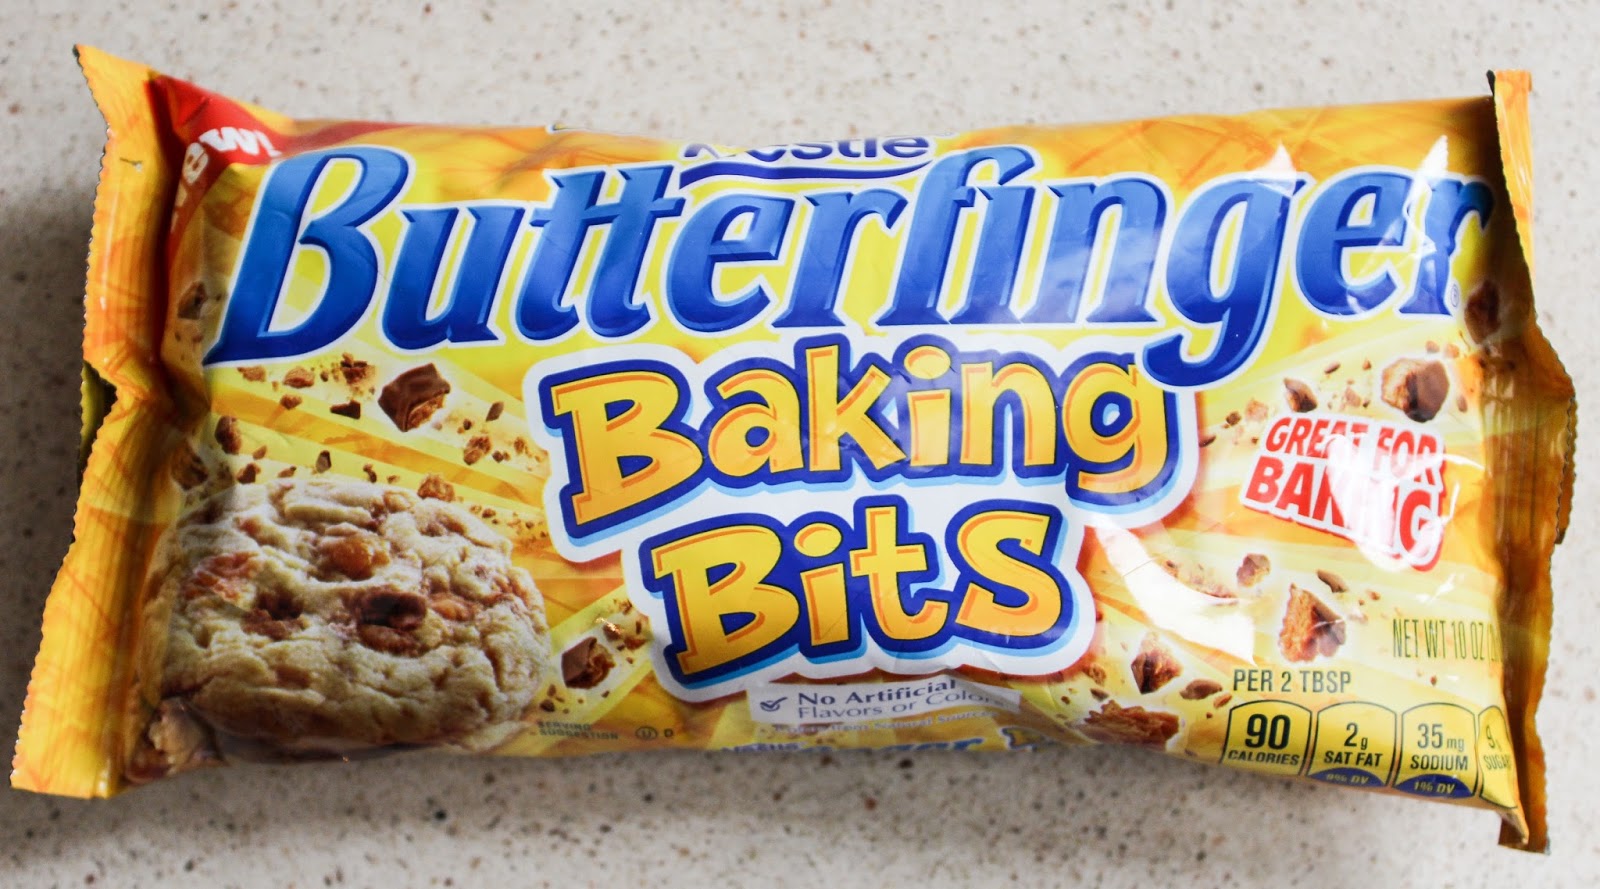
When I was in Target I spotted these  Butterfinger Baking Bits and decided I needed to buy them.


Butterfinger Cookies aka Candy Bar Cookies.  Use the new Butterfinger Baking Chips/Bits or cut up your favorite candy bar to make these delicious treats.  Use any leftover or extra candy bar from Halloween or candy around the house to make a tasty dessert.  Alohamora Open a Book http://www.alohamoraopenabook.blogspot.com/ cookies, dessert, holiday, simple, kid friendly

These Butterfinger Cookies are delicious.  To be honest, they taste ten times better than they look.  Apparently, Butterfinger isn't very photogenic.

You could definitely make these cookies by cutting up Butterfinger bars (2-3 large ones), but man a bag of these bits is a lot more convenient.

I also call these Candy Cookies b/c I've made this same recipe with Kit Kats as well; you can use whatever candy bar is your favorite.  Personalize the taste of the cookies with your favorite candy bar.
This cookie reminded me of these Heath Bar Cookies, which is understandable b/c toffee and Butterfingers (what are Butterfingers made of?) are similar in crunchiness.  However, they definitely have completely different tastes.

With candy bars starting to line the shelf, and now these Butterfinger Baking Bits in the baking aisle, these Candy Bar Cookies are the perfect cookie recipe you'll want to save, bookmark, print, or keep.
We all know we'll have extra candy; you might as well bake a treat with them.

Butterfinger Cookies aka Candy Bar Cookies.  Use the new Butterfinger Baking Chips/Bits or cut up your favorite candy bar to make these delicious treats.  Use any leftover or extra candy bar from Halloween or candy around the house to make a tasty dessert.  Alohamora Open a Book http://www.alohamoraopenabook.blogspot.com/ cookies, dessert, holiday, simple, kid friendly
    
Butterfinger Cookies/Candy Bar Cookies
Recipe: Alohamora adapted from Mels Kitchen Cafe
Active Time: 15 minutes
Inactive Time: 25 minutes
Servings: Medium Scoop 3 dozen, Large Scoop about 2 dozen

Ingredients: 
1 c. butter, softened
3/4 c. brown sugar, packed
3/4 c. sugar
2 eggs
2 tsp vanilla
3 c. flour
1 tsp baking soda
1 tsp baking powder
1/4 tsp salt
1 (10oz) bag Butterfinger Baking Bits or 1 2/3 c. chopped candy bar
1 c. chocolate chips (milk, semi, or bittersweet)

Directions: 


  1. Preheat oven to 350 degrees and line cookies sheets with parchment paper or baking mats. 
  2. In a stand mixer, or large bowl, cream the butter and sugars together until they are light and fluffy. 
  3. Add the eggs and vanilla one at a time mixing between each addition. 
  4. Add the dry ingredients, candy bar, and chocolate chips in order on top of the butter mixture. 
  5. Then mix everything until it is all just combined.  Sometimes the Butterfingers can stick to the bottom of the bowl, so you may need to use a spatula to make sure the tasty candy bar is mixing evenly.
  6. Using a medium, large cookie scoop, or a spoon to scoop balls of dough onto the prepared cookie sheets.
  7. Bake the cookies at 350 degrees for 8-10 minutes or until the cookies are barely golden brown on the edges.  The medium cookies took me 8 minutes, and the large took 10 minutes of baking time.
  8. Let the cookies cool on the cookie sheet for at least 4-5 minutes before moving them to a cooling rack. 
  9. Store cookies in an airtight container on the counter. 
  10. Enjoy! 

Happy Candy Bar/Butterfinger Cookie eating!

Tuesday, August 11, 2015

Butternut Squash Mac and Cheese {Gluten Free}

Butternut Squash Mac and Cheese. This delicious comfort food dinner recipe is easy to make and sneaks in extra vegetables your kids won't even notice. Extra vegetable nutrients is a win for kids, Moms and Dads. Alohamora Open a Book http://www.alohamoraopenabook.blogspot.com/ gluten free, easy, simple, kid friendly, healthy

Butternut Squash is one of my absolute favorite vegetables.  It's delicious and so versatile.  The other day I had some leftover roasted butternut squash, and decided to reinvent dinner with it.  It was a delicious dinner of comfort food goodness.  

Mac and Cheese is a comfort food; most everyone, kids to adults, love.  It is honestly my go to meal when bringing dinner to someone.  

However, this Butternut Squash Mac and Cheese is even better.  It's creamier, cheesier, and it sneaks in some extra vegetables.  According to my husband, you'd have no idea butternut squash is in there unless someone tells you.

Delicious Mac and Cheese goodness with a bonus serving of veggies.  This is definitely a meal kids, Moms, and Dads can come together and enjoy.  

Butternut Squash Mac and Cheese
Recipe: Alohamora
Active Time 40 minutes
Inactive Time: 20 minutes
Servings: 6-8

Ingredients:
1 box (8oz) quinoa pasta (you can use up to 12 oz of any pasta)
1/2 butternut squash, roasted (2-2 1/2 cups)
1/2 c. milk
1 1/2 Tbsp cornstarch
1/2 c. milk
2 Tbsp butter
1/4 c. onion, diced
1 garlic clove, minced
1/2 tsp ground mustard
dash of salt and pepper
1 c. milk
2 c. cheddar cheese, shredded
Toppings (Optional): 1/4 c. breadcrumbs

Directions: 

  1. In a medium to large pot boil water and cook the pasta according to the directions on the box.  Drain and rinse the pasta; place it in a 2 quart baking dish.  Feel free to use any kind of pasta you want; I like to use quinoa pasta b/c it's gluten free and has the superfood quinoa in it with extra protein.
  2. Preheat oven to 325 degrees.
  3. Using a blender or immersion blender to puree the butternut squash and a half a cup of milk. 
  4. In a mug or small cup whisk another half a cup of milk with the cornstarch. 
  5. In a large pan over medium heat add the butter, onion, garlic, and spices and cook it until the butter is melted and onions are softened.  
  6. Add the butternut squash and milk mix to the pan and stir to combine everything. 
  7. Add the milk cornstarch mix and 1 cup of milk to the pan and stir to combine everything.  Keep stirring the mixture for 5 to 10 minutes until it is slightly thickened. 
  8. Add the cheese and stir until it is melted and combined. 
  9. Remove the pan from the heat and add it to the cooked pasta in the prepared pan. 
  10. Stir to combine the butternut squash cheese mixture and pasta and then top it with breadcrumbs.
  11. Bake the Butternut Squash Mac and Cheese for 20-30 minutes until warm and bubbly. 
  12. Enjoy! 
  13. Store leftovers covered in the refrigerator/fridge. 

Happy sneaky vegetable comfort food eating aka Butternut Squash Mac and Cheese deliciousness! 


Wednesday, June 10, 2015

Rosemary Balsamic Chicken Casserole Bake

Easy and delicious Rosemary Balsamic Chicken Casserole/Bake that uses leftover crock-pot chicken.  My son calls this Mac and Cheese.  It's delicious, nutritious, easy and quick to make, and all around a tasty dinner perfect for a busy weeknight.  Alohamora Open a Book http://alohamoraopenabook.blogspot.com/ healthy, diet friendly, easily gluten free, kid friendly, remake leftovers,

I can eat leftovers over and over again and it doesn't bother me in the least.  My sister however, is not a fan of leftovers unless she revamps the meal completely.  

When I revamped the Rosemary Balsamic Crock-Pot Chicken and used the leftovers to make this delicious casserole bake I had a thought that my sister would be proud.  

Anytime I revamp leftovers I dedicate the meal to her; okay, maybe I just think of her and think that this is something she'd probably do.


This Rosemary Balsamic Chicken Casserole takes the chicken leftovers from yesterday, add a few things, and end up with this delicious casserole bake that my son likes to call Mac and Cheese.

I like to use Quinoa Pasta, but any pasta will work.  I've also made this casserole with gluten free flour and it turns out great as well.  Though, for GF (Gluten Free) novices, when using gluten free flour to thicken or for a roux you will need to cook it a little longer to get it to really thicken.

Rosemary Balsamic Chicken Casserole Bake
Recipe: Alohamora
Active Time: 25 minutes
Inactive Time: 25 minutes
Servings: 6-8

Ingredients: 

8oz pasta, uncooked (quinoa pasta is my favorite)
1/4 c. butter
3 cloves garlic, minced
1/4 c. onion, diced
1/4 c. flour
1/4 tsp rosemary
1/4 tsp garlic powder
1/4 tsp seasoning salt
1/8 tsp black pepper
2 c. milk
2 c. cheese, shredded (white cheddar is my favorite)
1 1/2 c. rosemary balsamic chicken, leftovers (you can use a bit more or less depending on your leftovers)
1 1/2 c. frozen peas
Optional: 1/4 c. bread crumbs

Directions: 

  1. Preheat oven to 325 degrees, and pull out an 11x13 casserole dish. 
  2. In a medium to large pan/pot boil water and cook your pasta according to the directions on the box.  When cooked drain the pasta and pout it into the prepared dish.  
  3. In a large saucepan melt your butter over medium heat.  While your butter is melting add the garlic and onion to the pan and saute it with the butter. 
  4. Turn the pan down to medium-low and add the flour (gluten free flour works great).  Stir to combine everything.  Remove the pan from the heat and add the rosemary, garlic powder, seasoning salt, and black pepper. Stir to combine everything.  
  5. Add the milk to the pan and stir the mixture constantly for 5-8 minutes until the sauce thickens.  If you used gluten free flour you will need to stir the sauce up to 10 minutes longer to truly thicken it. 
  6. When the sauce is thickened add the cheese to the pan and stir until the cheese is melted. 
  7. Finally, remove the pan from the stove and add the chicken and peas.  Stir until everything is combined.  
  8. Pour the sauce in the pan into the prepared casserole dish with the cooked pasta.  Stir to combine the pasta and the sauce and top it with the optional bread crumbs.  
  9. Bake the casserole at 325 degrees for 20 minutes.  
  10. Enjoy! 
  11. Store leftovers in the refrigerator. 

Happy Rosemary Balsamic Chicken Casserole eating! 

Wednesday, April 15, 2015

Grilled Ham and Pineapple Kabobs

Grilled Ham and Pineapple Kabobs is an quick and easy dinner the whole family will enjoy.  Use your leftover ham and enjoy the sweetly grilled pineapple with the slightly crispy ham.  It is delicious!  Alohamora Open a BOok http://alohamoraopenabook.blogspot.com/ gluten free, nut free, egg free, fast, simple, grill, kid friendly


Anyone else still working Easter leftovers?  Sometimes I feel like it is never ending, and we even split the leftovers among several families.

As I was trying recreate the leftovers into something new I came up with these easy and quick to make Grilled Ham and Pineapple Kabobs.   They were a winner weeknight meal you can get everything on the table in 30 minutes. 

The kabobs are easy to make, fun to eat, and grilled ham and pineapple is so sweet and delicious everyone loves it.  

Grilled Ham and Pineapple Kabobs
Recipe: Alohamora
Active Time: 25 minutes
Inactive Time: 0 minutes
Servings: 4-6

Ingredients:
1 small to medium pineapple
6 slices ham, precooked
4 Kabob skewers
Optional: Sweet and Sour Sauce

Directions: 

  1. Cut your pineapple into chunks. 
  2. Cut your ham into approximately 1 inch chunks.  I had thin slices of ham, but thin or thicker slices of ham will work equally well.
  3. Preheat your grill. 
  4. While your grill is heating grab at least 4 skewers and alternate the pineapple and ham chunks on the skewers until you fill all of your skewers or run out of pineapple and ham.  I like to have my ham as book ends.
  5. If you'd like to add Sweet and Sour sauce brush your sauce onto the skewers at this point before grilling. 
  6. If you have a grill Pam spray use that now.  It is helpful to prevent some sticking. 
  7. Over low to medium flame grill your kabobs until they are warm and the pineapple is softened.  Mine took no longer than 5 minutes on the grill. 
  8. Enjoy! 
  9. Store leftovers in the fridge. 

Happy Grilled Ham Pineapple Kabob eating! 


Tuesday, April 7, 2015

Egg Salad Lettuce Wraps {Gluten Free}

Classic egg salad just the way grandma made them, but on crisp lettuce leafs for a healthy touch.  Quick and easy lunch or dinner full of protein, and it's a great way to use up leftover hard boiled eggs from Easter. Alohamora Open a Book http://www.alohamoraopenabook.blogspot.com/

I think of my Grandma every time I eat or make egg salad.  My gma, who pretty much made everything delicious (she was an amazing cook) always made egg salad sandwiches for road trips.

There were many random parks or rest stops on various interstates I remember eating an egg salad sandwich.  It was what we did.

I love egg salad sandwiches, but I didn't always make it.  For years, I only had egg salad when grandma or my mom made it. Weak sauce, I know.  It's so quick and easy I'm not sure why I didn't. 

Luckily there was one summer when I was in college where I went to live with my older sister.  She was playing professional soccer and I thought it would be fun to spend the summer with her.

We had a blast that summer, and we made many memories.  That summer is when I started to make egg salad sandwiches.  That summer my sister and I ate a lot of egg salad sandwiches and Double Dippers (aka chocolate covered peanuts).  I think that could be declared the summer of egg salad sandwiches and double dippers.  

That summer with my sister we usually enjoyed our egg salad sandwich on warm toasted bread.  Which is delicious.  However, I don't eat as much bread these days.  Now, I enjoy egg salad on crisp lettuce leafs.  It's also delicious and I'd say pretty much amazing.  Plus, it's healthy, full of protein, and few carbs.

Bonus, you can use up any leftover hard boiled eggs you may have from Easter.

Egg Salad Lettuce Wraps
Recipe: Alohamora and Gma J
Active Time: 5 minutes
Servings: 2 (easily adjust for needs)

Ingredients: 
4 eggs, hard boiled, peeled, and chopped
2 Tbsp mayonnaise (olive-oil mayo works as well)
2 tsp prepared yellow mustard
1 Tbsp green onions, diced
garlic powder, seasoning salt (or regular salt), and pepper to taste
4 Romaine Lettuce leafs washed
Optional: paprika as a topping

Directions: 

  1. In a small bowl add the eggs, mayo, mustard and green onions. Stir to combine everything. 
  2. Add a dash of garlic powder, seasoning salt, and black pepper to taste and stir to combine. 
  3. Divide the egg salad among the four lettuce leafs and add a pinch of paprika to the top if you so desire. 
  4. Enjoy your egg salad lettuce wraps!
  5. Store leftovers in the refrigerator. 

Happy Classic, Simple, and Delicious Egg Salad Lettuce Wraps eating!